This website contains affiliate links, and some products are gifted by the brand to test. As an Amazon Associate, I earn from qualified purchases. Some of the content on this website was researched and created with the assistance of AI technology.
Key Takeaways
- Basket selection matters more than floral arrangement, clean lines and natural materials prevent crafty appearance
- Liner choices determine whether baskets look polished or homemade, with linen and burlap offering upscale alternatives
- Tulips stay upright in baskets through glass vessel inserts rather than exposed floral foam mechanics
- Restraint with ribbons, raffia, and embellishments separates sophisticated from DIY aesthetics
- Neutral textures and single-color tulip palettes create gallery-worthy displays instead of cluttered craft projects
Styling spring tulips in baskets without looking crafty or overdone requires understanding the razor-thin line between charming and cluttered. I’ve struggled with this balance for years, baskets inherently carry rustic, handmade associations, and adding flowers can easily tip them into craft fair territory if you’re not careful. The “crafty” look typically involves too many elements competing for attention: multiple ribbon colors, excessive embellishments, busy patterns, and arrangements that scream “I spent three hours on Pinterest making this.”
The antidote isn’t avoiding baskets entirely but approaching them with the same restraint you’d apply to any sophisticated design element. I think of baskets as sculptural vessels that happen to be woven rather than thrown on a potter’s wheel. This mental shift changes everything, suddenly you’re not “crafting,” you’re curating. The tulips become gallery-quality botanical specimens displayed in organic containers. Every element gets scrutinized through the question: does this add to or detract from the arrangement’s essential simplicity? When you eliminate the extraneous, the hot glue gun moments, the ribbon explosions, the theme-heavy executions, what remains is clean, beautiful, and decidedly un-crafty.
Use this quick table to pick the right basket, liner, tulip palette, and placement so your Spring Tulips look cozy—not crafty. Copy the checklists, follow the do/don’t rules, and style indoor counters, consoles, and tables plus outdoor porches and patios with clean, calm tulip baskets that stay stable and tidy.
Spring Tulips in Baskets: Cozy-Not-Crafty Style Guide
Pick the right basket shape, liner, tulip cluster plan, and placement for indoor + outdoor areas. Use the copy buttons to grab quick checklists.
| Focus Area | Do This (Clean + Cozy) | Avoid This (Looks Crafty/Messy) | Quick Setup Checklist |
|---|---|---|---|
|
INDOORBaskets Shapes
Low oval / low round
|
Keep tulips low and clustered. Use a hidden crock. Use a crisp liner that frames the rim.
Best: low oval on tables, low round on consoles
|
Avoid: tall handled baskets with sprays, scattered stems, too many greens. |
1) Hidden crock 2) 3 tight clusters 3) Greens at base only 4) Rim liner fold |
|
INDOORKitchen Counter
Still functional
|
Place basket near backsplash, leave work zone open. Keep footprint small. Match a mini basket elsewhere. | Centering on the cutting zone, tall tulips flopping into workspace, wet liner. |
1) Set back placement 2) Low silhouette 3) Dry liner 4) One mini repeat |
|
INDOORCoffee Table
No clutter
|
Small basket. Keep tulips below sightline. Leave room for a book/snack plate.
Rule: decor + empty space = polished
|
Oversized basket, tall stems blocking conversation, too many extras around it. |
1) Small basket 2) Low clusters 3) Clear space left open 4) Mini repeat nearby |
|
INDOORBuffet
Food first
|
Set baskets back from the edge. Use 1 compact center + 2 tiny end minis to frame platters. | Basket blocking platters, labels, or serving tools; big greens that spread. |
1) Center open 2) Baskets set back 3) Two end minis 4) Tight clusters |
|
OUTDOORPatio Dining
Stable centerpiece
|
Use heavier basket + snug bowl. Keep clusters tight so wind doesn’t mess the shape. | Light basket sliding, tall tulips catching wind, exposed water vessel. |
1) Snug inner bowl 2) Low tulip dome 3) Greens at base only 4) Leave plate space |
|
OUTDOORBreezy Porch
Anchor it
|
Add towel padding under crock. Use hidden weight if needed. Keep tulips compact.
Fix fast: pad + weigh + re-cluster
|
Slipping vessel, floppy tall stems, wet fabric liner. |
1) Towel padding 2) Hidden weight 3) Tight clusters 4) Dry liner |
|
OUTDOORRibbon
Subtle only
|
Use a thin flat ribbon band (one tie). Neutral tones. Keep ribbon secondary to tulips. | Big bows, multiple ribbons, ribbon as the “main event.” |
1) One ribbon 2) Flat tie 3) No loops 4) Tulips stay hero |
|
OUTDOORWeekend Refresh
Lasts longer
|
Trim stems, refresh water, keep liner dry and crisp. Re-tuck greens at base. | Letting water get cloudy, soaking the liner, rearranging too much. |
1) Quick trim 2) Fresh water 3) Dry liner 4) Reset clusters |
Low Basket Shapes (Indoor) INDOOR
Do This
Choose low oval/round baskets. Keep tulips low and clustered. Use a hidden crock and crisp liner.
Avoid
Tall handled sprays, scattered stems, too many greens.
Quick Checklist
Hidden crock → 3 tight clusters → greens at base → rim liner fold.
Kitchen Counter (Still Functional) INDOOR
Do This
Place basket near backsplash. Keep footprint small. Leave workspace open. Use a dry liner.
Avoid
Centering in the cutting zone, tall tulips flopping into work area, wet liner.
Quick Checklist
Set back placement → low silhouette → dry liner → one mini repeat.
Coffee Table (No Clutter) INDOOR
Do This
Use a small basket. Keep tulips below sightline. Leave room for a book or snack plate.
Avoid
Oversized baskets and tall stems that block conversation.
Quick Checklist
Small basket → low clusters → clear space left open → mini repeat nearby.
Buffet (Food First) INDOOR
Do This
Set baskets back from the edge. Use one compact center basket + two end minis to frame platters.
Avoid
Blocking platters, labels, or serving tools. Big greens that spread.
Quick Checklist
Center open → baskets set back → two end minis → tight clusters.
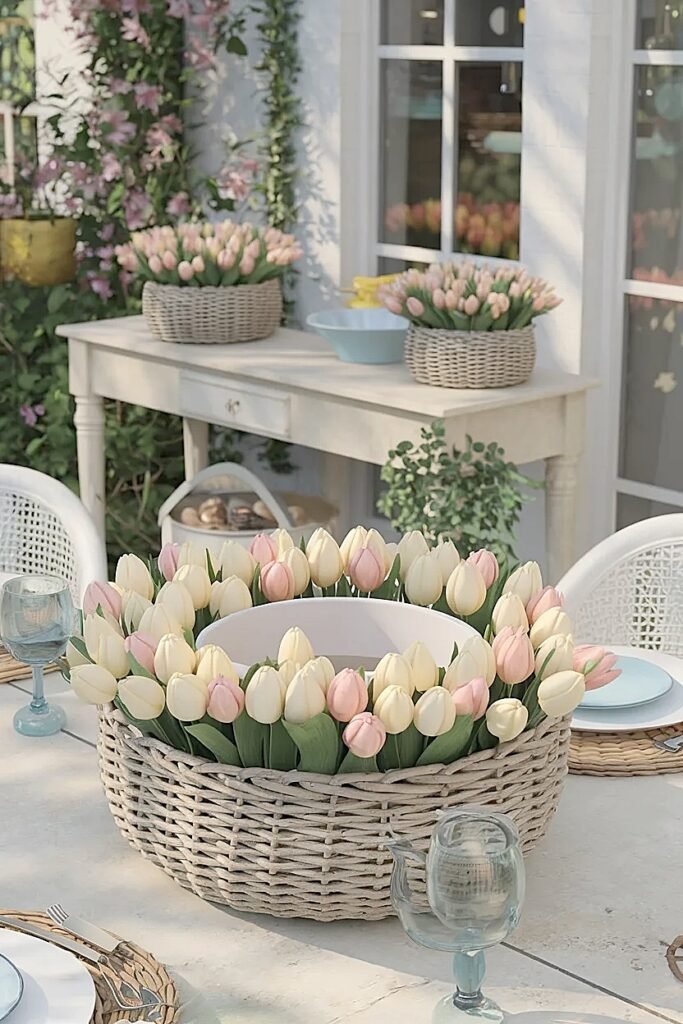
Patio Dining (Stable Centerpiece) OUTDOOR
Do This
Use heavier baskets and a snug inner bowl. Keep clusters tight so wind doesn’t wreck the shape.
Avoid
Light baskets sliding, tall tulips catching wind, exposed water vessels.
Quick Checklist
Snug inner bowl → low tulip dome → greens at base → leave plate space.
Breezy Porch (Anchor It) OUTDOOR
Do This
Use towel padding under the crock. Add hidden weight if needed. Keep tulips compact and low.
Avoid
Slipping vessels, floppy tall stems, wet fabric liners.
Quick Checklist
Towel padding → hidden weight → tight clusters → dry liner.
Ribbon (Subtle Only) OUTDOOR
Do This
Use one thin ribbon tied flat as a band. Neutral tones. Let tulips stay the hero.
Avoid
Big bows, multiple ribbons, ribbon as the main event.
Quick Checklist
One ribbon → flat tie → no loops → tulips first.
Weekend Refresh (Lasts Longer) OUTDOOR
Do This
Trim stems, refresh water, keep liners dry and crisp, re-tuck greens at the base.
Avoid
Cloudy water, soaked liners, rearranging too much.
Quick Checklist
Quick trim → fresh water → dry liner → reset clusters.
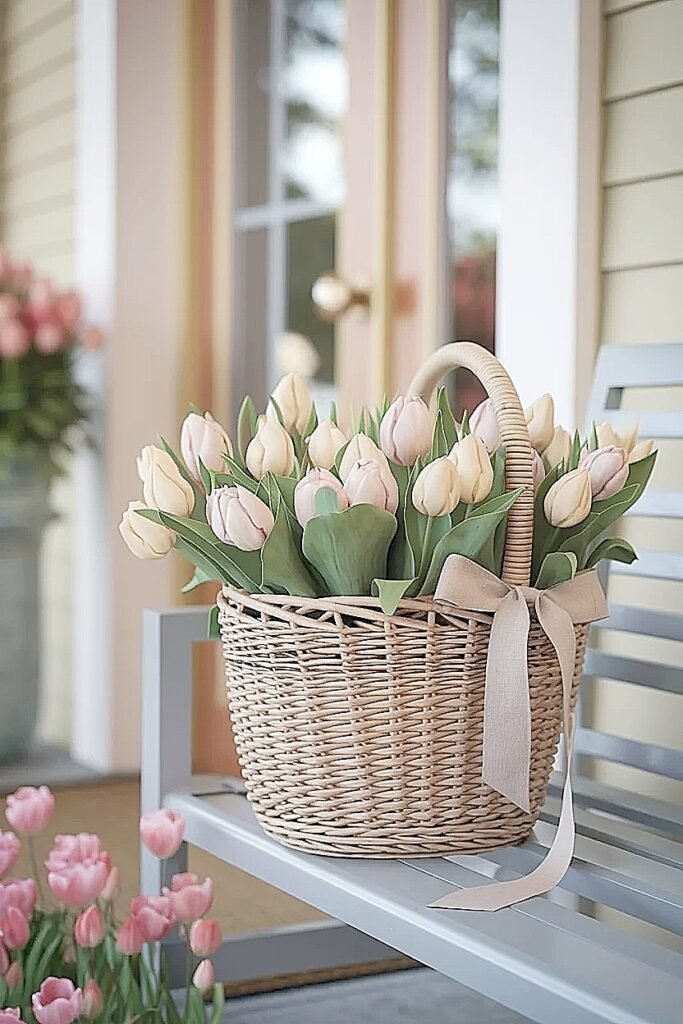
How to Style Spring Tulips in a Front Porch Basket Without Looking “Crafty”
Front porch baskets face unique pressures because they’re your home’s first impression, greeting every visitor before they’ve even knocked. The temptation runs strong to make these arrangements “special” through added decorative flourishes, which is precisely how things go sideways into craft territory. I’ve watched neighbors pile on the elements, bows, artificial butterflies, painted wooden stakes reading “Welcome Spring”, until their tulip baskets become visual chaos.
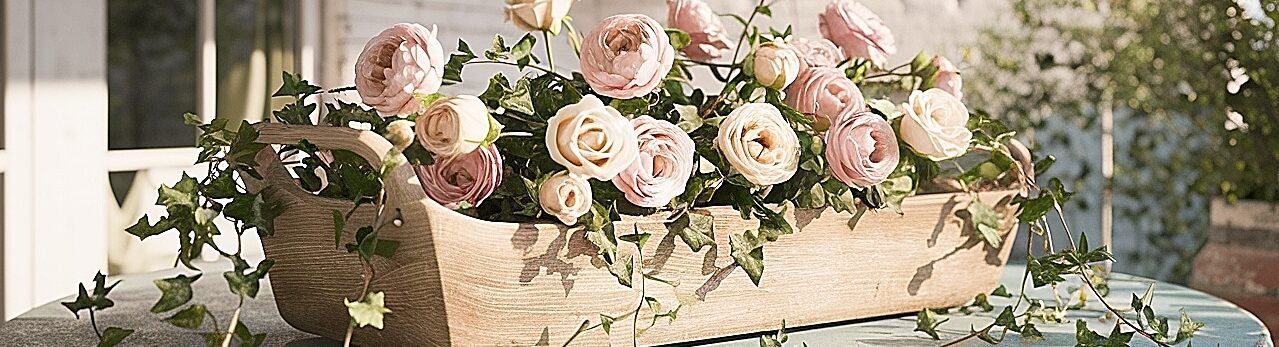
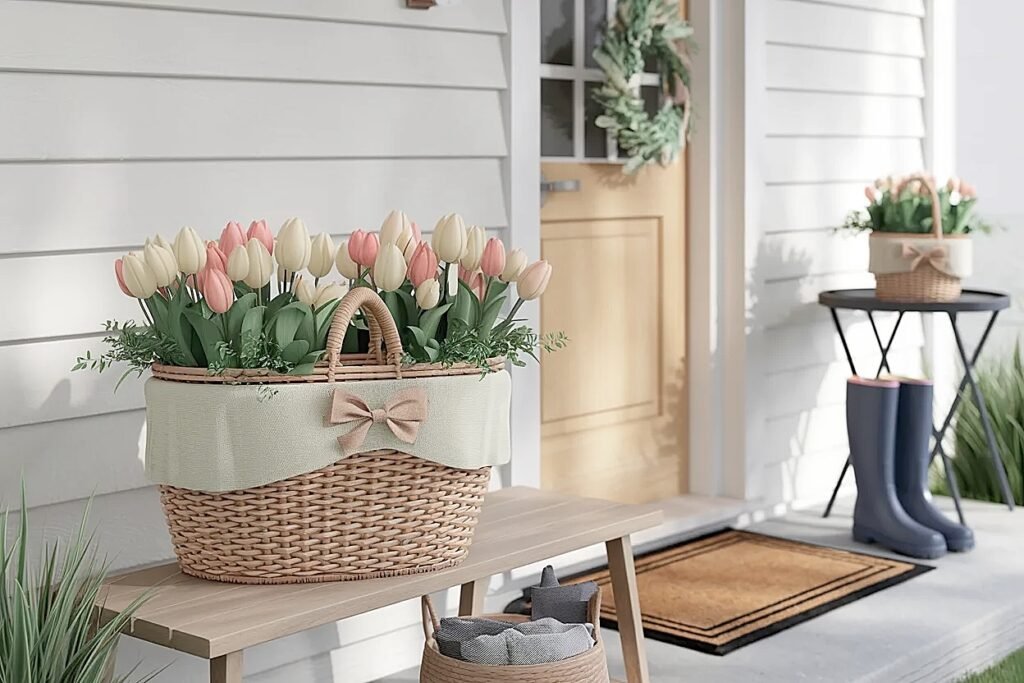
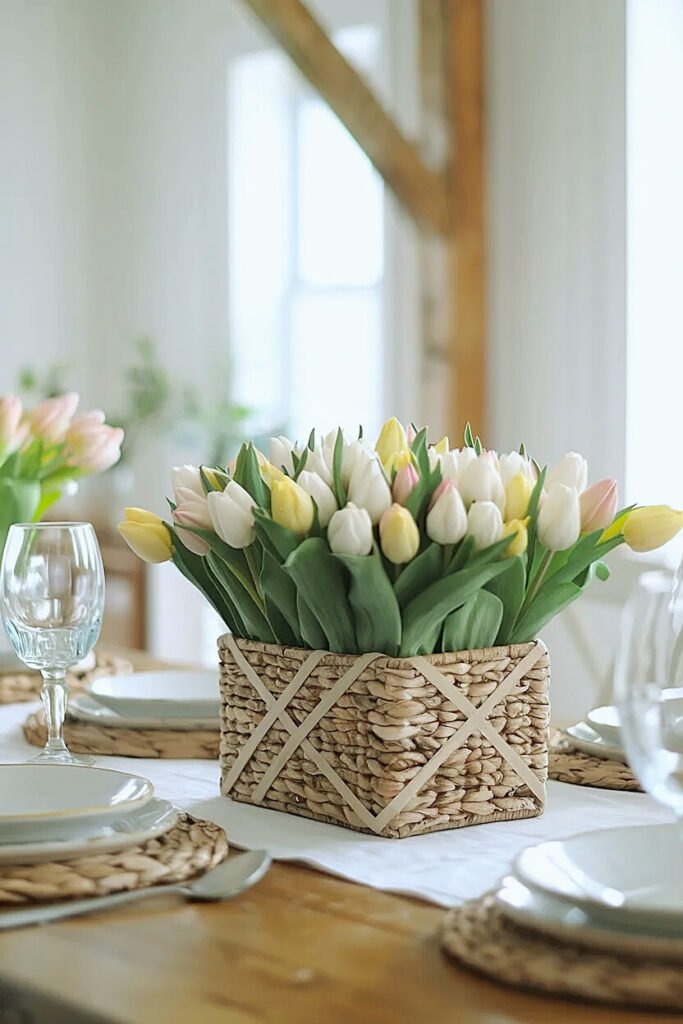
The sophisticated approach strips away everything except the essential beauty of tulips in a well-chosen basket. I select baskets with clean geometric shapes rather than ornate weaving patterns. A simple rectangular or oval basket in natural wicker tones provides structure without distraction. The weaving itself should be tight and regular, not loose or deliberately rustic, which can read as shabby rather than chic.
Inside that basket, I position a simple glass or ceramic vessel to hold water and tulips. The vessel stays completely hidden by the basket’s sides, creating the illusion that tulips grow directly from the basket itself. This seamless integration looks intentional and polished rather than obviously constructed. I choose tulips in a single color, maybe soft white, pale pink, or butter yellow, arranging fifteen to twenty stems loosely rather than in that tight, dome-shaped formality that screams “arrangement.”
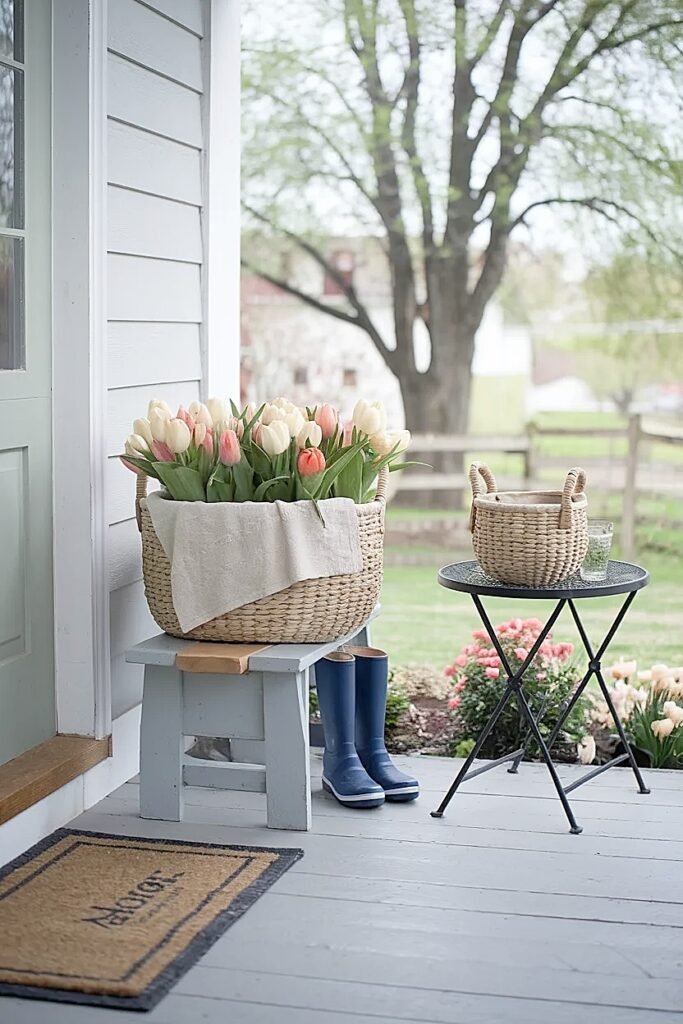
The basket sits directly on the porch floor or on a simple bench without additional props or staging. No decorative moss spilling over edges, no complementary smaller baskets clustered around it, no seasonal signs propped nearby. The singular basket becomes a statement through its restraint and quality rather than through accumulated decoration. The tulips’ natural movement, they shift and grow even after cutting, provides all the visual interest needed.
I replace the water every two days and recut stems to maintain freshness, because nothing undermines sophisticated styling faster than wilted flowers. The commitment to maintenance signals that this isn’t a set-it-and-forget-it craft project but a living installation that receives ongoing attention. For more approaches to spring tulip styling in unexpected vessels, there are some great kitchen-specific techniques worth exploring, share this with anyone who appreciates fresh flower displays!
The front porch strategies establish foundational principles that translate to other basket contexts, and the liner techniques ahead address how to upgrade baskets’ interior finishing.
What Are the Best Spring Tulips in Baskets Liner Tricks That Look Upscale
Basket liners solve the practical problem of containing soil or water while dramatically affecting perceived quality. Cheap plastic liners scream craft project, while thoughtfully chosen materials elevate baskets into designer territory. The liner might be invisible to casual observers, but it fundamentally shapes whether your arrangement reads as polished or homemade.
I’ve experimented with virtually every liner material available, and certain choices consistently deliver upscale results while others betray DIY origins regardless of how well-executed the overall arrangement might be.
1. Natural Linen Fabric Liner
Line baskets with unbleached natural linen that drapes softly over the basket’s interior, folding down slightly over the outer edge. Linen’s texture and neutral color create understated elegance that complements tulips without competing for attention. I cut fabric generously, at least four inches larger than the basket opening in all directions, allowing it to settle naturally rather than pulling taut. The organic wrinkles and folds add authenticity without sloppiness. Linen’s breathability also benefits potted tulips by preventing moisture buildup that synthetic liners trap. This material reads as thoughtfully chosen rather than grabbed from the craft store, signaling sophistication through texture and natural fiber quality.
2. Heavyweight Burlap with Clean Edges
Use high-quality burlap with tightly woven threads and clean-finished edges rather than the loose, fraying variety. The distinction matters enormously, quality burlap looks like textured linen while cheap versions read as costume material. I fold edges under before placing burlap in the basket, creating finished seams that won’t shed threads or appear ragged. The neutral tan color works universally with any tulip shade, providing subtle texture without pattern. Heavyweight burlap maintains its shape better than lightweight alternatives, creating clean lines inside the basket. This material bridges rustic and refined, offering organic texture while maintaining structural integrity that cheap burlap can’t match.
3. Moss Sheet Liner with Concealed Backing
Apply natural sheet moss to the basket’s interior, backed by hidden black plastic that prevents water seepage. The moss creates living-wall aesthetic inside the basket, lending organic beauty that feels garden-inspired rather than crafted. I use preserved sheet moss rather than fresh, which stays green without requiring ongoing moisture. The moss should cover the basket’s interior completely without gaps showing through, requiring careful fitting and possibly adhesive in spots. The black plastic backing stays invisible beneath the moss layer, handling water containment invisibly. This approach works beautifully when you want baskets to feel like they came directly from the greenhouse.
4. Vintage Grain Sack Fabric Liner
Line baskets with pieces cut from vintage European grain sacks featuring subtle striping or text in faded blues or reds. These authentic textiles add history and character without feeling decorative or crafty. I source real vintage sacks from antique markets rather than reproductions, the worn fabric and genuine aging create sophistication impossible to fake. The muted colors and utilitarian origins prevent the liner from reading as decorative choice, instead suggesting practical repurposing of beautiful old materials. Grain sack fabric drapes gorgeously, creating soft folds that add dimensional interest. This liner choice works especially well for farmhouse or European-inspired aesthetics.
5. Unbleached Canvas Drop Cloth Liner
Cut pieces from painter’s canvas drop cloth to line baskets, creating substantial backing with appropriate weight and texture. Canvas provides clean, neutral foundation that reads as practical rather than decorative. I appreciate canvas’s affordability, it costs a fraction of specialty liner materials while delivering comparable aesthetics. The material’s weight prevents it from collapsing or shifting inside the basket, maintaining clean lines throughout the arrangement’s lifespan. Canvas also ages beautifully if it gets wet or stained, developing patina rather than looking damaged. This choice signals utilitarian sensibility that aligns with sophisticated restraint rather than over-designed craft aesthetics.
6. Black Felt Underlayment with Visible Texture
Use black wool felt as liner material, letting its substantial texture show slightly above the basket rim. The dark color recedes visually, making tulips and basket weaving the stars while the felt provides subtle textural interest. I choose industrial felt at least 3mm thick rather than craft felt, the density and quality difference is substantial. Black grounds the arrangement without adding color that might clash with tulips or surrounding décor. Felt also provides excellent moisture protection while maintaining breathability that prevents root rot in potted bulbs. The material reads as purposeful and refined rather than decorative.
7. Simple Clear Plastic with Moss Cover Layer
Line baskets first with clear plastic sheeting for waterproofing, then conceal this practical layer beneath loose sheet moss arranged naturally. The plastic handles function invisibly while the moss provides all the visual appeal. I use heavyweight painter’s plastic rather than thin varieties that wrinkle or tear easily. The moss layer sits loosely atop the plastic rather than adhered, allowing easy removal for water changes or maintenance. This two-layer system offers complete water protection, critical for preventing basket damage, while maintaining natural aesthetic. The moss looks intentional rather than decorative, suggesting practical consideration for the basket’s material rather than craft embellishment.
These liner strategies prove that hidden elements significantly impact overall sophistication, and the structural support techniques ahead address keeping tulips beautifully upright without visible mechanics.
How to Keep Spring Tulips Upright in a Basket Without Foam or Mess
Floral foam screams craft project, that bright green block instantly identifies arrangements as deliberately constructed rather than naturally beautiful. Exposed foam edges, foam crumbles on surfaces, and the foam’s artificial color all telegraph “DIY.” I’ve completely eliminated foam from my basket work in favor of methods that maintain tulips’ upright positioning while staying invisible.
The solution centers on hidden vessel systems that contain water and provide stem support without any visible mechanics. Tulips need substantial water, so whatever method you employ must accommodate daily drinking while keeping stems from splaying outward in that messy, unkempt way.
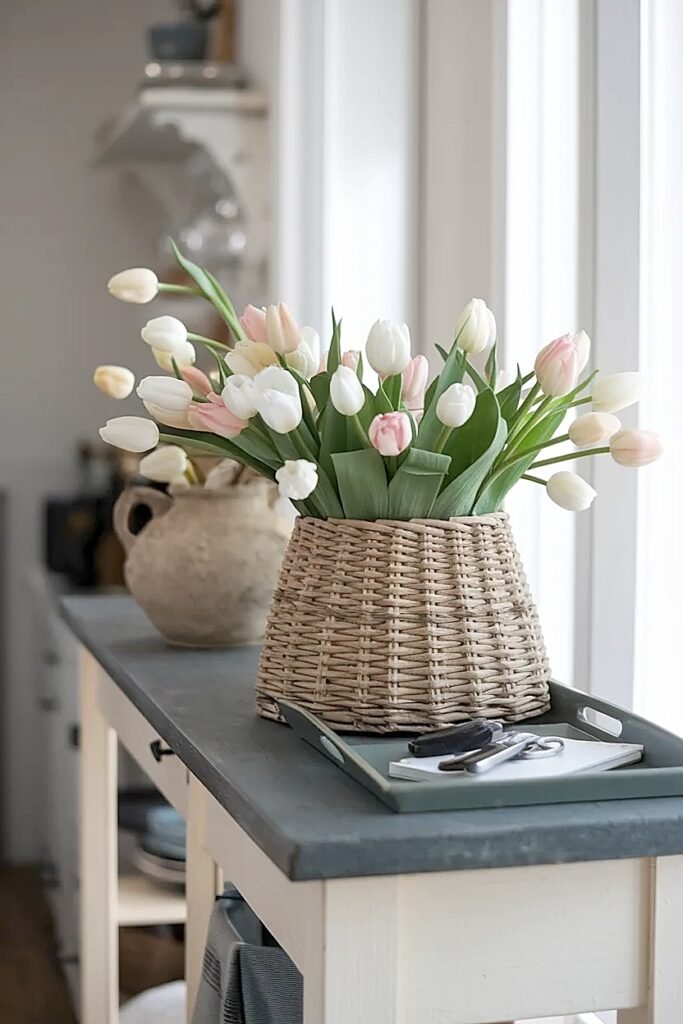
I position a straight-sided glass cylinder or simple ceramic crock inside the basket, ensuring it sits at least two inches below the basket rim so it stays completely hidden. The vessel’s diameter should fill roughly two-thirds of the basket’s interior width, providing stability while leaving some space around edges. I fill this vessel with cool water, cut tulip stems at sharp angles, remove lower leaves, and arrange stems to lean gently against the vessel’s interior walls.
For additional support without foam, I create a grid across the vessel’s opening using clear waterproof tape. The tape strips crisscross in roughly one-inch squares, creating openings through which tulip stems insert. The grid prevents stems from shifting or falling to one side while remaining completely invisible, the tape reads as reflection on water’s surface rather than structural element. Each tulip stem goes through a different grid opening, distributing blooms evenly across the arrangement.
Alternatively, I use smooth river rocks or glass marbles in the bottom third of the vessel, creating weight and slight resistance that holds stems in position. The stones stay submerged beneath waterline, invisible unless someone looks directly down into the basket. Stems nestle between stones, which prevent dramatic shifting while allowing the natural movement that makes arrangements feel alive rather than static.
These mechanical solutions handle the functional challenges invisibly, letting the basket and tulips tell their story without exposing construction methods, and the hanging basket concepts ahead address suspended arrangements’ unique requirements.
Ideas for Spring Tulips in Hanging Baskets That Don’t Scream “DIY”
Hanging baskets face extra scrutiny because they’re literally suspended at or above eye level, making every detail visible. The DIY aesthetic typically creeps in through excessive trailing elements, visible chains or hardware painted in decorative colors, and overstuffed arrangements that prioritize fullness over elegance. I approach hanging baskets as floating sculptures viewed from below, which demands different considerations than ground-level arrangements.
The sophistication comes from restraint and attention to how the basket reads from underneath, the viewing angle most guests will experience when walking beneath or sitting near the hanging arrangement.
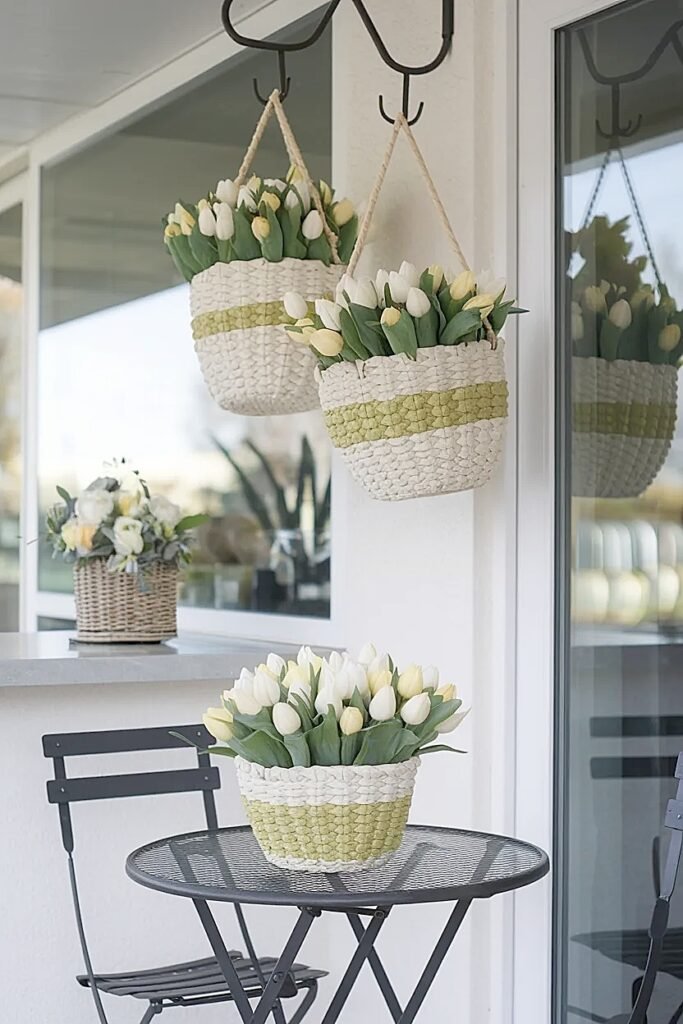
1. Minimalist Wire Basket with Hidden Liner and Single-Color Tulips
Use a simple wire basket with clean geometric lines, no decorative flourishes or colored coatings, lined with black coir or natural fiber that stays dark when wet. Plant tulip bulbs directly in quality potting soil, choosing a single color in quantities that fill the basket without overcrowding. The wire structure provides necessary support while maintaining visual lightness, and the dark liner recedes to invisibility from below. I select twelve to fifteen bulbs for a fourteen-inch basket, allowing individual tulips to stand out rather than creating dense masses. The monochromatic tulip color, perhaps all white or all soft pink, reads as intentional curation rather than random selection. Hardware stays natural metal rather than painted decorative colors.
2. Woven Basket with Substantial Chain and Underside Fabric Drape
Choose a tightly woven basket in natural materials, suspending it with heavy-gauge chain in matte black or natural metal finish. Line the basket’s interior with fabric that extends slightly below the basket’s bottom edge, creating soft drape visible from underneath. I use linen or canvas in cream or natural tones, cutting fabric large enough that eight to ten inches hang below the basket base. This fabric drape conceals the basket’s underside, often the least attractive angle, while adding soft movement as it sways. The substantial chain signals quality rather than delicate craft-store varieties that read as flimsy.
3. Galvanized Metal Bucket Basket with Drainage Modification
Repurpose a simple galvanized metal bucket as hanging basket by drilling drainage holes and attaching three equidistant hanging points near the rim. The industrial material creates clean aesthetic that’s definitively not crafty, while the bucket shape provides ample depth for tulip roots. I fill with quality soil and bulbs, keeping the metal exterior completely unadorned, no paint, stencils, or decorative elements. The bucket’s utilitarian origins prevent it from reading as decorative craft project, instead suggesting practical repurposing of functional object. Hang from simple rope or chain in natural materials that complement the metal’s industrial character.
These hanging approaches demonstrate that elevation demands extra attention to underside aesthetics and hardware quality, and the shape selection guidance ahead addresses how basket geometry affects perceived sophistication.
What Are the Best Basket Shapes for Spring Tulips to Look Clean, Not Busy
Basket shape fundamentally determines whether tulip arrangements read as refined or cluttered before you’ve added a single flower. Certain shapes inherently support clean aesthetics through their geometry and proportions, while others fight you from the start with complex forms or decorative weaving patterns. I’ve learned to be ruthlessly selective about basket shapes, recognizing that starting with the right form makes everything easier.
The cleanest basket shapes share common characteristics: simple geometric foundations, proportions that don’t skew extreme in any direction, and weaving patterns that create texture without busyness.
1. Classic Rectangular Market Basket with Low Profile
Choose rectangular baskets approximately twice as long as wide with sides no taller than six inches. These proportions create elegant horizontal emphasis perfect for displaying tulips in linear arrangements. The low profile prevents baskets from dominating the arrangement, tulips remain the stars while the basket provides understated foundation. I favor tight, regular weaving in natural tones without decorative borders or handles that add visual complexity. The rectangular shape works beautifully on mantels, entry tables, or sideboards where horizontal surfaces call for elongated forms. This basket shape reads as sophisticated storage piece repurposed for flowers rather than decorative craft element, maintaining that crucial distinction between curated and created.
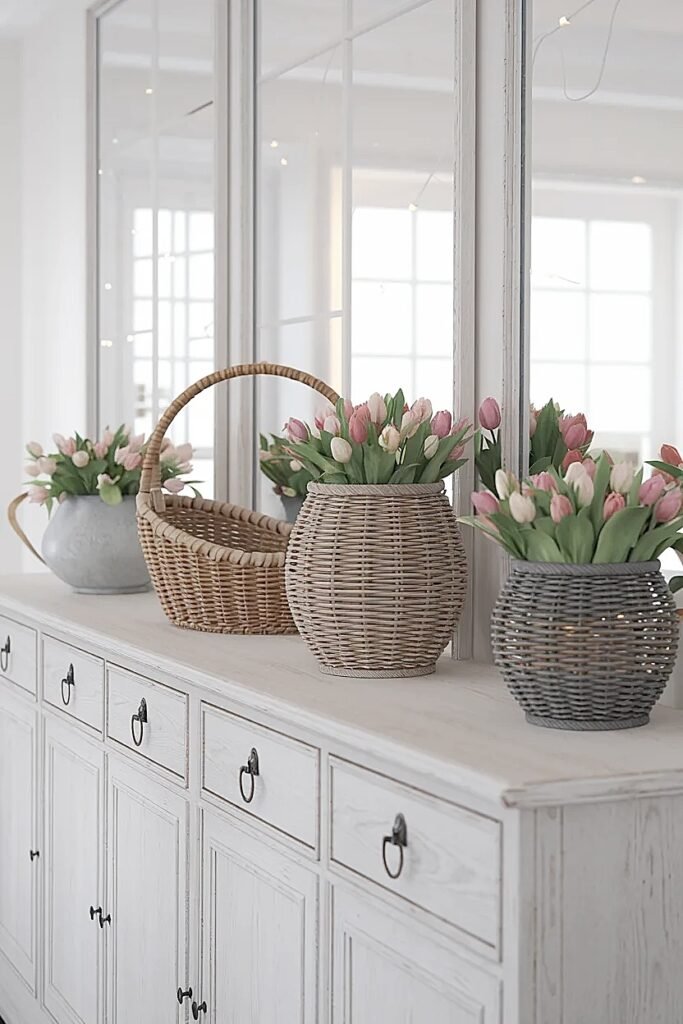
2. Round Bowl-Style Basket with Consistent Diameter
Select round baskets shaped like bowls with diameters between ten and fourteen inches and depths of five to seven inches. The circular form distributes visual weight evenly, preventing awkward emphasis in any direction. Bowl shapes create natural nests for tulip arrangements, their curves complementing flowers’ organic forms without imposing geometric rigidity. I choose versions with simple, tight weaving free from decorative patterns, painted accents, or unusual materials. The consistent diameter from rim to base creates clean silhouette from any viewing angle, important for baskets positioned where they’re seen from multiple sides. Round bowl baskets feel timeless and versatile, working across various décor styles without shouting their presence.
3. Shallow Oval Basket with Smooth Interior Finish
Opt for oval baskets with length-to-width ratios of roughly 1.5:1 and depths under five inches. The oval shape offers directionality without the aggressive linearity of extreme rectangles, creating softness through curved edges while maintaining elegant elongation. Shallow depth keeps the arrangement’s proportions balanced, deep baskets can create top-heavy appearances where flowers dwarf their containers. I ensure the interior weaving is smooth and finished without rough edges or protruding pieces that look unfinished or crafted. These baskets work phenomenally for coffee tables or side tables where their horizontal spread fills space appropriately without vertical drama. The oval form reads as more sophisticated than perfect circles while avoiding rectangles’ potential severity.
4. Square Basket with Generous Proportions and Minimal Detailing
Choose square baskets at least twelve inches per side with straight, vertical sides creating cube-like forms. The geometric clarity of squares provides modern sensibility that counteracts baskets’ rustic associations, landing in interesting territory between industrial and organic. I select versions with consistent weaving patterns free from decorative bands, contrasting colors, or embellishments. The square shape works brilliantly when you want strong architectural presence, on kitchen islands, large entry tables, or as floor-level statements near doorways. Generous sizing prevents the dainty craft-project feeling smaller baskets can project, instead offering substantial presence that commands attention through scale and simplicity rather than decorative flourishes.
5. Cylinder-Shaped Basket with Vertical Emphasis
Select cylindrical baskets taller than wide, perhaps eight inches diameter and twelve inches tall, creating vertical emphasis that elegantly showcases tulips’ natural height. The round footprint prevents harsh corners while the vertical stretch adds drama and sophistication impossible with squatter forms. I choose versions with uniform weaving from base to rim without decorative variations that fragment the form. Cylindrical baskets work beautifully on floors beside furniture, in room corners, or on side tables where their height creates presence without spreading horizontally. The shape’s simplicity feels almost Shaker-like in its functional purity, completely avoiding craft aesthetics through restrained geometry and consistent execution.
These shape guidelines prove that form dictates function in basket selection, and the texture blending strategies ahead address integrating baskets within broader design contexts.
How to Blend Spring Tulips in Baskets with Neutral Farmhouse Textures
Farmhouse aesthetics celebrate layered textures in neutral palettes, think weathered wood, natural linen, aged metals, and organic fibers. Tulip baskets need to nestle into this textural landscape as harmonious elements rather than standing apart as obvious decorative additions. The blending happens through material coordination and color restraint rather than through matching or theme-heavy execution.
I approach texture blending by considering what materials already exist in the room and selecting basket and tulip combinations that echo those elements naturally. If your farmhouse kitchen features butcher block counters and linen curtains, a natural wicker basket with cream tulips picks up those organic, neutral tones seamlessly.
The key involves avoiding anything that introduces jarring newness or obviousness. Baskets should look like they could have been sitting in that spot forever, found objects rather than recently purchased decorations. I sometimes artificially age new baskets by leaving them outside through a few rainstorms or rubbing them with steel wool to remove sheen and create subtle wear. This weathering helps baskets blend into farmhouse environments where everything else shows patina.
Tulip color selection matters enormously for texture integration. I gravitate toward soft, neutral tulip shades, whites, creams, pale yellows, soft pinks, that read as natural rather than saturated. These colors blend with farmhouse neutrals rather than popping against them, creating cohesive layering where the tulips add life and softness without introducing foreign color stories.
I also consider how basket materials relate to other organic elements in the space. Wicker baskets echo wooden beams or furniture, while woven seagrass connects to sisal rugs or jute accents. Metal baskets in galvanized finish relate to vintage hardware or light fixtures. These material relationships create subconscious coherence that makes everything feel intentionally collected rather than randomly assembled.
The placement matters too. I position baskets where they interact with existing textures, on a wooden side table next to linen curtains, on a marble counter beside ceramic crocks, on a metal stool near an industrial shelf unit. These pairings create textural conversations where each element enhances the others through proximity and material relationship.
These blending principles ensure baskets feel integrated rather than imposed, and the outdoor dining concepts ahead address how covered patios expand tulip basket opportunities.
Ideas for Spring Tulips in Baskets for Covered Patios and Outdoor Dining
Covered patios offer protected outdoor spaces where basket arrangements can thrive without full weather exposure. The semi-outdoor context invites slightly more casual styling than indoor spaces while still demanding sophistication. I love styling tulip baskets for these transition zones because they bridge garden abundance and interior refinement.
The covered structure provides protection from direct rain and intense sun while maintaining outdoor ambiance through natural light and air circulation. This environment suits tulips beautifully, they stay fresher longer than in hot, sunny exposures while contributing garden atmosphere.
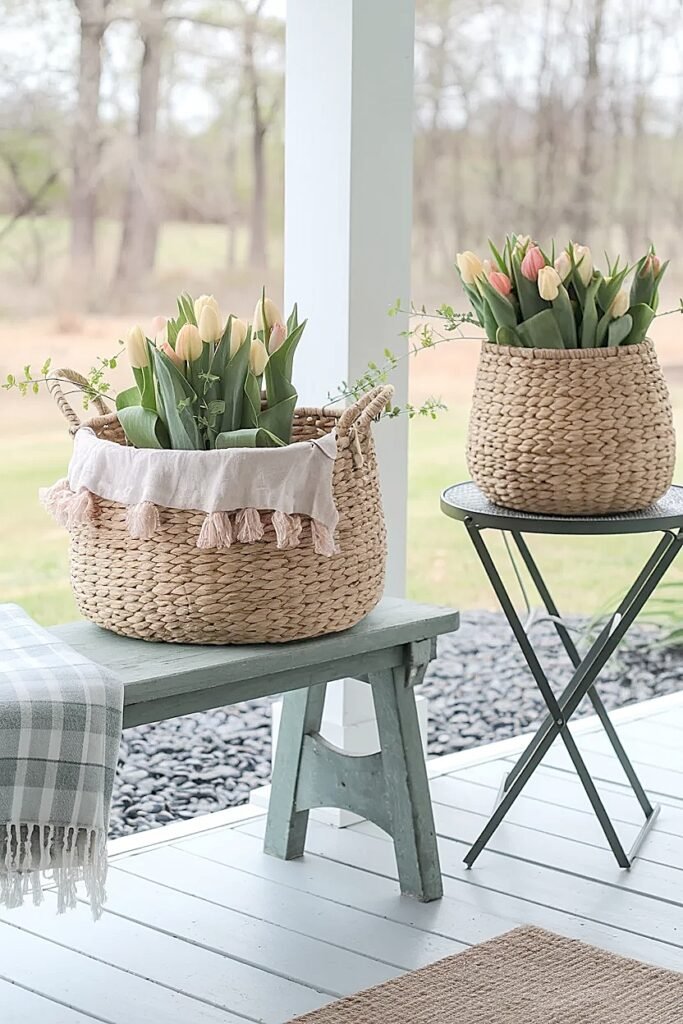
1. Floor-Level Basket Clusters in Odd Numbers
Arrange three or five baskets in varying heights on the patio floor near dining areas, creating asymmetric groupings that feel organic rather than staged. I use baskets ranging from eight to fourteen inches tall, positioning the tallest toward the back and shortest toward front for graduated visual flow. Each basket holds tulips in the same color but different quantities, perhaps fifteen stems in the largest, ten in medium, seven in smallest. This creates unity through color consistency while the varying scales prevent rigid uniformity. The floor-level placement grounds the arrangement, making it feel like an extension of the garden reaching into the covered space. The odd-number grouping avoids the paired symmetry that can feel too formal or designed.
2. Hanging Baskets Suspended at Varied Heights Above Dining Table
Install ceiling hooks at different heights above or near the dining table, suspending tulip baskets at staggered levels to create dimensional interest overhead. I hang baskets at heights ranging from five to seven feet from the floor, ensuring lowest points clear heads comfortably while creating layered visual composition when viewed from seated positions. Each basket uses simple rope or chain in natural materials, avoiding decorative hardware that reads as crafty. The varying heights prevent the regimented appearance of same-level installations while the multiple baskets create generous floral presence appropriate for outdoor entertaining. Tulips in single colors, all white or all pale pink, maintain sophistication while the abundance signals celebration and hospitality.
3. Linear Basket Procession Along Patio Railing or Ledge
Line up five to seven identical baskets along a patio railing or low wall, spacing them evenly to create rhythmic procession defining the covered space’s perimeter. I use matching baskets approximately eight inches in diameter, each filled with tulips in identical colors and quantities. The repetition creates strong visual rhythm that establishes the patio’s boundaries while the uniform execution prevents the scattered, unplanned appearance of varied containers. This linear installation works beautifully for long, narrow patios where a single large arrangement would get lost but coordinated multiples create substantial impact. The baskets can sit directly on railing tops or ledges, or hang from hooks along the railing’s outer edge, creating slight elevation that showcases blooms to people viewing the patio from the yard.
These outdoor dining approaches leverage covered spaces’ unique characteristics while maintaining the restraint that prevents crafty appearances, and the ribbon guidance ahead addresses one of the most treacherous decoration decisions.
What Are the Best Ribbon Rules for Spring Tulips in Baskets (Subtle Only)
Ribbons present the single greatest risk factor for tulip baskets crossing into craft territory. One overwrought bow can undermine an otherwise sophisticated arrangement instantly. I approach ribbons with extreme caution, applying them sparingly if at all, and following strict parameters about width, color, and application method.
The fundamental principle: ribbons should enhance the basket’s structure or handle functionality rather than serving as pure decoration. If the ribbon doesn’t have a practical job, securing liner, providing hanging mechanism, reinforcing handle, it probably shouldn’t be there.
1. Natural Jute Twine for Handle Wrapping Only
Use thin natural jute twine to wrap basket handles, creating textural interest through the wrapping pattern while maintaining neutral color. The twine serves practical purpose of providing better grip while adding subtle decorative element. I wrap handles completely from end to end in tight, even spirals, securing ends with small knots tucked invisibly at joints. This technique works only for baskets with handles, and only when the handles contribute meaningfully to the arrangement’s presentation or functionality. Avoid dyeing or bleaching the jute, natural tan color blends universally without drawing excessive attention.
2. Single-Width Grosgrain in Basket-Matching Neutral
If ribbon feels necessary, choose single-width grosgrain in cream, tan, or soft gray that matches the basket’s natural tones rather than contrasting. The ribbon width should stay under one inch, anything wider reads as decorative rather than subtle. I use ribbon solely to secure liner fabric at the rim, wrapping it once around the basket’s exterior circumference and tying a simple knot rather than bow. The ribbon disappears into the basket’s color story, serving its securing function without advertising its presence.
3. Waxed Linen Cord for Minimalist Accent
Replace traditional ribbon entirely with waxed linen cord in natural shades, wrapping it minimally around basket handles or rim. The cord’s thin profile and matte finish create sophistication impossible with shiny ribbon materials. I limit cord application to single wraps or simple knots, avoiding any multi-loop bow constructions that scream handmade. Waxed linen ages beautifully, developing patina rather than looking worn, which aligns with farmhouse aesthetics’ appreciation for materials that improve with time and use.
4. Leather Strip for Industrial-Organic Hybrid
Use narrow leather strips, quarter-inch width maximum, in natural tan shades to create subtle accents on basket handles. The leather introduces unexpected material that reads as sophisticated rather than crafty, bringing slight industrial edge to organic baskets. I wrap leather once around handles and secure with small metal rivets or simple knots, creating permanent installations rather than removable bows. This works particularly well for modern farmhouse aesthetics where industrial elements mix with organic materials.
5. Complete Ribbon Elimination in Favor of Clean Lines
The most sophisticated choice often involves eliminating ribbon entirely, letting baskets and tulips speak without additional embellishment. I secure liners with small staples or adhesive on basket interiors where they remain invisible, or choose liners that drape naturally without requiring fastening. This zero-ribbon approach prevents any risk of crossing into craft territory while maintaining absolute clean aesthetic. The arrangement succeeds through quality materials and thoughtful composition rather than added decoration, which represents the highest form of sophisticated styling.
These ribbon rules establish clear boundaries that protect against craft aesthetics’ most common pitfall, ensuring your tulip baskets maintain refined elegance.
Conclusion
Styling spring tulips in baskets without looking crafty comes down to ruthless editing and quality material selection. Every element, basket shape, liner choice, ribbon application, tulip color, either contributes to sophisticated simplicity or detracts through unnecessary complexity. I’ve learned that the most elegant solutions almost always involve subtracting rather than adding, letting the inherent beauty of natural materials and living flowers tell their story without interference. Start with the cleanest basket you can find, choose tulips in a single neutral shade, and resist every impulse to embellish. The restraint itself becomes the design statement, creating arrangements that feel effortlessly beautiful rather than laboriously crafted.
This website contains affiliate links, and some products are gifted by the brand to test. As an Amazon Associate, I earn from qualified purchases. Some of the content on this website was researched and created with the assistance of AI technology.