This website contains affiliate links, and some products are gifted by the brand to test. As an Amazon Associate, I earn from qualified purchases. Some of the content on this website was researched and created with the assistance of AI technology.
Key Takeaways
- Fern fronds provide delicate texture when pruned strategically to three fronds maximum per planter
- Trailing ivy varieties create cascade effects but need weekly pruning to prevent overtaking tulip focal points
- Lamb’s ear adds silvery softness at planter bases while naturally suppressing weeds between tulip stems
- Rosemary pairs beautifully with tulips through vertical structure and aromatic dimension
- Dusty Miller delivers sophisticated gray tones that make colored tulips pop without competing
- Trailing thyme creates living mulch while finishing planter edges with subtle fragrance
- Mint and artemisia work indoors where their aggressive spreading gets contained by pots
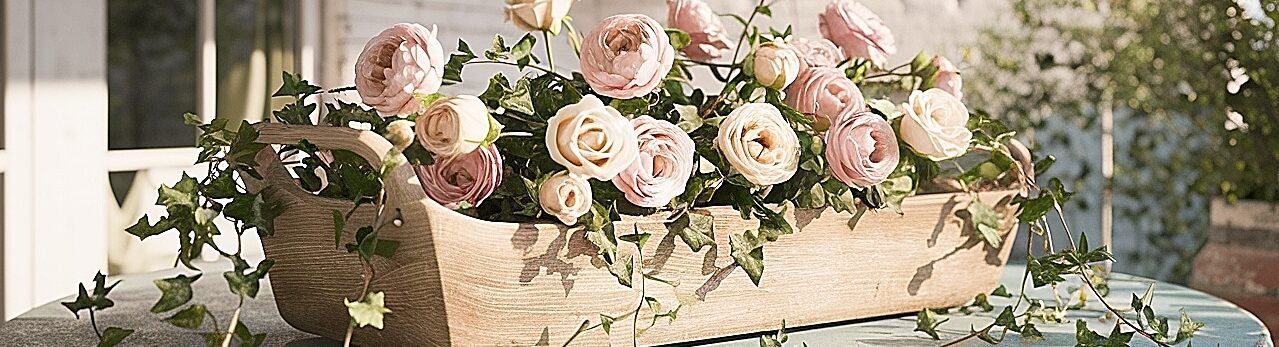
Pairing greenery with spring tulips for porch planters separates amateur arrangements from compositions that make visitors actually stop and ask what you did differently this year. I learned this the hard way after filling planters with tulips and random greenery from the garden center clearance rack, creating what my wife diplomatically called “enthusiastic” but what honestly looked like I’d dumped a salad bar into terracotta. The tulips disappeared into chaos, the greenery fought for attention, and the whole thing screamed “trying too hard” instead of “effortlessly beautiful.”
The revelation came from understanding that greenery serves specific architectural roles in planter design, it’s not just filler or afterthought but structural element that either amplifies or undermines your tulips completely. Too much greenery overwhelms the blooms you’re supposedly showcasing. Too little creates sparse, unfinished arrangements that look like you gave up halfway through planting. Wrong textures compete rather than complement. The right combinations create depth, movement, and sophistication that elevate simple tulip planters into genuinely beautiful compositions that photograph well and improve your porch’s entire aesthetic for the full six weeks tulips bloom.
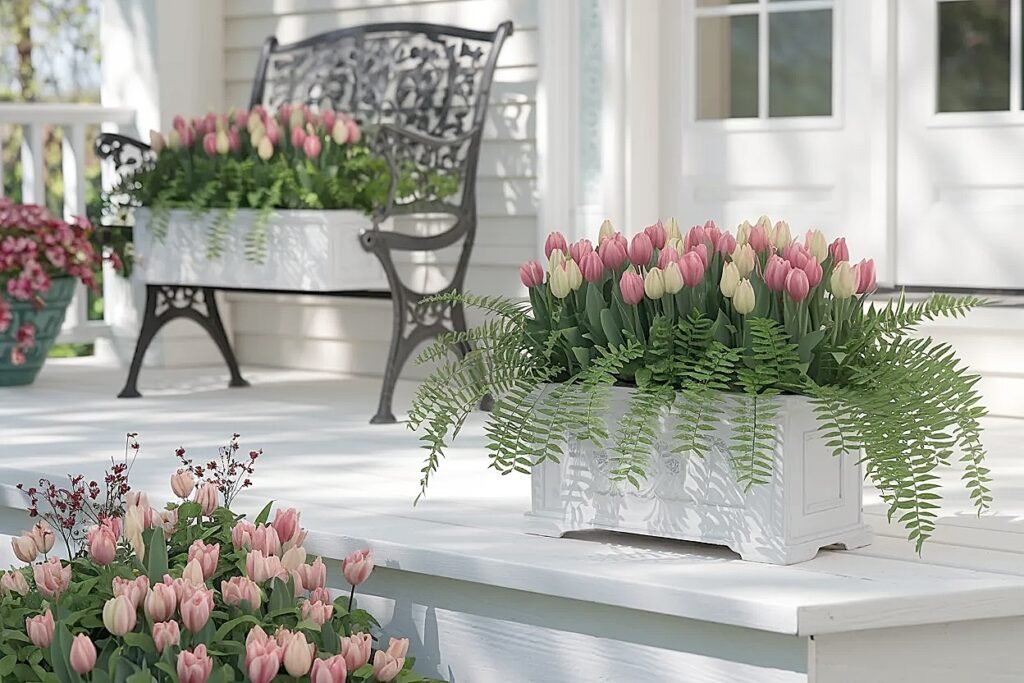
Use this greenery cheat sheet to pair Spring Tulips with the right greens for porch planters and indoor surfaces. It shows which greenery adds structure, which trails neatly, what stays compact, and what to avoid near steps or busy tables. Tap the copy buttons to grab a fast checklist.
Best Greenery to Pair with Spring Tulips (Porch + Indoors)
Quick picks for clean, cozy styling. Use structured greens for shape, soft greens for texture, and trailing greens only on the outside edge (not into walkways).
| Greenery | Best use | Best placement | Do / Avoid |
|---|---|---|---|
| OutdoorBoxwood | Structure + “green collar” base | Porch planters by steps, welcome tables | DO: tuck low & even • AVOID: tall, bulky stuffing |
| OutdoorTrailing Ivy | Soft edge + controlled drape | Outer rim away from traffic zones | DO: one-side drape • AVOID: spill into walkways |
| OutdoorRosemary | Clean texture + upright support | Base + back of porch planters | DO: trim & tuck • AVOID: messy long sprigs |
| OutdoorDusty Miller | Soft gray base to calm bright tulips | Base ring in porch planters | DO: low ring • AVOID: big fuzzy overhang |
| OutdoorCarex | Upright “frame” for height | Back edge behind tulips | DO: back-frame only • AVOID: wrap all around |
| IndoorItalian Ruscus | Crisp base frame + polished look | Entry tables, dining centerpieces | DO: base tuck • AVOID: thick bulky layers |
| IndoorSalal (Lemon Leaf) | Deep green volume, compact | Dining tables, console planters | DO: trim leaf length • AVOID: wide “leaf wings” |
| IndoorHeuchera Leaves | Rich depth + cozy contrast | Living room tables, entry consoles | DO: low ring • AVOID: tall foliage stacks |
Outdoor greens that stay tidy
Base collar for structure. Tuck low and even.
One-side drape on the outer rim. Keep walkways clear.
Back-edge frame for height. Don’t wrap all around.
Soft gray base ring to calm bright tulips.
Indoor greens for compact centerpieces
Crisp base frame for entry and dining.
Deep green volume. Trim leaf length to stay compact.
Low foliage ring for cozy depth and contrast.
How to Pair Fern Fronds with Spring Tulips Porch Planters Without Looking Wild
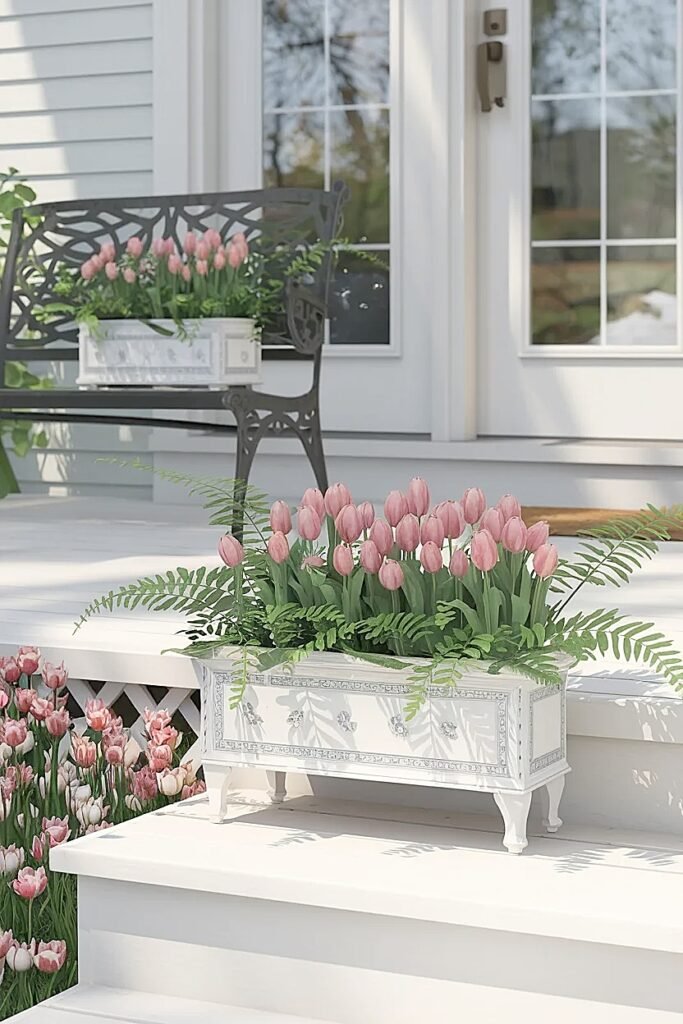
Ferns seduce gardeners with their delicate, feathery beauty, but they’re also the fastest route to creating planters that look like untamed woodland thickets rather than intentional compositions. I made this mistake spectacularly three springs ago when I tucked four small fern starts around the perimeter of a large planter filled with pink tulips. Those “small” ferns exploded into aggressive frond-producing machines within two weeks, completely obscuring my tulips and creating a green mass that belonged in a terrarium, not on my front porch.
The problem with ferns in spring planters is their growth rate combined with their naturally wild, spreading form. They evolved for forest floors where sprawling provides competitive advantage, not for ornamental containers where restraint creates beauty. Left unchecked, ferns will absolutely dominate any planter, sending out new fronds constantly and creating density that makes everything else disappear behind greenery.
My current fern strategy embraces severe limitation and deliberate positioning. I use exactly three fern fronds per planter, not plants, but individual fronds cut fresh each week from established ferns growing elsewhere in my yard. These cut fronds go into small water tubes hidden among the tulip stems, positioned at the planter’s back third only, never circling the perimeter. The cut fronds maintain their delicate beauty for five to seven days before needing replacement, and this replacement cycle prevents the explosive growth that potted ferns produce.
The species matters enormously. I’ve tested maidenhair, Boston, autumn, and sword ferns in various configurations, and autumn fern consistently delivers the best results for tulip planters. Its fronds stay more upright rather than sprawling horizontally, and the reddish tint on new growth coordinates beautifully with pink, coral, or white tulips. Japanese painted fern offers similar benefits with silvery variegation that adds interest without aggressive spreading. Both maintain relatively compact forms compared to Boston ferns, which seem determined to colonize every available inch.
If you’re committed to using potted ferns rather than cut fronds, the containment strategy becomes critical. Position the fern in its own small four-inch nursery pot, then nestle that pot among your tulips rather than planting the fern directly into the container soil. This root containment dramatically slows the fern’s spread while making removal easy when it inevitably starts overtaking the composition. I check these contained ferns every three days, removing any fronds that start sprawling beyond their designated zone. Ruthless editing maintains the arrangement’s integrity, one frond removal every few days prevents having to dismantle the entire planter when the fern takes over completely, and for more comprehensive approaches to positioning tulips and companion plants across different porch surfaces, that guide covers placement strategies that keep everything looking intentional rather than wild, definitely worth sharing with anyone tackling spring porch styling.
The fern principles establish restraint as the foundation for all greenery pairing, and the trailing ivy concepts ahead explore how to harness cascading plants without losing control entirely.
What Are the Best Trailing Ivy Styles for Spring Tulips Porch Planters
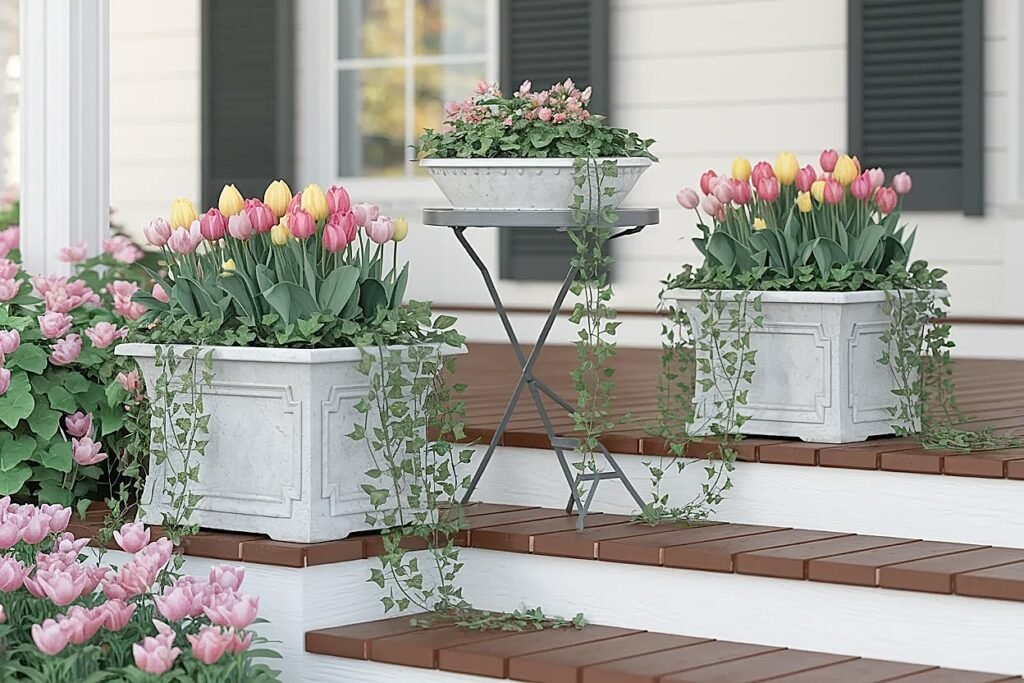
Trailing ivy transforms porch planters from flat, one-dimensional compositions into dynamic installations with vertical interest and movement. The cascade effect softens container edges and creates professional polish that elevates even simple tulip varieties into sophisticated displays. But ivy’s aggressive nature requires strategic variety selection and maintenance discipline, or you’ll end up with planters where ivy has consumed everything else and turned your tulip showcase into an ivy showcase with occasional flower cameos.
I’ve worked with ivy in porch planters for six years, killing some varieties through neglect, watching others consume entire compositions, and finally identifying which types actually behave appropriately in spring containers where tulips need to remain the focal point. The wrong ivy selection creates weekly battles where you’re constantly trimming back aggressive growth, while the right varieties provide beautiful cascade with minimal intervention.
1. English Ivy ‘Needlepoint’ for Delicate Trails
Needlepoint ivy produces smaller leaves and more refined growth patterns than standard English ivy varieties, creating elegant trails that enhance rather than overwhelm tulip arrangements. The leaf size stays proportional to container scale, roughly one inch across compared to the three-inch monsters that standard English ivy produces. I position three Needlepoint starts evenly spaced around the planter’s perimeter, tucking them slightly under tulip stems so the ivy emerges from beneath the blooms rather than competing at the same visual level. The growth rate stays manageable with weekly tip pinching, which takes maybe ninety seconds per planter and prevents the ivy from developing those long, aggressive runners that colonize everything. The dark green foliage provides strong contrast against white or pastel tulips while blending harmoniously with darker tulip varieties.
2. Glacier Ivy for Variegated Interest
Glacier ivy brings cream-and-green variegation that adds complexity to monochromatic tulip arrangements without introducing additional flower colors that might clash. The variegated leaves catch light beautifully, creating subtle sparkle that draws attention without demanding it. I use Glacier sparingly, just two plants per large planter, because the variegation creates stronger visual presence than solid green varieties, and too much becomes busy rather than interesting. Position Glacier at the planter’s front edge where trails will drape over the container rim and showcase the variegation prominently. The slower growth rate compared to standard English ivy makes maintenance easier, though I still pinch back tips every ten days to maintain controlled cascade rather than wild sprawl.
3. Gold Child Ivy for Warm Color Echoes
Gold Child ivy produces green leaves edged in golden yellow, creating warmth that complements yellow, orange, and coral tulips beautifully while providing contrast for purple and pink varieties. The golden edge adds subtle color without competing with tulip blooms since the ivy stays foliage-focused while tulips provide flower power. I’ve found Gold Child works best in planters receiving at least four hours of direct sun daily, the golden variegation fades to plain green in too much shade, losing the entire point of choosing this variety. Position three Gold Child starts at the planter’s midpoint between front and back, allowing trails to cascade naturally while some foliage weaves through tulip stems creating integrated layers rather than distinct zones. The growth rate sits between aggressive standard ivy and slower Glacier, requiring pinching every seven to eight days to maintain appropriate scale.
These ivy varieties prove that trailing plants can enhance without overtaking, and the lamb’s ear techniques ahead explore how to use textured groundcover without creating visual competition.
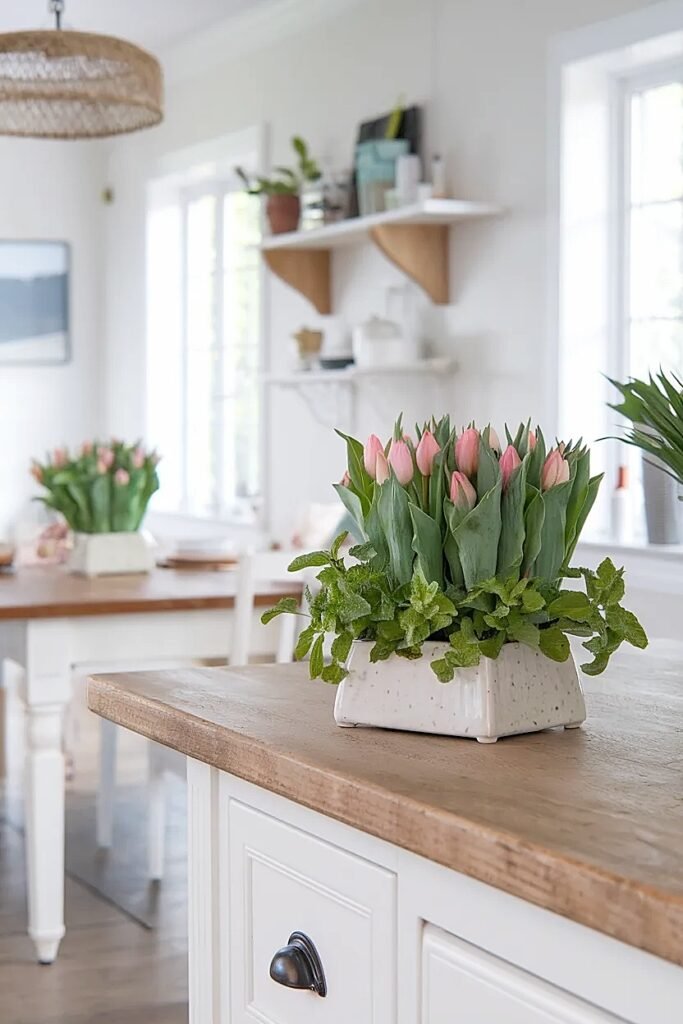
How to Use Lamb’s Ear for a Cozy Base with Spring Tulips Porch Planters
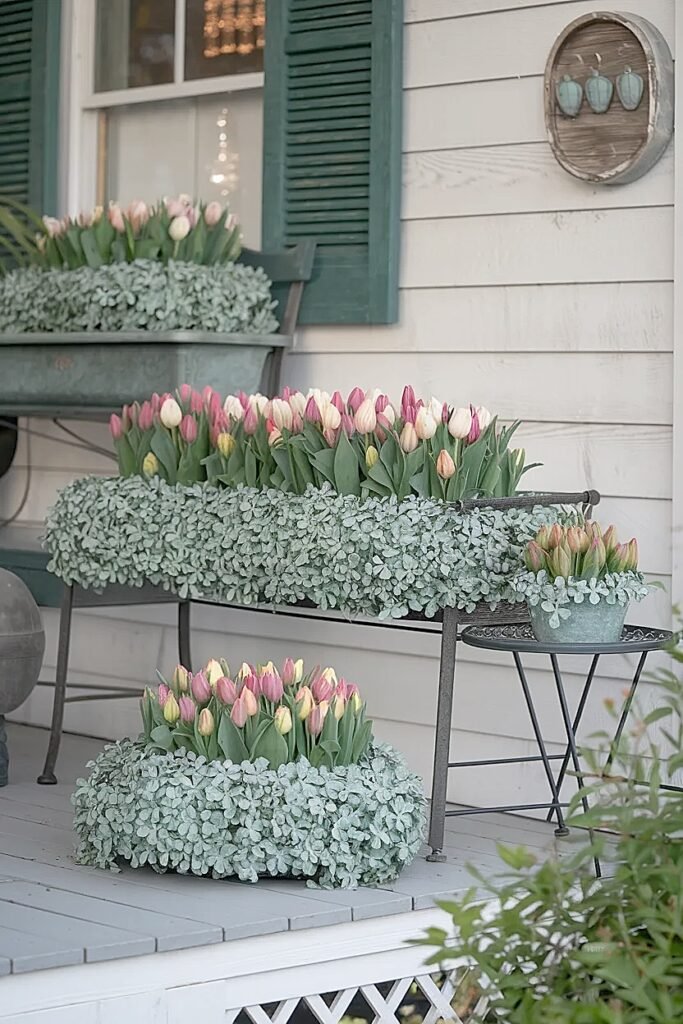
Lamb’s ear brings soft, silvery foliage with tactile fuzzy texture that creates unexpected sophistication in spring planters. Most people associate it with perennial borders or herb gardens, not container compositions, but it’s actually one of my secret weapons for grounding tulip arrangements and creating professional-looking planters that feel finished rather than sparse.
The silver-gray foliage provides neutral foundation that makes any tulip color pop, and I mean any color. Purple tulips gain richness against the silver. White tulips create elegant tonal contrast. Pink and coral varieties sing. Even yellow tulips, which can feel harsh against pure green foliage, look refined when nestled into lamb’s ear’s silvery carpet. The effect resembles how gray walls in homes create backdrop that makes colorful art pop without competing.
My lamb’s ear strategy centers on using it as living mulch that fills the planter’s soil surface between tulip stems. I plant tulip bulbs at appropriate depth first, then tuck small lamb’s ear starts into the remaining topsoil, spacing them to create coverage without crowding. Three to four starts per sixteen-inch planter creates sufficient coverage once they establish. The lamb’s ear grows outward rather than upward, staying low and spreading across soil surface while sending up the occasional flower spike, which I remove immediately since those tall stalks disrupt the arrangement’s proportions.
The practical benefits extend beyond aesthetics. Lamb’s ear’s dense foliage suppresses weeds that would otherwise sprout in the exposed soil between widely-spaced tulips. The fuzzy leaves also help retain soil moisture by shading the surface and reducing evaporation, I’ve measured this with a soil moisture meter and found lamb’s ear planters stay consistently more hydrated than those with bare soil or traditional mulch. This moisture retention means less frequent watering, which matters during busy spring weeks when I’m not home consistently.
Texture creates the magic here. Lamb’s ear’s fuzzy, almost velvety leaves provide completely different tactile quality than tulips’ smooth petals or their blade-like foliage. This textural contrast adds dimension that monochromatic smooth-textured arrangements lack. Kids who visit invariably want to touch the lamb’s ear, creating interactive element that pure tulip planters don’t offer. The silver color and soft texture also photograph exceptionally well, the fuzzy leaves catch light in interesting ways that add depth to photos, while the neutral color prevents the color clashes that can happen when photographing multiple bold flower colors together.
The winter-hardiness provides bonus value. In zones 4-9, lamb’s ear survives winters in outdoor planters, meaning you can leave it in place after tulips fade and it’ll return the following spring. I’ve maintained the same lamb’s ear plants in my porch planters for three years now, just adding fresh tulip bulbs each fall around the established lamb’s ear. This permanence saves money and effort while creating consistency across years.
The lamb’s ear approach shows how groundcover-style greenery can enhance without overwhelming, and the rosemary concepts ahead explore how upright herbs add vertical dimension.
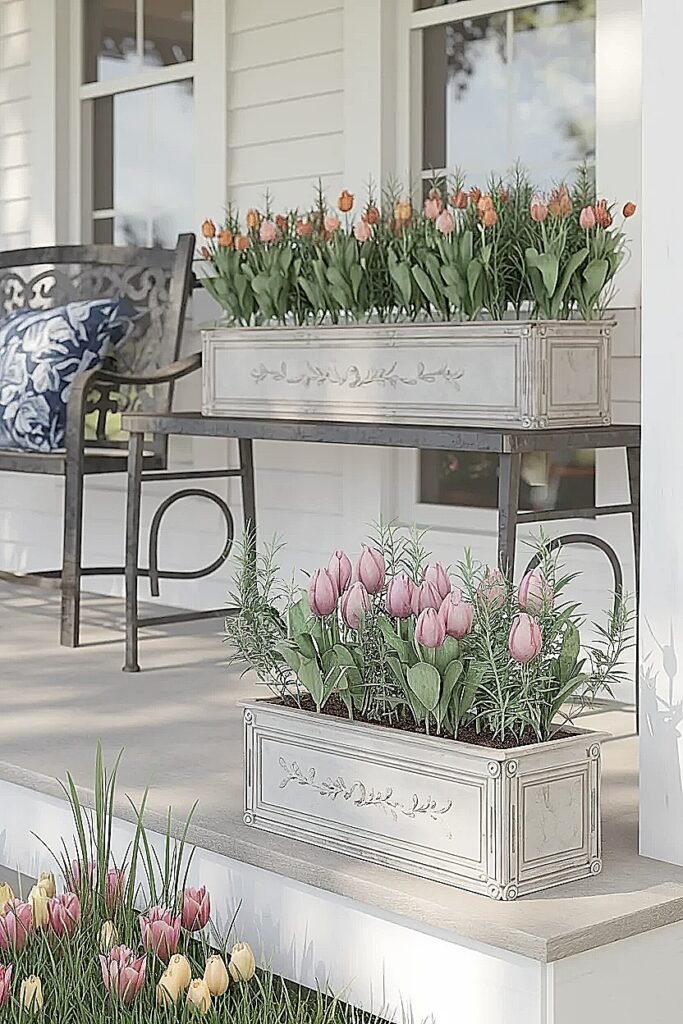
Ideas for Pairing Rosemary with Spring Tulips Porch Planters for a Fresh Look
Rosemary transformed how I think about greenery in tulip planters. Most people default to decorative foliage, ivy, ferns, ornamental plants chosen purely for appearance. But adding culinary herbs introduces aromatic dimension while maintaining the visual interest that purely ornamental choices provide. You get beauty plus function, which appeals to my practical nature.
The aromatic element matters more than I initially realized. Every time someone brushes past planters containing rosemary, that distinctive piney fragrance releases, creating sensory experience that purely visual arrangements can’t match. On warm spring afternoons when I’m sitting on the porch, the rosemary scent drifts over subtly, making the space feel more interesting and intentional than standard floral arrangements provide.
1. Vertical Accent Positioning for Structure
Plant a single upright rosemary variety like ‘Tuscan Blue’ or ‘Arp’ at the planter’s back center, allowing it to grow twelve to eighteen inches tall while tulips bloom at six to eight inches in front. This creates tiered height progression that adds architectural interest while the rosemary’s narrow, upright form doesn’t spread enough to compete with tulips for lateral space. I use one rosemary per planter regardless of container size, more creates forest rather than accent. The vertical rosemary anchors the composition visually while its dark green foliage provides backdrop that makes lighter tulip colors advance visually. The bonus: after tulips fade, the rosemary continues providing structure and can be shaped through summer, then harvested for cooking throughout the season.
2. Corner Triangulation for Balanced Frames
Position three small rosemary starts in triangular formation around the planter’s perimeter, spacing them evenly to create balanced framing for central tulip grouping. I use ‘Prostratus’ or other semi-trailing rosemary varieties for this application since their spreading habit creates softer edges than upright types would. Each rosemary start stays small, four-inch pots maximum, so they provide structure without dominating. The triangular positioning creates visual stability while the rosemary’s evergreen nature means it holds foliage even if late spring frosts damage tulips. This configuration works particularly well for round or square planters where the geometric rosemary positioning echoes the container shape, creating subtle harmony between vessel and contents.
3. Perimeter Ring for Living Herb Border
Create a complete rosemary border around the planter’s outer edge using six to eight small rosemary starts spaced evenly, with tulips emerging from the center in tight grouping. This inverts the typical arrangement where flowers occupy the perimeter and greenery fills the center, creating unexpected composition that draws attention through its reversal of convention. I use ‘Spice Island’ or other compact rosemary varieties that stay bushy rather than growing tall or trailing. The rosemary ring needs diligent pinching to maintain appropriate scale, I check weekly and remove any growth extending inward toward tulips or outward beyond the container rim. After tulips fade, this rosemary ring becomes standalone herb feature that transitions the planter into summer use without looking suddenly empty.
These rosemary strategies prove that functional herbs can be gorgeous ornamentals, and the dusty miller techniques ahead explore how to use silvery foliage for sophisticated color harmony.
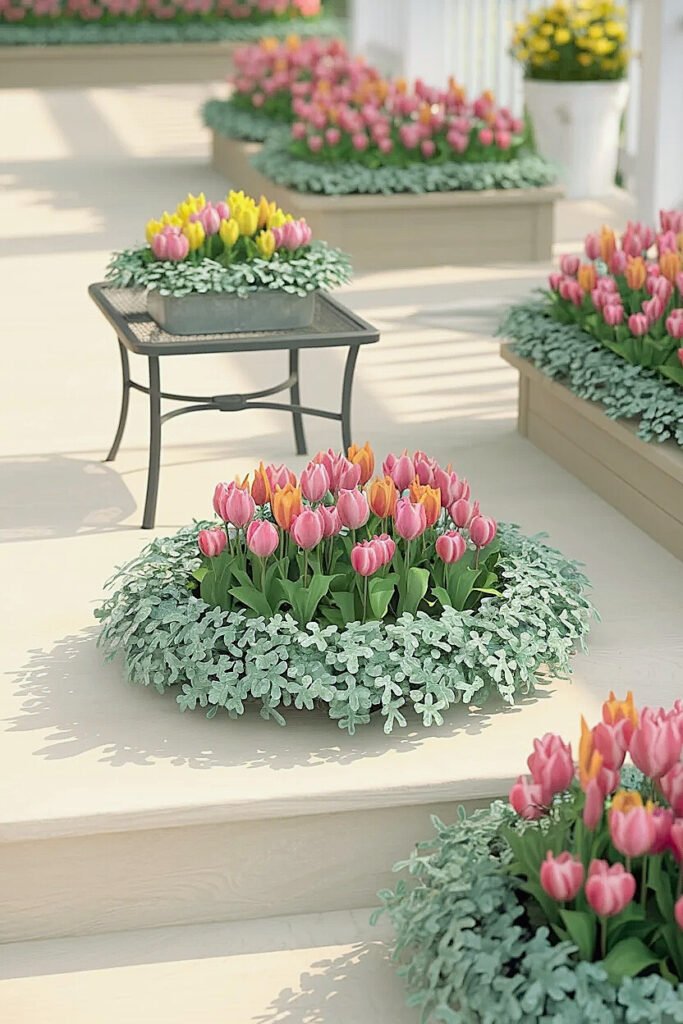
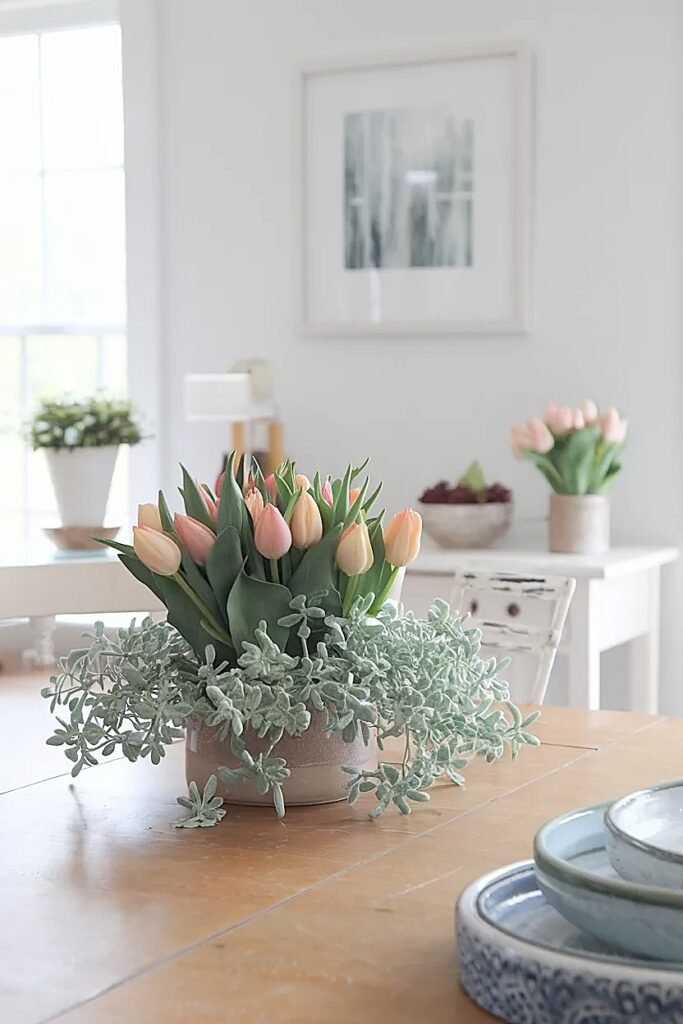
Ways to Use Dusty Miller as the “Soft Gray” with Spring Tulips Porch Planters
Dusty miller might be the most underutilized companion plant for tulips in porch planters. Most gardeners think of it as summer annual or cemetery plant, which undersells its sophisticated beauty and its particular magic for making tulip colors more vibrant without adding competing blooms.
The silver-gray foliage creates neutral backdrop similar to lamb’s ear but with completely different leaf structure and growth habit. Where lamb’s ear sprawls low and fuzzy, dusty miller grows in compact mounds with deeply lobed or lacy leaves depending on variety. This architectural foliage adds structure while the silver tone makes literally every tulip color look more saturated and vivid, it’s like the floral equivalent of matting artwork, where the neutral border makes the central image pop.
1. Central Focal Point Surrounded by Tulip Ring
Position one substantial dusty miller, six-inch pot size, at the planter’s center, surrounding it with tulip bulbs planted in circular formation around the perimeter. This inverts traditional arrangements where flowers occupy the center, creating unexpected composition that works beautifully with white or pastel tulips. The silver mound anchors the center while tulips bloom around it like colorful frame. Works best in large planters minimum eighteen inches diameter where there’s sufficient space for both elements.
2. Alternating Corner Placements for Rhythm
Place dusty miller in opposite corners of rectangular planters or in alternating quadrants of round containers, creating rhythm through repetition. This works with three to four small dusty miller plants, each in its own designated zone with tulips filling the spaces between. The alternating pattern creates visual interest without the predictable balance of symmetric positioning.
3. Front Edge Border Creating Gray Ribbon
Line the planter’s front edge with four to five small dusty miller starts positioned continuously, creating a silver ribbon running the container’s width. Tulips plant behind this border emerge from the gray base like colorful performers stepping onto a stage. The front-edge positioning ensures the dusty miller stays visible from viewing angles rather than getting hidden behind tulip foliage.
4. Scattered Individual Specimens for Sparkle
Rather than clustering dusty miller, scatter individual small starts randomly throughout the planter among tulip groupings. This creates subtle silver sparkle distributed across the composition rather than concentrated in specific zones. Use six to eight very small starts for this application, accepting that each individual specimen won’t create much impact but the collective effect adds dimension.
5. Tiered Back-to-Front Gradient
Position largest dusty miller at the planter’s back, medium-sized at midpoint, and smallest at front edge, creating tiered height progression that adds depth. Tulips plant in the spaces between, with shorter tulip varieties in front and taller in back echoing the dusty miller’s graduated sizing. This creates professional composition with intentional depth rather than flat arrangements.
These dusty miller applications show how neutral-toned foliage can actually make colors more vibrant rather than competing with them, and the trailing thyme concepts ahead explore how to use spreading herbs for finished edges.
Ways to Use Trailing Thyme to Finish Spring Tulips Porch Planters Neatly
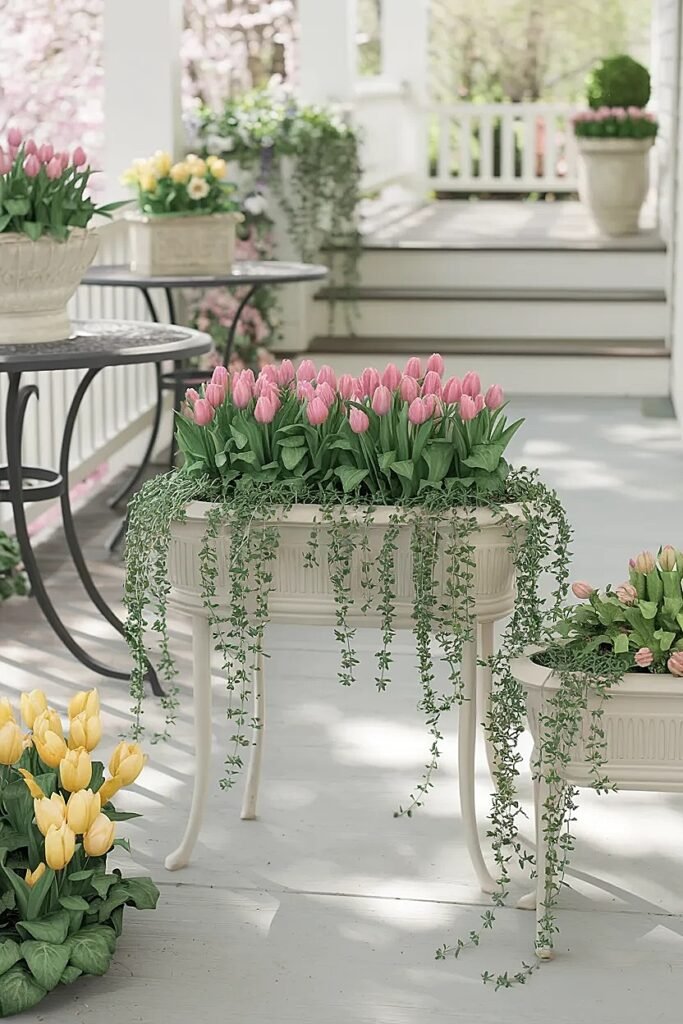
Trailing thyme solves a problem many people don’t even realize their tulip planters have: abrupt edges where container meets air, creating harsh transitions that make arrangements look unfinished. I didn’t notice this until a designer friend pointed at my planters and said “those need something to soften the rim.” She was right, without edge treatment, planters read as plants-in-containers rather than cohesive compositions.
Trailing thyme provides that finishing touch while adding subtle fragrance when brushed or when warming in sun. The tiny leaves create delicate texture completely different from tulips’ bold blooms and blade-like foliage, adding complexity through contrast. And unlike aggressive trailing plants, thyme’s spread stays manageable with minimal maintenance.
1. Complete Perimeter Cascade for Softened Edges
Plant trailing thyme at three-inch intervals around the entire planter perimeter, positioning starts right at the container edge so growth immediately drapes over the rim. I use ‘Elfin’ or ‘Minus’ varieties for this application since their extremely low growth habit creates tight cascades rather than loose tangles. Within three weeks, the thyme creates continuous living collar softening the container edge completely. The cascade effect works best on elevated planters, on porch railings or plant stands, where the trailing growth can drape freely rather than sitting on surfaces. Water the perimeter thyme slightly less than the tulips since thyme prefers drier conditions, allowing the soil at the planter edge to dry between waterings while keeping the center moister for tulips.
2. Corner Accent Drapes for Subtle Movement
Position trailing thyme only at the planter’s corners, four starts for square containers, two for rectangular planters at the short ends. This creates accent cascades at strategic points rather than complete coverage, maintaining some of the container’s visibility while adding movement where eyes naturally land on corners. I use ‘Pink Chintz’ or other flowering thyme varieties for this application since the corner positioning showcases their tiny blooms beautifully when they appear. The selective placement requires far fewer thyme plants than complete perimeter coverage, saving money while creating more dynamic composition where cascades happen at specific points rather than uniformly everywhere.
3. Front-Edge Asymmetric Drape for Artful Imbalance
Plant trailing thyme along only the planter’s front two-thirds, leaving the back third without cascade. This creates asymmetric composition where the cascading front draws attention while the clean back allows the tulips themselves to be focal point when viewed from behind. Works particularly well for planters positioned against walls or railings where the back isn’t visible, why waste thyme on unseen areas? I use ‘Highland Cream’ with its cream-and-green variegation for this application since the front positioning showcases the variegation prominently.
4. Interplanted Ground Coverage Between Tulip Stems
Rather than limiting thyme to the planter edges, interplant small starts between tulip stems throughout the container, allowing the thyme to create living mulch covering soil surface while also trailing over edges. This requires more thyme, eight to ten starts per large planter, but creates lush, finished appearance where no bare soil shows anywhere. The thyme weaves between tulip foliage creating integrated layers rather than distinct zones. I use lemon thyme for this application since its subtle citrus fragrance adds another sensory dimension when the planter warms in afternoon sun.
5. Graduated Corner-to-Center Planting for Depth
Plant trailing thyme densely at planter corners, moderately along edges, and sparingly toward the center, creating gradient from heavy coverage at perimeter to minimal coverage in the middle. This graduated approach creates subtle depth where the eye perceives layers moving from outer edges inward to the central tulip grouping. Requires careful planning during planting, I actually sketch the gradient pattern before positioning any thyme to ensure even progression rather than random placement.
These trailing thyme techniques demonstrate how the right edge treatment transforms arrangements from plants-in-containers to professional-looking compositions, and the mint concepts ahead explore how to use aggressive herbs indoors where their spreading gets controlled.
How to Pair Mint Sprigs with Spring Tulips for a Fresh Indoor Kitchen Planter
Moving tulips indoors changes everything about companion planting. Outdoor containers battle wind, rain, temperature swings, and need to handle these stresses across weeks. Indoor planters exist in controlled environments where aesthetic becomes the primary consideration since survival isn’t really in question. This control lets you experiment with combinations that would fail outdoors, like pairing tulips with mint.
Mint grows aggressively, spreading through underground runners that colonize everything within reach. Outdoors in the ground, mint becomes invasive pest requiring constant vigilance to prevent it taking over entire garden beds. But in contained indoor planters with no opportunity to spread beyond the pot’s boundaries, mint’s aggressive nature becomes manageable while its fresh fragrance and bright green foliage provide perfect complement to cut tulip arrangements.
I keep a kitchen windowsill planter specifically for this combination, a fourteen-inch rectangular ceramic container that lives on the sill above my sink where it gets eastern morning light. Every Monday I cut fresh tulips from my outdoor planters or buy a bunch from the grocery store, cutting stems to eight inches and arranging them in small water tubes hidden among mint plants growing in the container soil. The mint grows in the soil permanently while tulips rotate weekly as blooms fade and get replaced with fresh cuts.
The mint species matters significantly. Spearmint stays more compact and upright than peppermint, which tends to sprawl and create tangled masses in containers. I’ve tested chocolate mint, apple mint, orange mint, and plain spearmint, finding that spearmint and chocolate mint provide the best growth habits for container use. Chocolate mint adds subtle brownish tint to leaves that creates interesting color variation, while its unique fragrance combining mint and chocolate notes makes doing dishes oddly pleasant when the scent drifts up from the windowsill planter.
Stem cutting from the mint becomes part of the routine. I snip sprigs for tea twice weekly, which doubles as maintenance pruning keeping the mint from getting too dense or tall. These regular cuttings maintain the mint at eight to ten inches height, preventing it from overwhelming the tulips while ensuring fresh young growth stays abundant. The pruning takes maybe thirty seconds but makes the difference between controlled mint that complements tulips versus overgrown mint that consumes the entire planter.
Water management requires attention since mint and cut tulips have different needs. The mint growing in soil wants consistently moist conditions, while cut tulip stems just need their water tubes kept filled. I water the mint every three days, keeping the soil damp but not soggy, while checking and refilling the tulip water tubes daily. This dual-maintenance system sounds complicated but becomes automatic after the first week.
The kitchen placement creates practical benefits beyond aesthetics. Having fresh mint readily available encourages actually using it, I clip sprigs for morning tea, for garnishing dishes, for muddling in drinks, which forces the regular pruning that keeps it appropriately scaled. The tulips provide cheerful color in a space that often lacks fresh flowers since kitchens can be too humid or temperature-variable for many cut flowers, but tulips handle those conditions fine for their week-long vase life.
The indoor mint pairing proves that “aggressive” plants become manageable in controlled environments, and the artemisia concepts ahead explore more silver-foliage options for indoor arrangements.
What Are the Best “Silvery Greens” (Artemisia) with Spring Tulips Indoors
Artemisia varieties offer sophisticated silver-gray foliage that elevates indoor tulip arrangements from simple flower displays to designer-quality compositions. Most people encounter artemisia only as ‘Powis Castle’ or ‘Silver Mound’ in outdoor perennial borders, never considering it for indoor container use, but several varieties adapt beautifully to indoor conditions while providing that gorgeous silvery color that makes tulip colors more vibrant.
The silver foliage creates neutral backdrop similar to dusty miller but with completely different texture, artemisia’s feathery, finely-divided leaves create soft, almost cloud-like appearance rather than the architectural structure dusty miller provides. This delicate texture contrasts beautifully with tulips’ bold, simple flower forms and smooth petals.
1. Artemisia ‘Powis Castle’ for Substantial Silver Mounds
‘Powis Castle’ produces generous mounds of silver filigree foliage reaching twelve inches tall and wide, creating substantial presence in indoor planters. I position one ‘Powis Castle’ plant off-center in a sixteen-inch container, surrounding it with eight to ten cut tulip stems in water tubes creating asymmetric composition where silver mound anchors one side while tulips cluster on the other. The artemisia’s non-flowering nature means it stays purely foliage-focused, never competing with tulips for attention through its own blooms. The substantial size fills space generously, making arrangements look full and intentional rather than sparse. Keep ‘Powis Castle’ in bright indirect light near south or west windows, watering when soil surface dries, it tolerates slight drought better than constant moisture, making it forgiving for inconsistent waterers.
2. Artemisia schmidtiana ‘Silver Mound’ for Compact Elegance
‘Silver Mound’ stays low and compact, growing just six to eight inches tall in rounded formation perfect for smaller indoor planters. I use this variety in ten-inch containers on side tables or desks where space limits larger compositions. Position the ‘Silver Mound’ at the container’s front edge with five to seven cut tulips emerging from behind it, creating tiered effect where the low silver artemisia forms base layer with taller tulips rising above. The extremely fine, feathery foliage creates almost impossibly soft texture that begs to be touched. Unlike ‘Powis Castle,’ ‘Silver Mound’ can handle slightly less light, making it viable for east-facing windows or bright north exposures that wouldn’t support sun-hungry varieties.
3. Artemisia ‘Silver Brocade’ for Spreading Groundcover Effect
‘Silver Brocade’ grows low and spreading rather than mounding, creating groundcover effect in containers where it flows across soil surface between tulip stems. I use this variety when planting tulips in bulb fiber or forcing them indoors in wide, shallow bowls, the ‘Silver Brocade’ fills the spaces between emerging tulip shoots creating living mulch that covers the growing medium completely. The spreading habit means you need just one or two plants per container since they’ll expand to fill available space within three to four weeks. The silver foliage stays under four inches height, ensuring it never competes with tulip blooms for visual attention but instead creates sophisticated base layer. Prune back any stems that start stretching or getting leggy, which happens occasionally in lower light, the pruning keeps growth compact and encourages denser branching.
4. Artemisia ludoviciana ‘Valerie Finnis’ for Vertical Silver Spikes
‘Valerie Finnis’ produces more upright, spiky growth than other artemisias, reaching ten to twelve inches with silvery-white leaves creating vertical accents. I use this variety when I want architectural rather than soft effects, positioning one ‘Valerie Finnis’ at the container’s back with tulips arranged in front. The vertical stems create backdrop similar to how rosemary functions but with silver color instead of green. This variety tolerates more shade than other artemisias, making it viable for north-facing windows or rooms with limited natural light. The upright habit also means it occupies less lateral space than mounding types, working well in narrow containers where width is limited but height is available.
5. Artemisia stelleriana ‘Silver Brocade’ for Coastal Tolerance
Despite the similar name to #3, this is actually a different species with scalloped, almost succulent-like silver leaves creating bold texture. I use this variety in kitchen or bathroom planters where humidity runs higher than other rooms, it evolved for coastal conditions and handles moisture better than typical artemisias that prefer dry air. Position one plant per container, allowing its spreading habit to create silver carpet under and around tulip stems. The thicker, more substantial leaves create different texture than the feathery artemisias, adding variety if you’re creating multiple tulip-artemisia combinations across different rooms. Water slightly more frequently than other artemisia varieties since it tolerates and even appreciates more consistent moisture.
These artemisia varieties demonstrate that silver foliage creates sophistication indoors just as effectively as outdoors, providing neutral backdrop that makes tulip colors sing while adding textural interest that simple green foliage can’t match.
Conclusion
Pairing greenery with tulips in porch planters transforms simple seasonal displays into sophisticated compositions that reward attention to texture, color harmony, and growth management. The strategies I’ve detailed emerged from years of trial and error, overgrown ferns that consumed everything, aggressive ivy that required daily pruning, and failed combinations that looked chaotic rather than cohesive. The successful pairings share common principles: greenery serves as supporting actor rather than competing star, textures contrast rather than duplicate, growth rates stay manageable with minimal maintenance, and colors either harmonize or provide neutral backdrop rather than clashing. Start with one greenery type this spring rather than attempting complex multi-plant combinations, master the relationship between tulips and that single companion before adding complexity. Your porch planters will gain dimension, sophistication, and professional polish that simple tulip-only arrangements can’t achieve, creating displays that make visitors pause and actually look rather than just glancing as they pass.
This website contains affiliate links, and some products are gifted by the brand to test. As an Amazon Associate, I earn from qualified purchases. Some of the content on this website was researched and created with the assistance of AI technology.