This website contains affiliate links, and some products are gifted by the brand to test. As an Amazon Associate, I earn from qualified purchases. Some of the content on this website was researched and created with the assistance of AI technology.
Key Takeaways
- Snack stations demand zero-obstruction design since guests graze continuously rather than serving once
- Green roses positioned at station edges create ambiance without blocking food visibility or access points
- Vertical rose displays maximize visual impact while preserving horizontal surface area for platters and bowls
- Outdoor snack stations require weather-resistant installations that won’t topple in wind or shift during service
- White roses paired with green varieties add dimensional contrast that elevates simple snack presentations
Styling Saint Patrick’s Day “snack station” decor with green roses requires a completely different mindset than formal buffet arrangements. Snack stations operate as ongoing destinations where people return multiple times throughout your celebration, which means your décor needs to withstand repeated approaches from all angles. I discovered this distinction the hard way when my beautifully arranged rose centerpiece looked perfect for the first thirty minutes, then got progressively disheveled as guests circled back for seconds and thirds.
The casual nature of snacking creates unique design challenges. People aren’t following a linear buffet line, they’re hovering, chatting, reaching across surfaces at unexpected angles. Your green rose installations need to tolerate this chaos while maintaining beauty. I’ve learned to build snack station florals with the assumption that someone will eventually lean directly over them to grab that last pretzel, and the arrangement needs to survive that encounter gracefully. The strategies I’m sharing here come from years of trial, error, and observation about how people actually interact with casual food displays.
Use this quick table to keep your Saint Patrick’s Day snack station looking styled while staying food-first. Pick the surface, choose a green-rose “shape rule,” match it with the right napkin + label setup, and avoid the biggest hosting mistakes. It’s built for phones—tap open rows, copy checklists fast.
Saint Patrick’s Day Snack Station Color + Placement Cheat Sheet
Pick a surface, then follow the “food-first” rule: keep green roses low, compact, and off the grab lane.
| Surface + Zone | Green Roses Shape Rule | Napkins + Labels (Clean Setup) | Big Mistake to Avoid |
|---|---|---|---|
|
IndoorKitchen Counter
Best for: dips, chips, grab bowls
|
Rule: low crock + tight hunter greens
Placement: back corner, never front edge
|
Napkins: stacked, folded rectangles
Labels: flat cards beside bowls (not behind)
Copied
|
Don’t: put flowers in the grab lane or block labels |
|
IndoorBuffet
Best for: serving lines
|
Rule: one low bowl pushed back
Bonus: two tiny end minis only
|
Napkins: one stack at start of line
Labels: in front of platters, low + readable
Copied
|
Don’t: crowd serving tools or the plate stack |
|
OutdoorPatio Serving Table
Best for: chips + covered dips
|
**Rule:** heavy bowl, wide + low **Greens:** hunter base, emerald pop |
Napkins: weight them with a small tray
Labels: minimal—2–3 max
Copied
|
Don’t: use tall arrangements or loose greenery near food |
|
OutdoorFire Pit Snack Table
Best for: small bowls + napkins
|
Rule: low + dense, set far side of table
Color: hunter depth + tiny gold accent
|
Napkins: stacked near plates
Labels: skip if it’s obvious
Copied
|
Don’t: place flowers where hands reach in the dark |
Kitchen Counter Snack Station (Indoor) Hunter depthLow + tight
Green Roses Shape Rule
Low crock + tight hunter greens. Place roses in the back corner, never the front edge.
Napkins + Labels
Stack napkins flat. Put labels beside bowls so they stay readable.
Big Mistake
Blocking the grab lane or hiding labels behind flowers.
Food-First Buffet (Indoor) Clear lanesMini end caps
Green Roses Shape Rule
One low bowl pushed back + two tiny minis at ends only.
Napkins + Labels
Napkins at start of line. Labels low in front of platters.
Big Mistake
Crowding tongs, plates, or the serving edge.
Patio Serving Table (Outdoor) Heavy bowlWide + low
Green Roses Shape Rule
Heavy bowl, wide + low. Tight greenery so nothing falls into food.
Napkins + Labels
Weight napkins with a tray. Keep labels minimal (2–3 max).
Big Mistake
Tall arrangements or loose greens near snacks.
Fire Pit Snack Table (Outdoor) Set backLow + dense
Green Roses Shape Rule
Low + dense. Place on the far side of the table, not the reach edge.
Napkins + Labels
Napkins near plates. Skip labels if the snacks are obvious.
Big Mistake
Flowers in the hand zone when it’s darker outside.
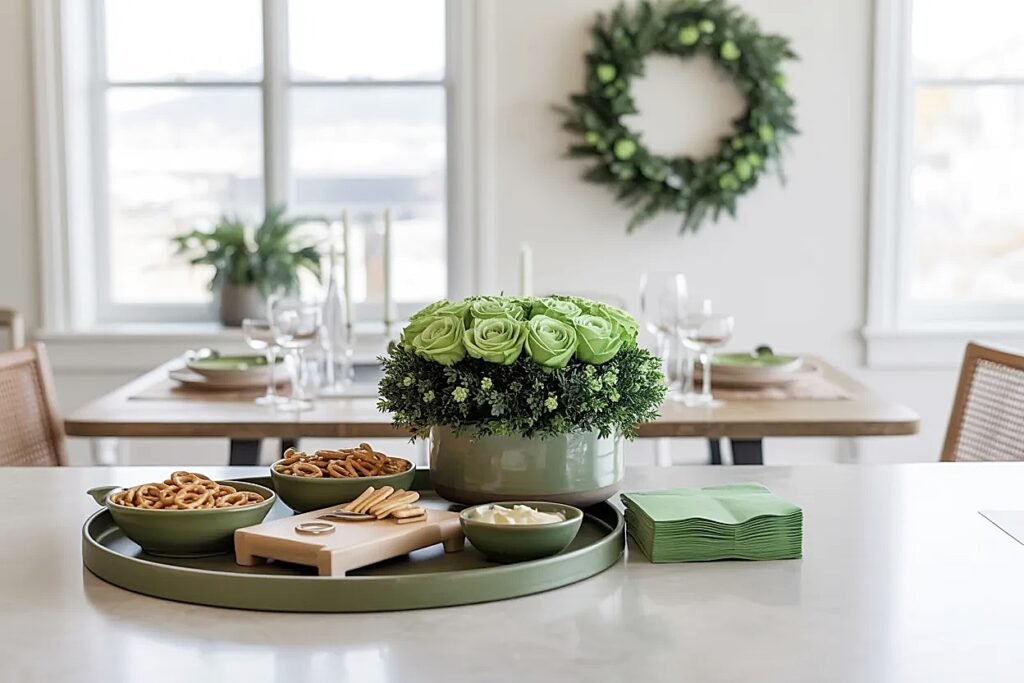
How to Create Saint Patrick’s Day “Snack Station” Decor with Green Roses on a Kitchen Counter
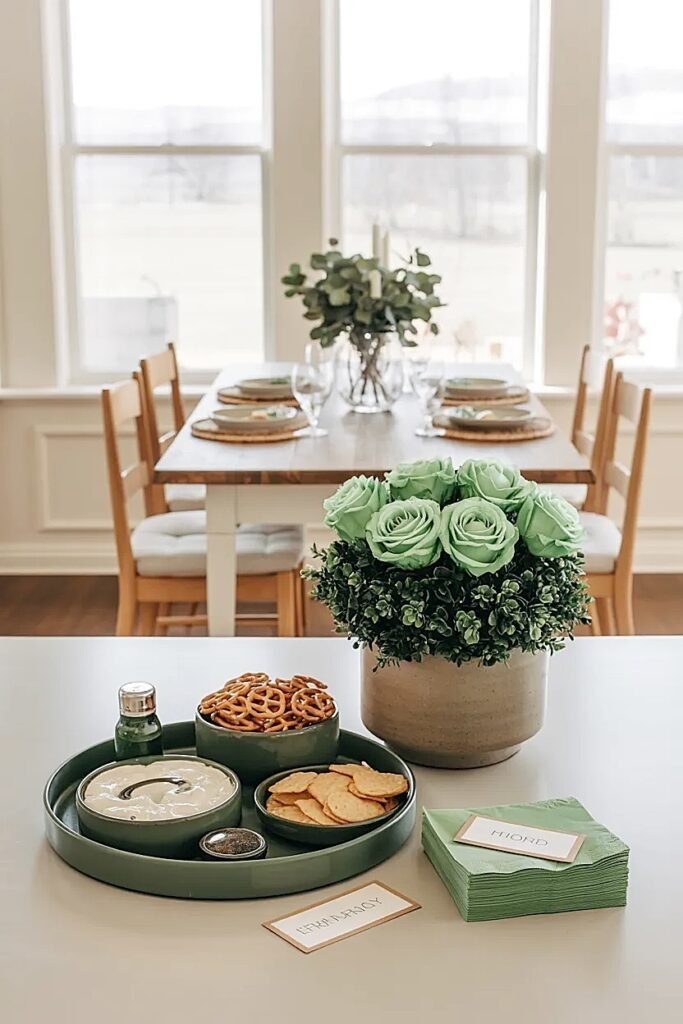
Kitchen counter snack stations become command centers during parties, everyone gravitates there regardless of where you originally intended guests to congregate. The counter’s linear configuration and wall backing actually simplify your decorating decisions, though the limited depth means you’re working within strict spatial parameters.
I treat kitchen counters as theater sets where the wall serves as your stage backdrop and the counter itself is merely the apron. All significant décor should happen vertically against that wall rather than claiming precious horizontal real estate. People need room to set down plates, lean against the counter while talking, and access snacks without contorting themselves.
My go-to strategy involves magnetic strips or adhesive hooks mounted on the backsplash, holding individual green rose stems in water tubes. This creates a floating garden effect where roses appear suspended above the food without touching the counter surface at all. I space stems every six to eight inches for substantial coverage without density. The roses frame whatever snacks you’re serving, chips, vegetables, cheese cubes, without interfering with bowls or platters.
Alternatively, I’ll run a slim shelf about ten inches above the counter, positioning small bud vases along its length. Each vase holds one to three green roses, creating a rhythmic pattern that extends the full counter span. The shelf depth stays under four inches so it doesn’t protrude awkwardly into the room. This elevated approach keeps everything within view but completely out of the functional zone where hands reach and plates land.
The wall-mounted methods I prefer eliminate surface clutter entirely, letting you maximize snack variety without spatial compromise. If you’re exploring different approaches to green rose arrangements for Saint Patrick’s Day food presentations, you’ll find some brilliant charcuterie-specific techniques worth trying, share this with anyone who’s planning their own celebration!
These counter-specific techniques establish a foundation for approaching other snack station configurations, and there’s essential guidance coming about universal principles that apply across all setups.
What Are the Best Saint Patrick’s Day Green Roses Rules for a Food-First Buffet
Understanding the fundamental rules prevents common mistakes that compromise both aesthetics and functionality. I’ve developed these principles through countless parties where I watched what worked and what created problems. These aren’t arbitrary guidelines, they’re battle-tested solutions to predictable challenges.
Food-first design philosophy means every decorative decision gets filtered through a simple question: does this help or hinder people accessing snacks? If the answer is “hinder” or even “neutral,” I reconsider the placement. Snack stations exist to feed people easily, not to showcase your decorating prowess at the expense of convenience.
1. The Twelve-Inch Clearance Rule
Maintain at least twelve inches of completely clear counter space directly in front of every snack bowl or platter. This gives guests adequate room to maneuver serving utensils, hold their plates, and reach comfortably without fear of knocking anything over. I measure this religiously because even ten inches feels cramped when someone’s juggling a napkin and plate while trying to scoop dip. Green roses should occupy the spaces behind, beside, or above this clearance zone, never within it. The rule applies whether you’re working with a compact apartment counter or sprawling island setup. I’ve found that violating this boundary creates bottlenecks where guests hesitate or skip items entirely rather than navigate awkward reaches. Think of this clearance as sacred territory that belongs exclusively to functional food access. The psychological comfort this space provides matters enormously, people relax and engage more naturally when they’re not worried about disturbing décor.
2. The “No Blind Spots” Visibility Standard
Position roses so they never block sightlines between a guest and any snack item. Stand at various approach angles around your station and verify you can clearly see every bowl’s contents without craning your neck or shifting position. This seems obvious until you realize how many arrangements create partial obstructions that force guests to guess what’s in containers. I test visibility from a standing position at normal eye level, roughly five and a half feet, since that’s how most people will view your station. Green roses work beautifully as backdrop elements that frame snacks rather than hiding them. The visibility standard also means considering how roses cast shadows under various lighting conditions. I check my setup both in natural daylight and evening artificial light to catch any unexpected blind spots. Transparent or skeletal vase options help minimize visual blockage even when positioned closer to food items.
3. The “Touch-Proof” Stability Requirement
Every rose arrangement must withstand accidental contact without tipping, shifting, or shedding petals onto food. I test this by deliberately bumping the counter and gently nudging each vase to ensure stability. Snack stations get jostled constantly as people lean, reach, and crowd around popular items. Your green rose displays need to tolerate this physical interaction without becoming casualties or, worse, contaminating food with water or petals. I use museum putty under vase bases, choose wide-bottom vessels that resist tipping, and avoid top-heavy arrangements that want to topple. For outdoor stations, this rule intensifies, wind becomes another force testing your installation’s resilience. The stability requirement also means reconsidering delicate stems that might break under minor pressure. I favor roses with sturdy stems and established blooms rather than fragile buds that could scatter if disturbed.
These foundational rules inform every subsequent decision about snack station styling, and the next sections demonstrate how these principles adapt to specific environments and configurations.
How to Create Saint Patrick’s Day “Snack Station” Decor with Green Roses on an Outdoor Bar Top
Outdoor bar tops present thrilling opportunities because the casual atmosphere invites creative approaches that might seem too informal for indoor settings. The bar height, typically forty-two inches, changes guest interaction patterns since people often stand rather than sit, creating different sightline considerations than standard counter heights.
Bar tops work brilliantly for snack stations because they naturally encourage circulation. Guests approach from all sides rather than queueing in lines, which means your green rose placements need to look attractive from 360 degrees. I love this challenge because it pushes me toward sculptural arrangements rather than flat, front-facing designs.
Weather introduces complications that don’t exist indoors. I’ve watched wind transform delicate arrangements into disasters within minutes. Every outdoor rose installation now gets subjected to my “shake test”, I literally grab the bar and rock it while observing whether anything shifts. If it moves even slightly, I reinforce it before guests arrive.
My preferred outdoor bar approach centers on weighted, low-profile arrangements that spread horizontally rather than growing tall. I use shallow ceramic bowls filled with floral foam, creating dense green rose clusters no higher than eight inches. The roses mass together tightly, almost succulent-like in their compactness. This configuration resists wind while providing substantial visual impact from all viewing angles.
I incorporate natural elements that complement the outdoor setting, river rocks around the bowl base for additional weight, moss tucked between stems, small pieces of driftwood creating textural contrast. These organic additions feel authentic to the outdoor environment rather than trying to replicate indoor formality in an outdoor space. The green roses blend into this natural palette beautifully.
For bars with overhead structures like pergolas or umbrellas, I’ll hang water tubes containing individual rose stems from the framework above the bar surface. This aerial approach creates drama without claiming any bar top real estate. I secure tubes with fishing line rated for outdoor use, ensuring nothing crashes down mid-party. The suspended roses cast interesting shadows on the bar surface as the sun moves, creating dynamic visual interest that changes throughout your event.
The outdoor bar configuration proves that limitations, weather, wind, all-angle viewing, can actually inspire more creative solutions, and you’ll see this principle continue in the patio table scenarios ahead.
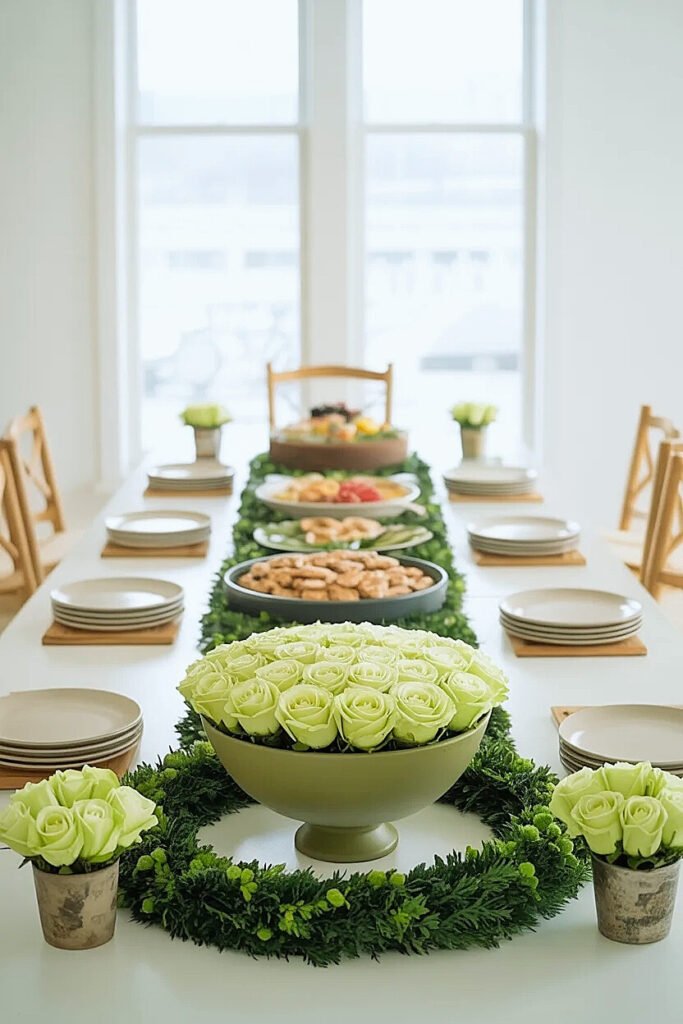
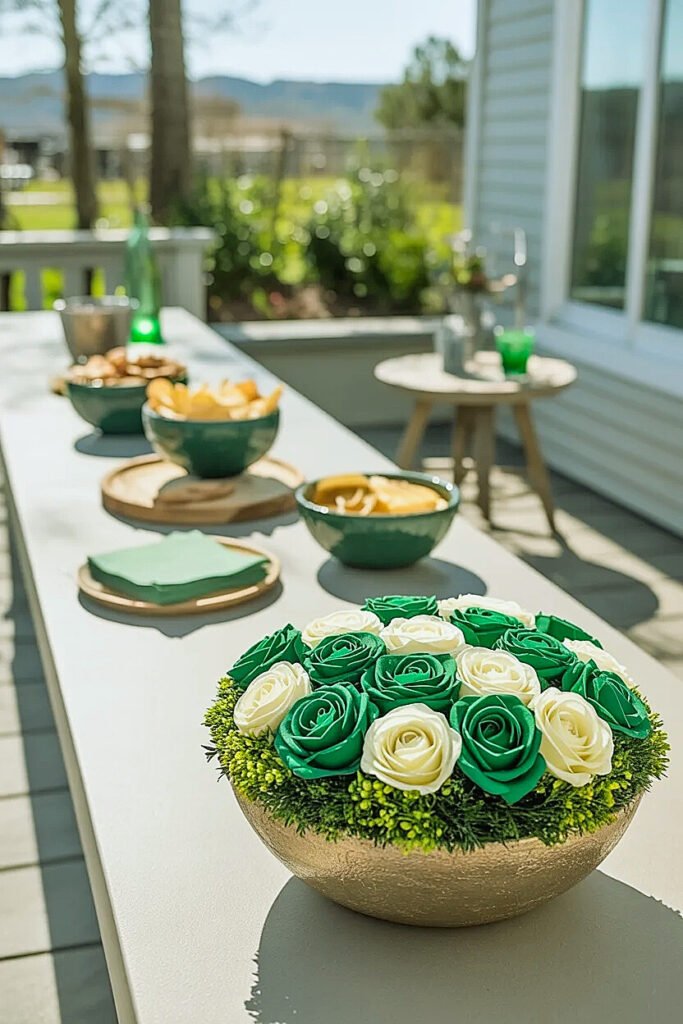
Ideas for Saint Patrick’s Day Snack Station Decor with Green Roses on a Patio Serving Table
Patio tables for snack service combine outdoor durability needs with the space generosity that full tables provide. Unlike narrow bar tops or kitchen counters, you’re working with genuine surface area, maybe forty-eight inches square or larger, which opens possibilities unavailable in confined spaces.
The rectangular or square configurations create natural zones for different design approaches. I divide patio tables mentally into quadrants, designating specific areas for snacks and others for décor. This structured thinking prevents the scattered, unplanned appearance that happens when you just start placing things randomly.
1. Corner Cluster Rose Anchors
Position substantial green rose arrangements in two opposite corners of your patio table, leaving the center and other corners completely open for snack bowls. Each cluster contains eight to twelve roses in a weighted ceramic vessel that won’t budge. I build these clusters slightly asymmetrically, not perfectly round, so they feel organic rather than formulaic. The two-corner approach creates diagonal visual balance while maximizing available snack surface. This works especially well for square tables where the geometry supports symmetrical placement naturally.
2. Central Rose Wreath with Interior Food Display
Create a wreath of green roses arranged in a circle approximately twenty inches in diameter, positioning it flat on the table surface. Place all snack bowls inside the wreath’s center opening, treating the roses as a framing device. I construct this wreath using chicken wire as the foundation, securing rose stems through the wire mesh. The wreath stays completely flat, no height to obstruct sightlines, while creating a defined boundary that makes the snack presentation feel intentional and curated rather than haphazard.
3. Runner-Style Rose Garland with Side Access
Build a narrow garland of green roses running the table’s full length down the center, keeping it under six inches wide. Position snack bowls on both sides of this floral runner, allowing guests to access food from either long edge of the table. I use floral foam in cage sections to create this continuous garland, ensuring consistent hydration for all stems. The runner effect adds elegance while the narrow width prevents any access obstruction. This works phenomenally for rectangular patio tables where you want to emphasize the length.
4. Elevated Cake Stand Rose Tower
Use a three-tier cake stand as your rose display, positioning it at one end of the patio table while snacks occupy the remaining surface. Each tier holds small bud vases with individual green roses, perhaps three vases per tier arranged in triangular formation. The vertical display creates height drama without horizontal sprawl, and the tiered structure adds architectural interest. I choose cake stands with substantial bases that resist tipping in wind. The tower becomes a focal point that draws people to the snack station while staying completely out of the functional serving zone.
5. Perimeter Box Planter Border
Arrange narrow wooden box planters around the table’s entire perimeter, creating a living border of green roses. The planters themselves stay on the ground rather than on the table surface, but roses grow tall enough to frame the table edge at roughly six to eight inches. I fill planters with soil and actual rooted rose plants when possible for longevity, or cut stems in floral foam for single-event setups. This ground-level approach means your table surface remains 100% available for snacks while the roses create a verdant boundary that defines the station’s footprint within the larger patio space.
These patio table concepts demonstrate how generous surface area invites creative spatial thinking, and the portable cart configurations coming next present entirely different opportunities and constraints.
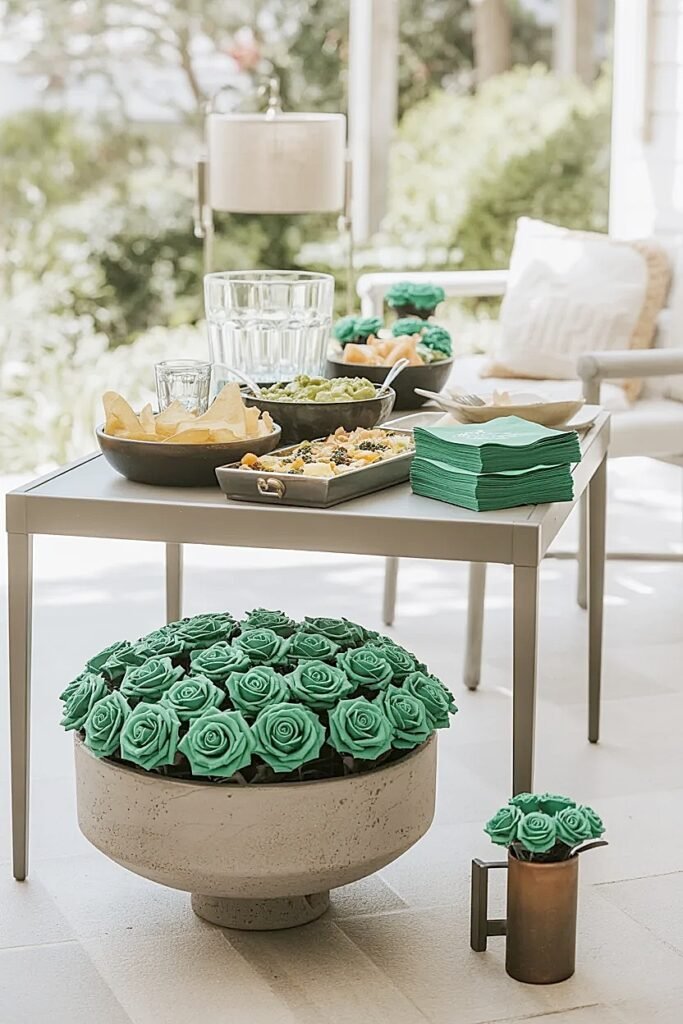
Ways to Decorate a Saint Patrick’s Day Snack Station Cart with Green Roses
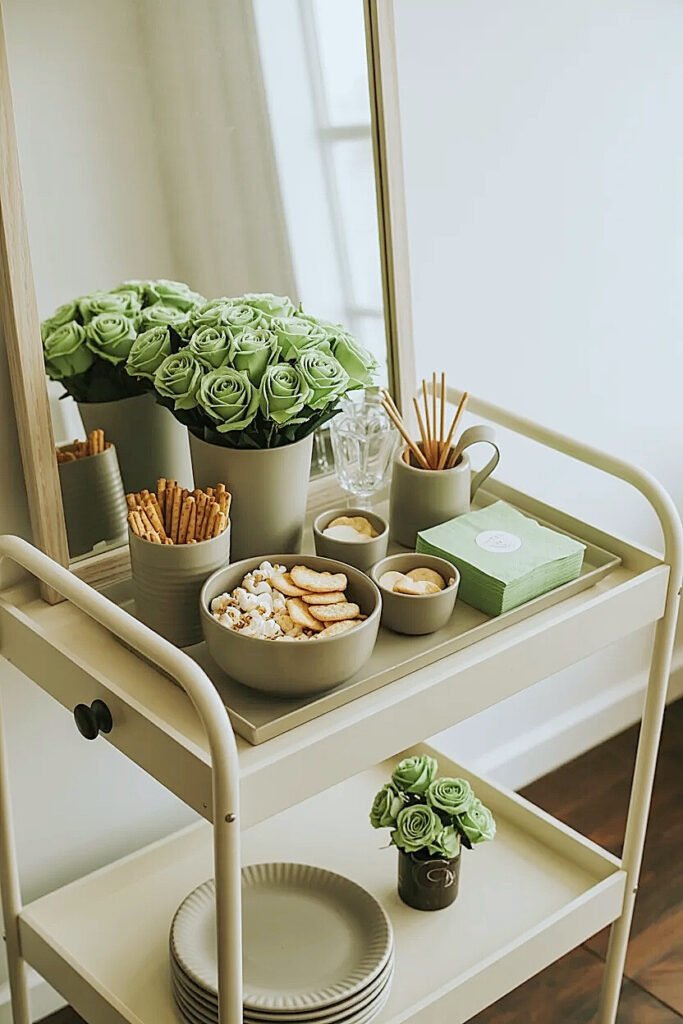
Rolling carts revolutionized my party planning because they offer mobility that fixed tables can’t match. I can stage the cart in the kitchen during prep, then roll it to wherever guests naturally congregate. The multi-tiered design of most bar carts creates distinct zones that beg for strategic rose placement.
Carts introduce stability concerns that don’t exist with stationary surfaces. I learned this when my gorgeously decorated cart tipped slightly while rolling over a door threshold, sending a vase sliding toward disaster. Now I secure everything before the cart moves anywhere.
1. Top Tier Asymmetric Rose Statement
Dedicate one corner of the cart’s top tier to a single spectacular green rose arrangement while the remaining surface holds snacks. I build this arrangement in a low, wide vessel, maybe ten inches across but only six inches tall, so it commands attention without towering precariously. The asymmetric placement creates visual interest through imbalance rather than predictable centering. I pack roses densely for that abundant, overflowing look that photographs beautifully. This approach works because the top tier typically offers the most visibility, making it ideal for your showpiece floral moment. The remaining three-quarters of the tier stays completely clear for chip bowls, dip containers, or whatever snacks you’re featuring. I secure the vase with museum putty so it won’t slide during transport.
2. Middle Tier Hanging Rose Garland
Drape a lightweight garland of green roses from the middle tier’s edge, letting it cascade slightly toward the lower tier without actually touching it. I construct this garland using floral wire as the spine, adding roses and some trailing ivy for movement. The garland hangs via small cup hooks screwed into the cart’s frame, not the shelf surface itself. This creates vertical drama between tiers without claiming horizontal space on either level. The cascading effect adds softness to the cart’s rigid metal or wood structure. I keep the garland narrow, maybe four inches deep, so it doesn’t interfere with accessing items on the middle tier. This works brilliantly when your middle tier holds napkins, small plates, or utensils that need to remain visible and accessible.
3. Bottom Tier Rose-Filled Bucket Display
Position a galvanized metal bucket on the bottom tier, filling it with a generous arrangement of green roses mixed with eucalyptus branches. The bucket style feels casual and appropriate for a bottom tier that’s less visually prominent but still contributes to the overall aesthetic. I choose buckets with handles for that farmhouse or Irish cottage vibe. The bottom tier’s lower visibility means you can create something lush and abundant without worrying it’ll block sightlines to upper levels. I often make this bottom arrangement taller, maybe twelve to fifteen inches, since it’s viewed from above and benefits from height. The bucket also provides excellent stability due to its weight and wide base, making it perfect for a mobile cart.
4. Vertical Corner Post Rose Accents
If your cart has corner posts or a frame structure, attach small water tubes containing individual green rose stems at intervals along these vertical elements. I use floral wire to secure tubes at roughly eight-inch intervals up each post, creating a living architecture effect. The roses climb the cart’s structure without occupying any shelf space whatsoever. This technique works especially well for carts with exposed metal frames where the roses soften industrial edges. Each stem becomes an individual accent rather than part of a mass arrangement. I stagger the attachment points between different corner posts so they don’t create a rigid, uniform pattern that looks too controlled.
5. Behind-Cart Wall Shelf Rose Backdrop
Install a temporary floating shelf on the wall directly behind where you’ll position the cart, arranging bud vases with green roses along the shelf’s length. The shelf stays stationary while the cart can move, but when positioned together they create a unified snack station with floral backdrop. I place the shelf at roughly fifty inches from the floor, just above the cart’s top tier, so roses appear to hover behind the entire setup. This expands your decorating real estate beyond the cart itself, making a small rolling cart feel like a substantial snack station. The wall shelf stays put for your party’s duration while the cart offers flexibility to relocate as needed.
Cart-specific strategies leverage mobility and vertical structure in ways fixed surfaces can’t replicate, and the poolside scenario ahead introduces moisture and recreational considerations that demand adapted approaches.
How to Style a Poolside Saint Patrick’s Day Snack Station with Green Roses
Poolside snack stations confront you with moisture, splashing, and swimsuit-clad guests who might be dripping wet. I approach these setups with waterproof everything and the expectation that nothing will stay pristine. The goal becomes creating something that looks beautiful despite inevitable water exposure.
Chlorine presents challenges you don’t face with regular outdoor setups. I’ve watched pool water splash onto rose petals and cause discoloration within hours. Positioning becomes critical, you want proximity to the pool for convenience but enough distance to minimize chemical exposure. I typically set up at least four feet from the pool edge.
My poolside approach emphasizes synthetic elements that tolerate moisture better than natural alternatives. I’ll use waterproof containers, resin, sealed ceramic, or plastic disguised as planters, rather than terracotta or unfinished wood that absorbs water. The green roses themselves stay fresh in water tubes, but I protect the mechanics with waterproof floral tape and sealed containers.
I create elevated displays using weather-resistant risers or upturned buckets draped with waterproof fabric, positioning rose arrangements on these platforms above the splash zone. This lifts the florals into better visibility while protecting them from ground-level moisture. The roses appear to float above the snack station surface.
For horizontal protection, I use plexiglass or acrylic sheets as barriers between pool-facing edges and my rose installations. The transparent material doesn’t block sightlines but prevents direct splashing from reaching the flowers. I’ve found this simple addition extends arrangement longevity dramatically during pool parties.
Battery-operated LED lights woven through rose stems create magic for evening pool parties, reflecting off the water surface in ways that feel genuinely special. I choose waterproof LED strands rated for outdoor use, treating them as integral to the design rather than afterthought illumination. The combination of glowing green roses reflected in pool water creates an almost ethereal effect that elevates your entire celebration.
Poolside configurations demand pragmatism balanced with beauty, and the sideboard scenarios coming next return to more controlled environments where you can pursue refined dual-color presentations.
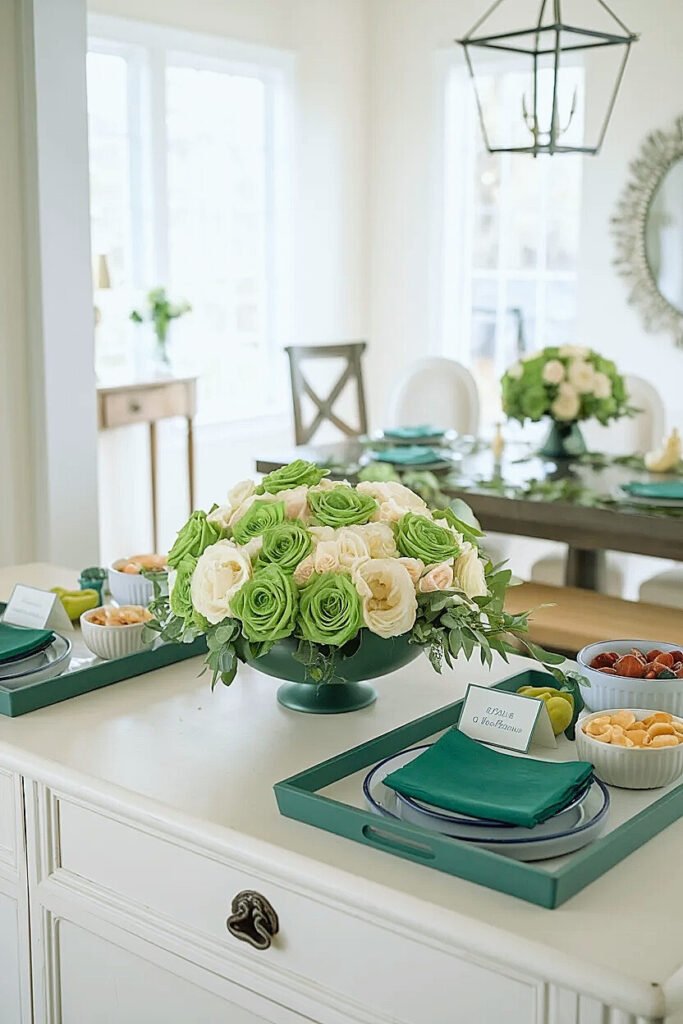
Ideas for a Saint Patrick’s Day Snack Station Sideboard with Green Roses and White Roses
Sideboards occupy that sweet spot between casual kitchen counters and formal dining tables. They offer generous surface area, typically sixty inches or longer, with enough depth to accommodate both snacks and décor without spatial anxiety. The furniture’s substantial presence in a room invites more sophisticated styling approaches.
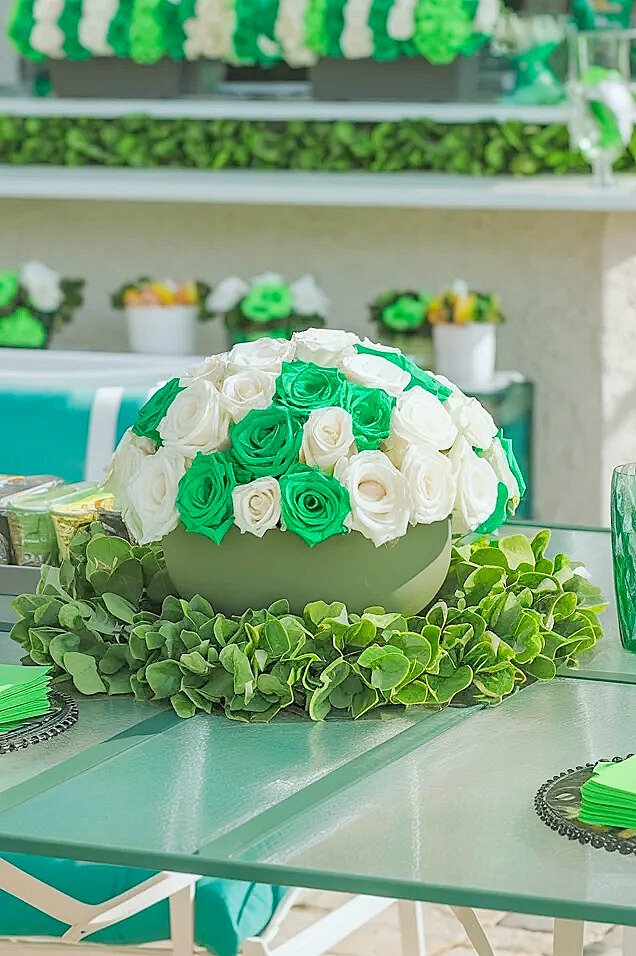
Adding white roses to green varieties creates tonal complexity that transforms simple arrangements into dimensional displays. I think of white as punctuation within green passages, it creates visual rest points that prevent monotony while reinforcing the Saint Patrick’s Day palette through contrast rather than additional green.
1. Alternating Height Bud Vase Procession
Line the sideboard’s back edge with seven to nine bud vases alternating between green and white roses, varying heights from four to ten inches in a wave pattern. The rhythm creates movement through vertical variation while the color alternation prevents predictability. I position each vase about six inches apart for substantial coverage without crowding. The procession runs the sideboard’s full length, creating a continuous floral element that ties together whatever snacks you arrange in front. This approach works beautifully because each rose, green or white, gets individual showcasing rather than competing within a mixed arrangement. The bud vases themselves become part of the design if you choose interesting ceramics or vintage glass options that contribute character beyond merely holding flowers.
2. Corner Cascade Green-to-White Gradient
Build substantial arrangements in opposite corners of your sideboard using gradient color transitions. Start with pure green roses at the outer edges, gradually introducing white roses toward the center of each arrangement. The gradient creates visual journey from saturated color to pale tones, adding sophistication through subtle color theory. I pack these corner arrangements densely, fifteen to twenty roses per side, for that abundant, overflowing aesthetic. The gradients don’t need to be perfectly smooth; in fact, I prefer slightly irregular transitions that feel organic rather than calculated. This technique creates symmetry through position while introducing variety through color flow. The corners anchor your sideboard’s endpoints while leaving maximum center space for snack platters and serving bowls.
3. Central Mixed Arrangement with Satellite Monocolor Accents
Position a large mixed arrangement of green and white roses at the sideboard’s center, then flank it with smaller satellite arrangements of single colors, green on one side, white on the other. The central piece becomes your focal point at roughly twelve to fifteen inches tall, while satellites stay lower at six to eight inches. This composition creates hierarchy through size variation and color relationships. I build the central arrangement with roughly equal proportions of green and white roses thoroughly mixed together, achieving an integrated rather than separated appearance. The satellite pieces echo colors from the main arrangement while providing pure color moments. This configuration works phenomenally when you want one stunning centerpiece but need to balance it with additional floral elements.
4. White Rose Runner with Green Rose Bookends
Create a continuous line of white roses running two-thirds of the sideboard’s length down the center, capping each end with compact green rose clusters. The white runner provides clean, elegant continuity while green bookends create strong visual stops that frame the entire composition. I keep this runner narrow, four to five inches wide, so it doesn’t obstruct access to snacks positioned on either side. The white roses can be in individual bud vases placed close together or a single long vessel creating one continuous arrangement. The green bookends inject color at strategic endpoints, preventing the white runner from feeling washed out or lacking in Saint Patrick’s Day identity. This approach reads as refined and sophisticated, perfect for adult gatherings where subtlety trumps obvious holiday theming.
5. Vertical Wall Arrangement with Horizontal Sideboard Echo
Mount a substantial mixed green and white rose arrangement on the wall directly above the sideboard’s center point, then echo smaller versions of that arrangement at each end of the sideboard surface. The wall installation draws eyes upward and claims vertical real estate, while surface arrangements ground the design and create cohesion between wall and furniture. I build the wall piece in a frame or mounted container, maybe fifteen inches square, mixing green and white roses in balanced proportions. The sideboard echoes use smaller containers, perhaps six inches diameter, but replicate the color mixing ratio from the wall piece. This creates visual conversation between vertical and horizontal planes, adding dimensionality to what could otherwise be a flat presentation. The echoing technique unifies your design through repetition while the scale variation prevents monotony.
These sideboard concepts prove that generous surface area invites layered design thinking where multiple elements create cohesive compositions rather than competing installations.
Conclusion
Snack stations succeed when guests feel completely comfortable approaching them repeatedly throughout your celebration. The green rose installations I’ve outlined here prioritize accessibility while delivering substantial visual impact. Every technique respects the fundamental principle that people need clear paths to food and unobstructed views of what’s available.
The settings vary, kitchen counters, patio tables, poolside setups, formal sideboards, but the underlying philosophy remains constant: décor enhances food presentation rather than competing with it. Your green roses tell guests this space matters, that you’ve invested thought into their experience, that the snacks deserve beautiful framing. But that message only lands if the actual snacking experience flows smoothly. Start with function, then layer in your floral elements strategically. The result will be stations that look gorgeous and work flawlessly, exactly the combination that makes celebrations memorable.
This website contains affiliate links, and some products are gifted by the brand to test. As an Amazon Associate, I earn from qualified purchases. Some of the content on this website was researched and created with the assistance of AI technology.