This website contains affiliate links, and some products are gifted by the brand to test. As an Amazon Associate, I earn from qualified purchases. Some of the content on this website was researched and created with the assistance of AI technology.
Key Takeaways
- Grocery store bundles at $8-12 each create impressive wide centerpieces rivaling expensive florist arrangements
- The “Cluster of 3” method uses three small vessels instead of one large arrangement, tripling visual impact
- Wide shallow bowls create horizontal spread maximizing perceived fullness from fewer stems
- Budget flowers like carnations, alstroemeria, and mums deliver exceptional value per stem
- Angled stem positioning extends arrangements beyond container rims, increasing apparent diameter
- Color blocking with single varieties creates modern fullness perception without excessive stem counts
- Inexpensive grocery store greens double arrangement volume for under $5 additional cost
- Low troughs on coffee tables preserve drink space while creating substantial horizontal presence
Making spring flower centerpieces look wide and full on a budget requires abandoning the expensive florist mindset where beauty supposedly correlates with spending. I wasted probably $300 across my first year of arranging flowers before realizing that the $60 “designer” bunches from specialty shops looked barely better than $10 grocery store options when arranged with actual technique. The expensive flowers came pre-arranged in my mind as “special,” so I handled them preciously, while the cheap ones forced me to learn proper mechanics creating fullness through placement rather than relying on sheer quantity.
The budget constraint turned out to be a gift. When you can’t just buy 50 stems to create fullness through brute force, you develop actual skills, strategic angling, clever vessel selection, greenery integration, and color blocking techniques that make 12 stems look like 25. These methods work regardless of flower cost, meaning once you’ve mastered budget arranging, upgrading to premium blooms occasionally creates absolutely spectacular results. But here’s the secret: most people can’t tell the difference between a $15 grocery store centerpiece and a $75 florist arrangement when both are properly designed. The techniques matter exponentially more than the flower pedigree.
Want wide, full Spring Flowers centerpieces without spending more? Use this guide to match your surface to a low container, pick budget-friendly blooms that fill wide, and follow quick “cluster” rules that make small bundles look lush. Tap rows on mobile, copy the checklist, and build a centerpiece that still leaves space for real life.
Budget Wide + Full Spring Flowers Cheat Sheet
Use clusters, low containers, and smart fillers to make Spring Flowers look wide and full for less.
| Surface + Container | Budget Bloom Picks | Wide + Full Method | Rules |
|---|---|---|---|
Dining tableLow bowl
|
Short tulipsDaffodilsFew ranunculus
|
|
|
Kitchen islandLow oval
|
AnemonesShort tulipsMini daffs
|
|
|
Coffee tableLow tray
|
RanunculusMuscariMini tulips
|
|
|
SideboardLow trough
|
TulipsDaffodilsAnemones
|
|
|
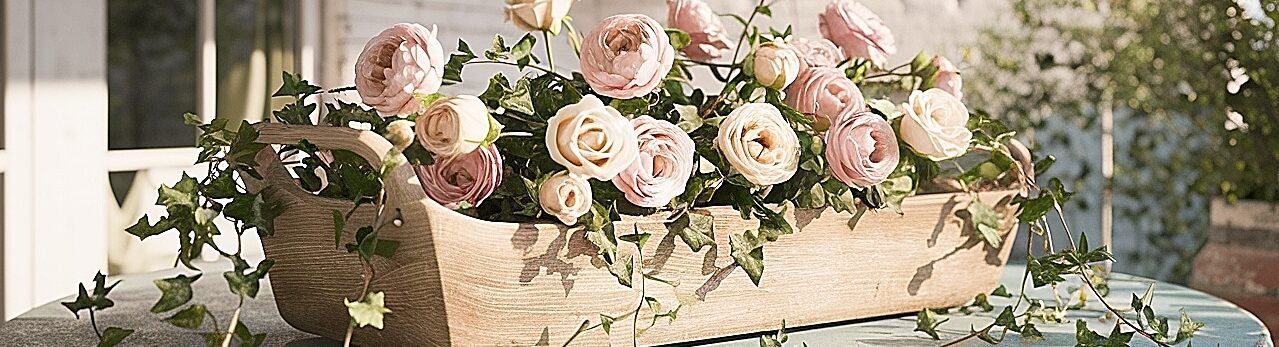
How to Make Spring Flowers Look Wide and Full in a Shallow Bowl Using Grocery Store Bundles
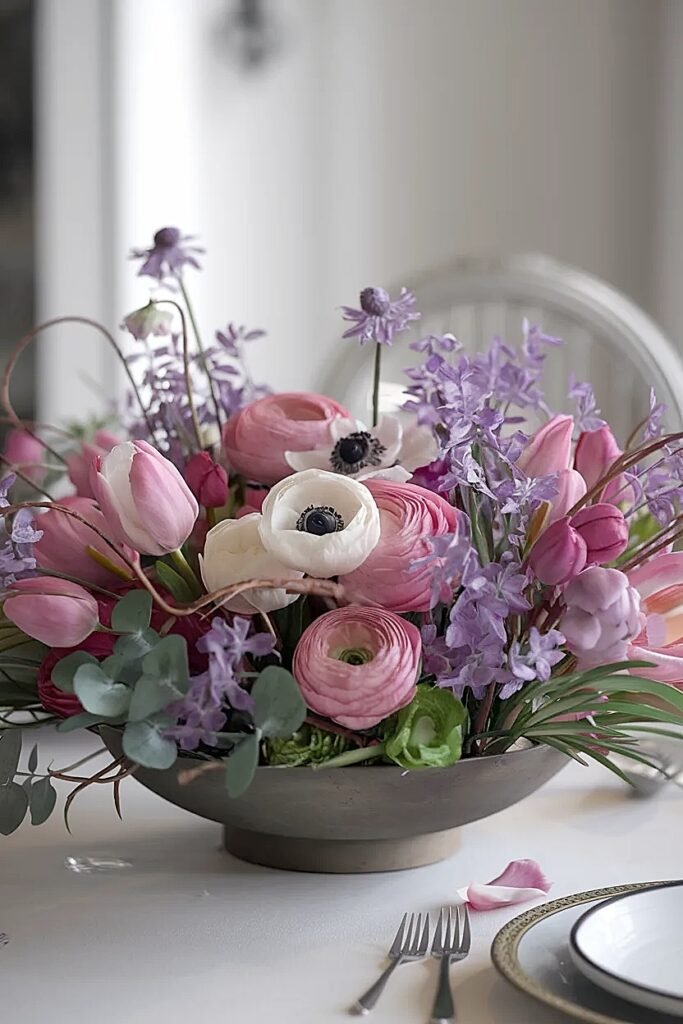
Grocery stores sell spring flower bundles for $8-12 typically, maybe 10-15 stems of tulips, daffodils, or mixed seasonal blooms. Most people stick these directly into tall vases and call it done, creating vertical arrangements that look exactly like what they cost. The transformation happens when you cut those same stems short and arrange them in wide shallow bowls instead.
I buy two bundles, around $20 total, giving me 20-30 stems to work with. That’s the magic number for creating genuinely impressive wide centerpieces that don’t scream “budget.” One bundle looks sparse in wide vessels; two creates the density needed for perceived abundance.
The vessel selection multiplies your investment’s visual impact. I use bowls between 10-14 inches diameter with 3-4 inch depths, you can find these at thrift stores for $3-8, or repurpose kitchen mixing bowls or serving dishes you already own. The wide diameter creates immediate presence before flowers arrive, while shallow depth forces horizontal spread rather than vertical growth.
I cut all stems to 6-8 inches total length, removing the psychological attachment to those long stems that feel wasteful to trim. Then I insert stems at outward angles from bowl center, maybe 30-45 degrees from vertical, using floral foam or a makeshift grid of tape across the bowl opening to hold angles. This angled insertion extends the arrangement’s visual diameter well beyond the bowl itself. Twenty stems angled outward can create 16-18 inch perceived width despite sitting in a 12-inch bowl, and when you’re ready to explore specific flower varieties that excel in short wide formats, there’s detailed guidance on choosing blooms that look intentional rather than awkwardly stunted when cut short, share this with anyone tackling budget flower projects!
The grocery bundle approach proves you don’t need specialty flowers, and the cluster method ahead shows how vessel multiplication creates even more impact.
Ways to Stretch Spring Flowers for Wide Centerpieces Using the “Cluster of 3” Method
The “Cluster of 3” method uses three small vessels positioned as one grouped unit instead of buying enough flowers to fill one large centerpiece. This creates the visual presence of a substantial arrangement while requiring far fewer total stems, maybe 12-15 across all three vessels versus 25+ for a single large piece.
I stumbled into this method when I could only afford one grocery store bundle but needed to fill my dining table. Splitting those 10 stems across three small containers looked way better than cramming them all into one vase.
1. Triangular Grouping at Table Center
Position three small vessels, maybe 4-6 inch diameter bowls or vases, in tight triangular formation at table center, each holding 4-5 stems. The cluster reads as one cohesive centerpiece from normal viewing distances despite being three separate elements. This creates perceived fullness through spatial distribution, the triangular footprint claims more table presence than one vessel could. Use identical containers for cohesive aesthetic. Total cost: one grocery bundle at $10-12 plus vessels.
2. Linear Row Along Table Length
Arrange three matching vessels in a straight line running the table’s length, spacing them 8-10 inches apart. Each holds 3-4 stems creating modest individual arrangements that collectively form a visual runner. The linear distribution creates continuous presence along the table while the spacing prevents that cluttered “too much” feeling. This works brilliantly on rectangular tables where the line emphasizes table geometry. The three-vessel approach costs the same as one bundle.
3. Varied Height Cluster Creating Dimension
Use three vessels of different heights, maybe 3-inch, 5-inch, and 7-inch tall, grouped tightly together, each holding 4-5 stems cut proportionally to vessel height. The height variation creates dimensional interest that flat uniform arrangements lack. Position the tallest vessel slightly back, medium height mid-position, shortest forward creating tiered effect. The varied silhouette reads as more complex and intentional than uniform heights despite using identical total stem counts.
The cluster multiplication creates impressive presence economically, and the coffee table tray technique ahead addresses functional surfaces with drink-space demands.
How to Build Spring Flowers Wide Centerpieces in Low Trays for Coffee Tables (Drink Space)
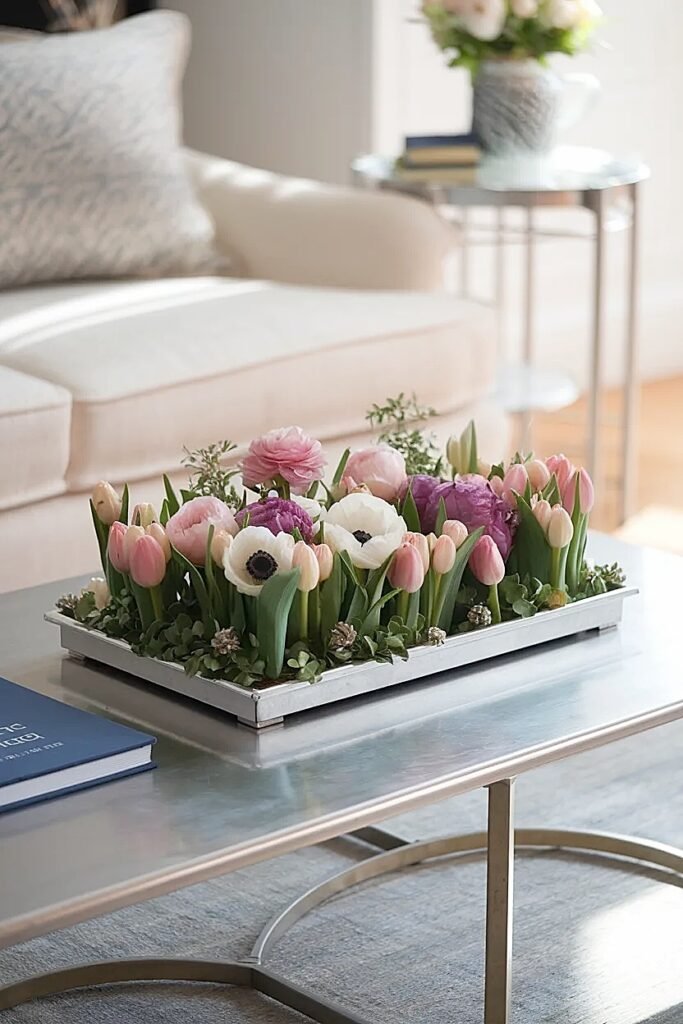
Coffee tables serve dual purposes, decorative display and functional surface for drinks, remotes, books, and phones. Flowers must enhance without interfering, which means ultra-low wide trays creating beauty that doesn’t claim the vertical or horizontal space people need.
I use rectangular trays measuring 16×10 inches with 2-3 inch depths, found at HomeGoods or Target for $12-20, or repurposed serving trays from kitchen cabinets. The shallow depth forces appropriate low profiles while the generous length creates substantial presence.
The key: positioning the tray at coffee table’s back third against any sofa or wall, leaving the entire front two-thirds clear for setting down drinks and other items. This back positioning creates floral backdrop visible from seating while preserving functional surface area. I fill the tray with 12-15 short-stemmed flowers, cut to 4-6 inches, creating carpet-like arrangements viewed from above by seated people.
I build these arrangements by starting with greenery around the tray perimeter, then packing flower stems tightly into the center using floral foam. The dense packing in the center creates focal fullness while the greenery extends visual boundaries inexpensively. One grocery store bundle plus a bunch of greenery (maybe $4-5) creates impressive results.
The super-low profile, typically 6-8 inches total height including tray, means these never obstruct conversation sightlines across coffee tables the way taller arrangements would. The wide format creates presence through horizontal spread appropriate for low surfaces viewed from seated positions.
The coffee table tray strategy maximizes limited budgets through smart positioning, and the budget flower list ahead identifies specific varieties delivering maximum value.
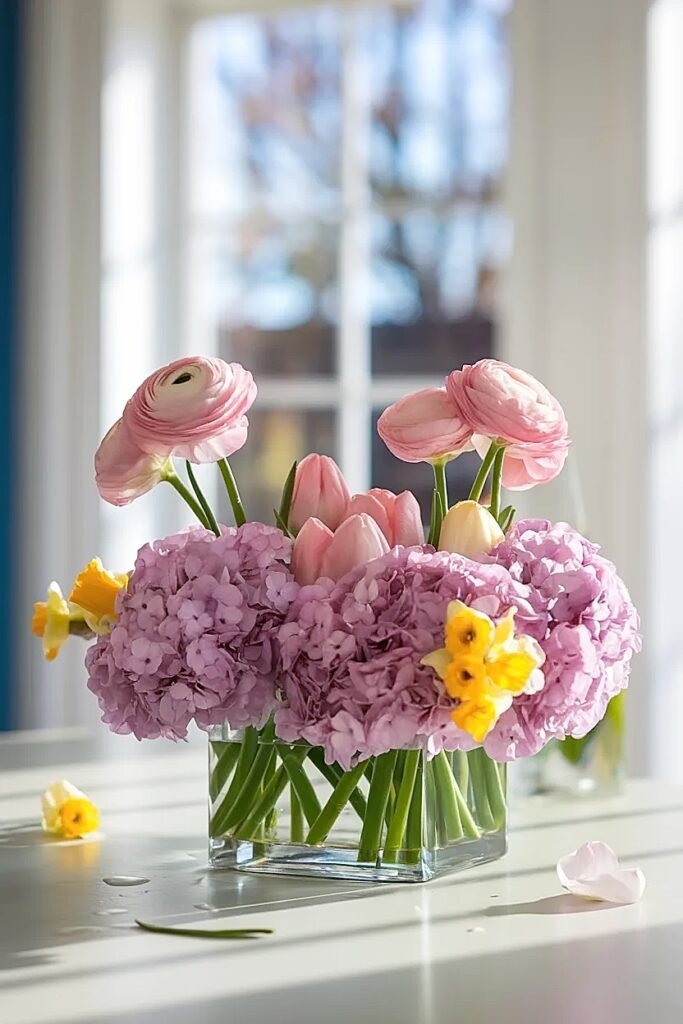
What are the Best Budget Spring Flowers for Short, Wide Centerpieces on Dining Tables?
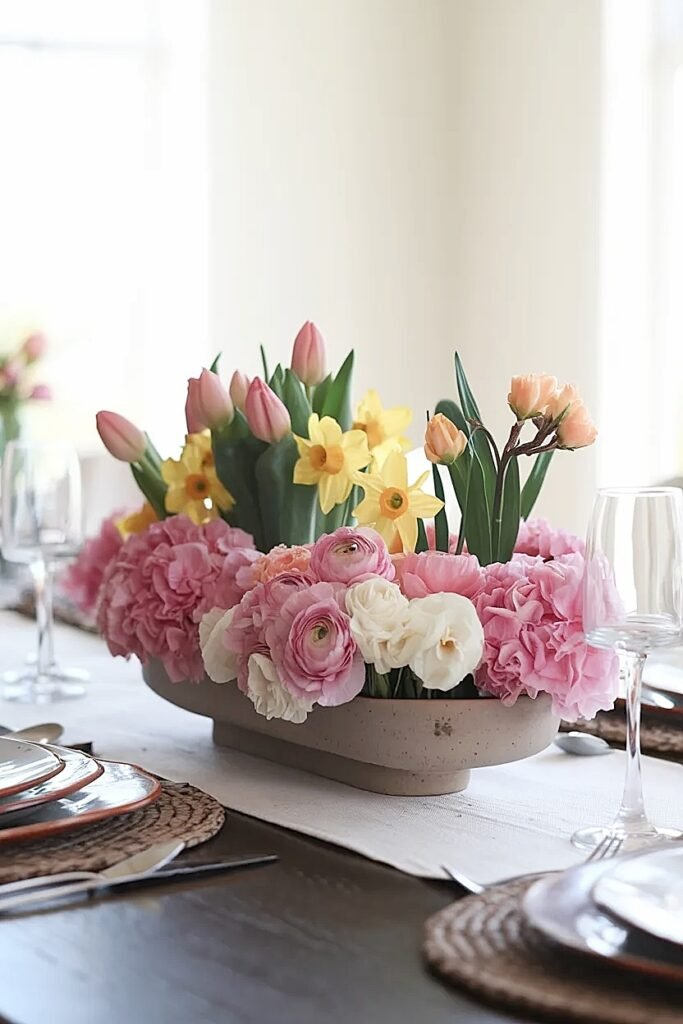
Not all budget flowers work equally well in short wide formats, some cheap options look cheap when cut short, while others create surprisingly sophisticated results. I’ve tested extensively to identify which affordable varieties actually deliver.
These five consistently outperform their price points, creating centerpieces guests assume cost way more than reality.
1. Carnations for Underestimated Value
Carnations get unfairly dismissed as cheap or dated, but modern varieties in sophisticated colors create stunning results when properly arranged. Grocery stores sell bunches for $5-8 with 12-15 stems. The full ruffled blooms create substantial presence even when cut to 6-7 inches. Choose single colors rather than mixed bunches, all white, all burgundy, or all coral reads as elegant rather than cheap. The sturdy stems hold positions well in arrangements.
2. Alstroemeria for Stem Count Abundance
Alstroemeria bunches pack serious value, typically 8-10 stems for $8-10, but each stem carries 4-6 individual blooms creating incredible flower count. Cut stems to 6-8 inches and the multi-bloom structure creates lush fullness quickly. The lily-like blooms add sophistication. Choose coordinated colors within bunches rather than wildly mixed options. The long vase life, often 10-14 days, extends your investment’s value substantially.
3. Mums for Year-Round Availability
Standard chrysanthemums offer exceptional value at $6-10 per bunch of 8-10 stems. The full pompom-style blooms create instant fullness when densely arranged. Cut to 5-7 inches, they maintain perfect proportions. Choose button mums for compact scale or spider mums for textural interest. Single-color bunches in white, burgundy, or coral create sophisticated results. The sturdy stems and long vase life make them practical beyond just affordable.
4. Statice for Budget Filler Volume
Statice bunches cost $5-8 and provide enormous volume, those branching stems with countless tiny papery flowers create substantial mass inexpensively. Use statice as arrangement base or filler, positioning 5-6 stems around bowl perimeters then adding focal flowers centrally. The purple, white, or pink options coordinate well. The dried-flower-like texture adds interesting contrast. One statice bunch can fill what would otherwise require $20 worth of premium flowers.
5. Grocery Store Tulips for Seasonal Beauty
Grocery store tulip bunches run $8-12 for 10 stems during spring months, dramatically cheaper than florist tulips at $3-5 per stem. The quality difference is minimal when arranged properly. Cut to 6-8 inches and position in wide bowls. The naturally flexible stems create organic flowing compositions. Buy two bunches in complementary colors creating 20-stem arrangements rivaling $50+ florist displays for under $25 total investment.
These budget flowers prove affordability doesn’t mean sacrificing beauty, and the kitchen island ideas ahead address functional surfaces requiring strategic placement.
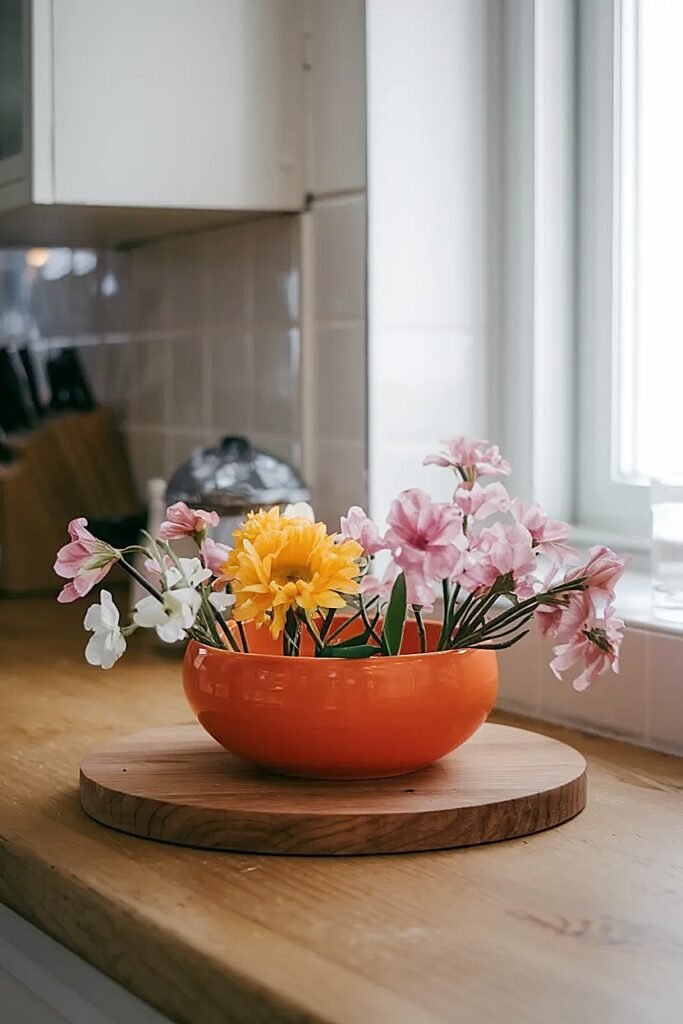
Ideas for Spring Flowers Wide Centerpieces on Kitchen Islands That Leave a Prep Lane
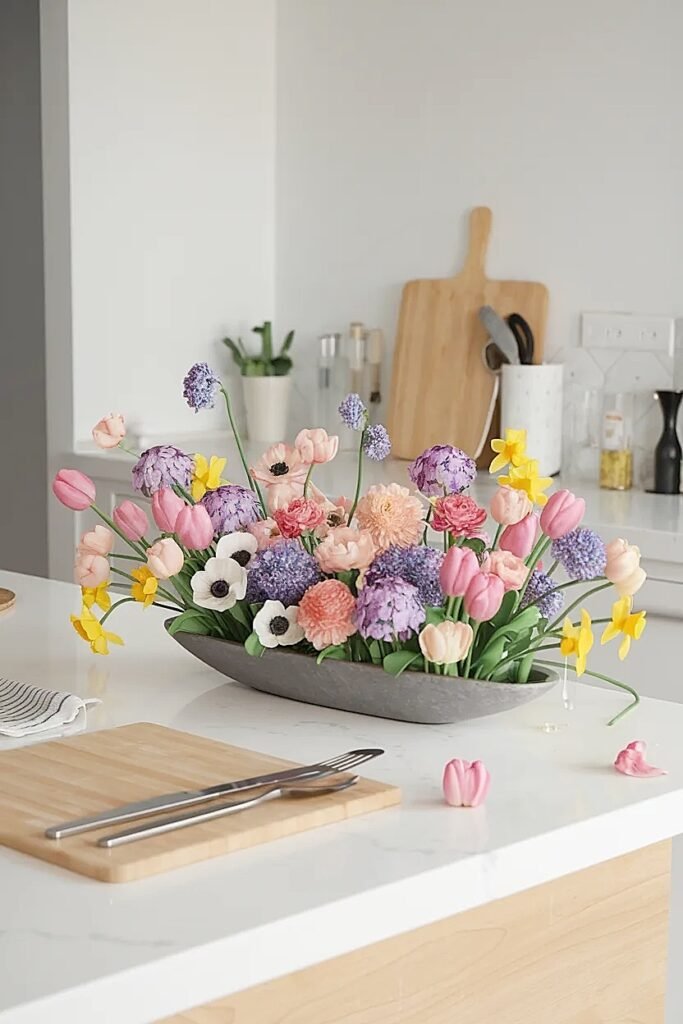
Kitchen islands serve as primary meal prep surfaces, meaning flowers must preserve working space rather than claiming it. The challenge: creating visual presence without interfering with the island’s actual job.
Maximum width for island centerpieces: 8 inches. This preserves the critical 22+ inches of clear surface most cooks need for comfortable meal preparation.
1. Long Narrow Trough at Island Back Edge
Position an 18×6 inch trough along island’s back edge against any wall or backsplash, creating linear floral presence while leaving entire front area clear for prep work. Fill with 10-12 grocery store stems cut to 5-7 inches creating low horizontal arrangement. The back positioning means it’s visible but never in the way during cooking. Cost: $10-12 for flowers plus a repurposed baking dish or $15-20 thrift store trough.
2. Dual Mini Bowls at Island Ends
Position two small 6-inch bowls at opposite island ends, each holding 5-6 budget stems creating bookend framing while central span stays completely clear. This distributes visual interest without claiming prime prep real estate. Use matching containers for cohesion. Total flowers needed: one grocery bundle at $10-12 split between both bowls. The end positioning preserves maximum functional surface while adding beauty.
3. Single Corner Bowl with Maximum Prep Clearance
Place one 8-inch bowl in island’s back corner, angling stems outward creating asymmetric composition visible from multiple kitchen positions while occupying minimal functional space. Fill with 8-10 stems from one grocery bundle. The corner location uses otherwise underutilized space while central and front areas remain completely available for food prep. The asymmetry feels more dynamic than centered placement.
The island strategies balance decoration with function, and the color blocking technique ahead creates modern fullness through organization.
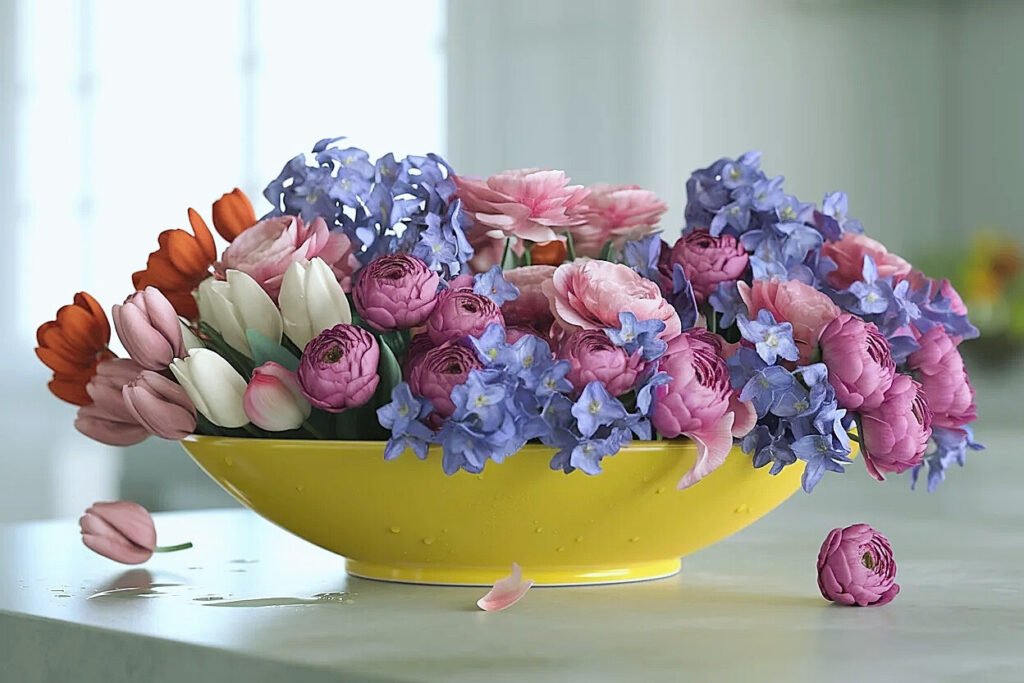
How to Use Spring Flowers Color Blocking to Make a Wide Centerpiece Look Fuller
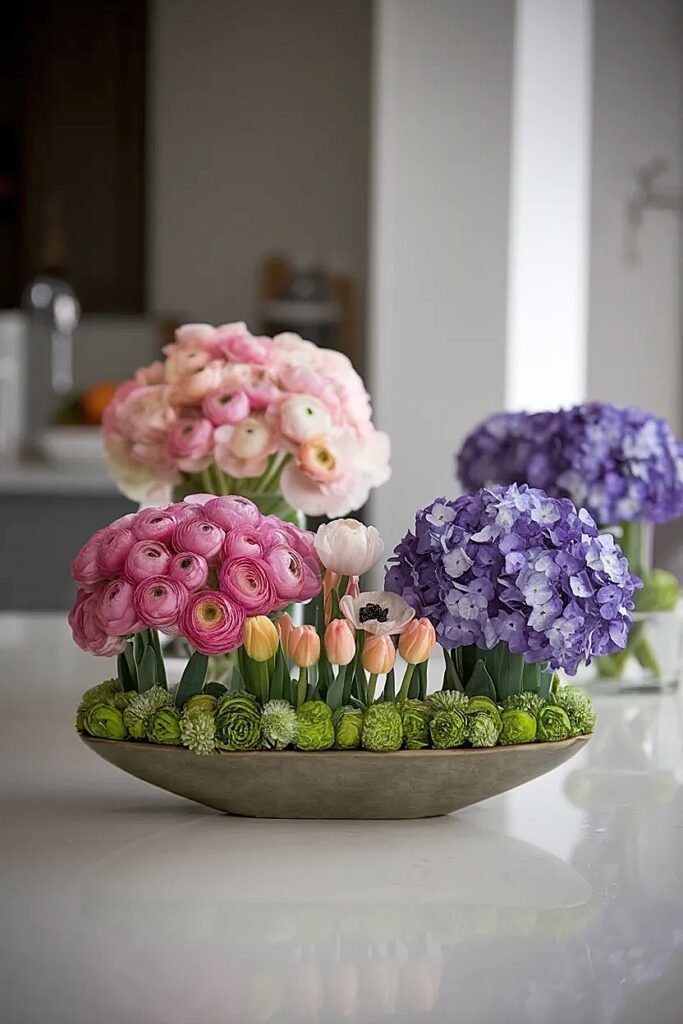
Color blocking organizes flowers into distinct single-color zones within one arrangement rather than mixing shades randomly throughout. This creates perceived fullness through intentional organization, the eye reads structured color as abundant even when actual stem counts stay modest.
I discovered this accidentally when I bought two different colored carnation bunches and couldn’t decide which to use. Splitting the bowl into color zones looked way better than mixing them randomly.
The technique: mentally divide your wide bowl into halves, thirds, or quarters. Dedicate each section to one solid color. In a 12-inch bowl split into thirds, I might position all white carnations in one third, all coral in another, all burgundy in the final section. The colors meet at borders but don’t intermix.
This organization creates visual structure that brains interpret as intentional design rather than random placement. The structured approach also maximizes color impact, solid color blocks read more powerfully than scattered individual stems of the same shades distributed randomly.
The color relationships determine success. I use either analogous colors (coral, peach, burgundy) creating harmonious flow, or complementary contrasts (purple and yellow, coral and teal) creating vibrant energy. The key: thoughtful color theory rather than just grabbing whatever’s available.
Budget execution: buy two different colored grocery bunches at $10-12 each. That gives you 20-24 total stems in two distinct colors, enough for impressive color-blocked arrangements in 10-14 inch bowls. The technique makes modest stem counts feel abundant through organization.
The blocking approach creates modern sophistication, and the budget greens guidance ahead shows how to double apparent volume inexpensively.
What are the Best Budget Greens to Make Spring Flowers Look Full Without Height?
Greens dramatically increase arrangement fullness for minimal cost, typically $4-6 per bunch at grocery stores versus $15-30 at florists. Adding greenery to flower-only arrangements can double the perceived volume while keeping total costs under $20.
The key: choosing greens that stay naturally low rather than shooting upward, maintaining your centerpiece’s short wide profile.
1. Leather Leaf Fern for Structural Framework
Grocery store leather leaf fern bunches cost $4-6 and provide enormous volume, 15-20 individual fronds creating substantial mass. The sturdy waxy leaves hold up excellently in arrangements. Position fronds around bowl perimeters angling outward, creating structural framework that extends visual boundaries before flowers arrive. Then pack flowers into the center framed by greenery. The dark green provides neutral backdrop making flower colors pop. One fern bunch plus one flower bunch (total $14-18) creates arrangements appearing to contain $40+ worth of materials.
2. Salal for Rounded Fullness
Salal (lemon leaf) bunches run $5-7 and offer densely packed branches with rounded leaves perfect for creating fullness base. The branches spread naturally creating volume without height. Position 5-7 salal stems around arrangement edges then add flowers centrally. The glossy leaves catch light beautifully. The full branching structure fills gaps between flower stems preventing that sparse “see-through” quality that undermines budget arrangements. Salal’s durability means it lasts 10-14 days maintaining arrangement integrity.
3. Eucalyptus for Textural Silver-Green
Seeded eucalyptus or silver dollar eucalyptus costs $6-8 per bunch and provides unique silvery-green color adding sophistication beyond standard dark greens. The branching structure creates natural fullness while the silver tones complement virtually any flower color. Position eucalyptus around bowl perimeters or intersperse among flowers creating textural variety. The pleasant subtle scent adds sensory dimension. The dried-flower quality means eucalyptus often lasts 2-3 weeks, making it exceptional value for extended display.
The budget greens transform flower-only arrangements, and the sideboard trough ideas ahead demonstrate how to maximize linear surfaces.
Ideas for Wide Spring Flowers Centerpieces on Sideboards Using a Single Low Trough
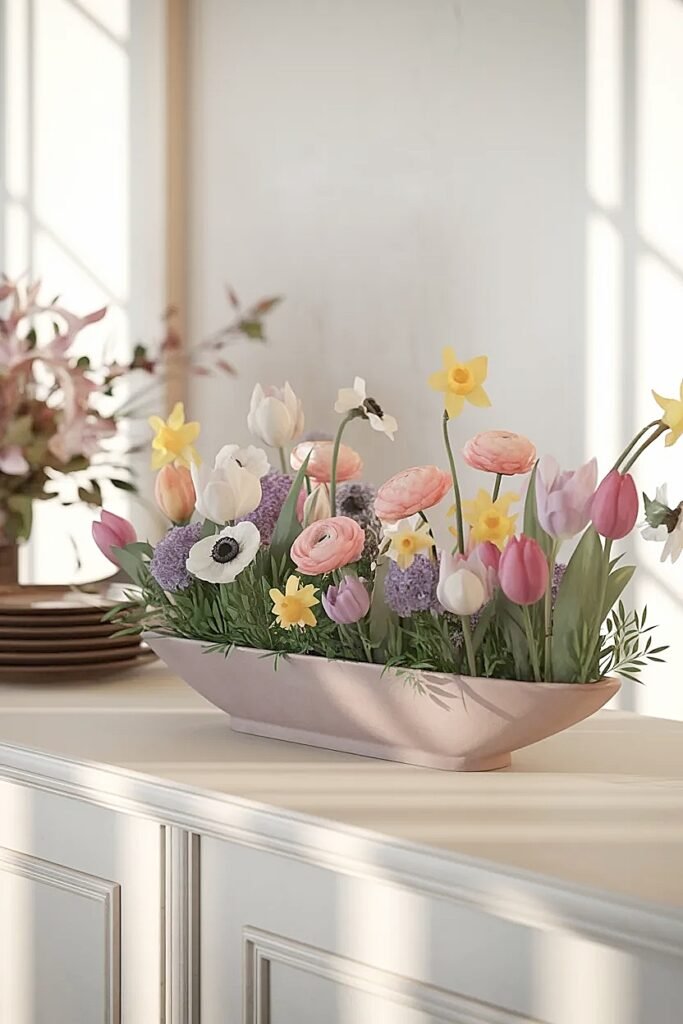
Sideboards offer generous linear surfaces perfect for low trough arrangements creating substantial horizontal presence without interfering with their typical function displaying serving pieces or storing dining essentials.
A single long trough maximizes the sideboard’s linear nature while the low profile maintains the furniture’s utility.
1. Back-Edge Continuous Linear Installation
Position one long trough (24-30 inches length, 6-8 inches width, 3-4 inches depth) along sideboard’s entire back edge creating continuous floral presence while front surface remains clear for functional use. Fill with 15-20 grocery store stems cut to 5-7 inches creating abundant linear arrangement. The back positioning provides backdrop for any serving pieces displayed on front surface. Cost: $12-15 for flowers, $15-25 for trough (or repurpose long baking dish). The continuous installation creates professional styling elevating the entire sideboard presentation.
2. Centered Statement Trough with Functional Flanks
Center one substantial trough (20×8 inches) on sideboard creating focal floral statement while leaving space at both ends for functional items like wine bottles, serving platters, or decorative objects. Fill trough with 12-15 stems creating lush central composition. The centered positioning creates traditional symmetry while end spaces preserve utility. This works when sideboards primarily serve decorative rather than active serving roles. Total cost under $20 using one grocery bundle plus repurposed vessel.
3. Diagonal Orientation Creating Dynamic Energy
Position trough diagonally across sideboard rather than parallel to front edge, creating unexpected visual interest breaking conventional placement expectations. Use 18×6 inch trough with 12-15 stems arranged flowing with diagonal orientation. The unconventional positioning creates contemporary edge while the trough’s narrow width means even diagonal placement doesn’t claim excessive surface. This approach suits modern décor where conventional symmetry might feel too traditional. The diagonal creates movement drawing eyes across the entire sideboard surface.
Conclusion
Making spring flower centerpieces look wide and full on a budget requires strategic thinking over simple spending, choosing wide shallow vessels that maximize horizontal spread, buying grocery store bundles offering best value per stem, using the “Cluster of 3” method multiplying impact through vessel distribution, and incorporating inexpensive greens that double arrangement volume for $5 additional cost. Color blocking creates perceived fullness through organization while angled stem positioning extends arrangements beyond container boundaries. These techniques transform $15-20 of materials into centerpieces rivaling $60+ florist arrangements, proving that proper mechanics matter infinitely more than flower pedigree. Start with two grocery store bundles, a wide shallow bowl, and one bunch of budget greenery, that $20 investment teaches you the skills that elevate all future arranging regardless of eventual budget.
This website contains affiliate links, and some products are gifted by the brand to test. As an Amazon Associate, I earn from qualified purchases. Some of the content on this website was researched and created with the assistance of AI technology.