This website contains affiliate links, and some products are gifted by the brand to test. As an Amazon Associate, I earn from qualified purchases. Some of the content on this website was researched and created with the assistance of AI technology.
Key Takeaways
- Patio centerpieces need at least 24 inches of clear table space around them for plates and serving dishes
- Low bowl shapes under 6 inches tall prevent visual barriers during outdoor conversations
- Creating deliberate “serving lanes” around centerpieces eliminates awkward reaching and spills
- Coffee table arrangements require even lower profiles, 4 inches max, for comfortable viewing angles
- Bistro tables under 30 inches work best with compact 6–8-inch diameter centerpieces
- Two smaller matching centerpieces solve space problems better than one oversized arrangement
- Simple, uncluttered compositions photograph dramatically better than accessory-heavy displays
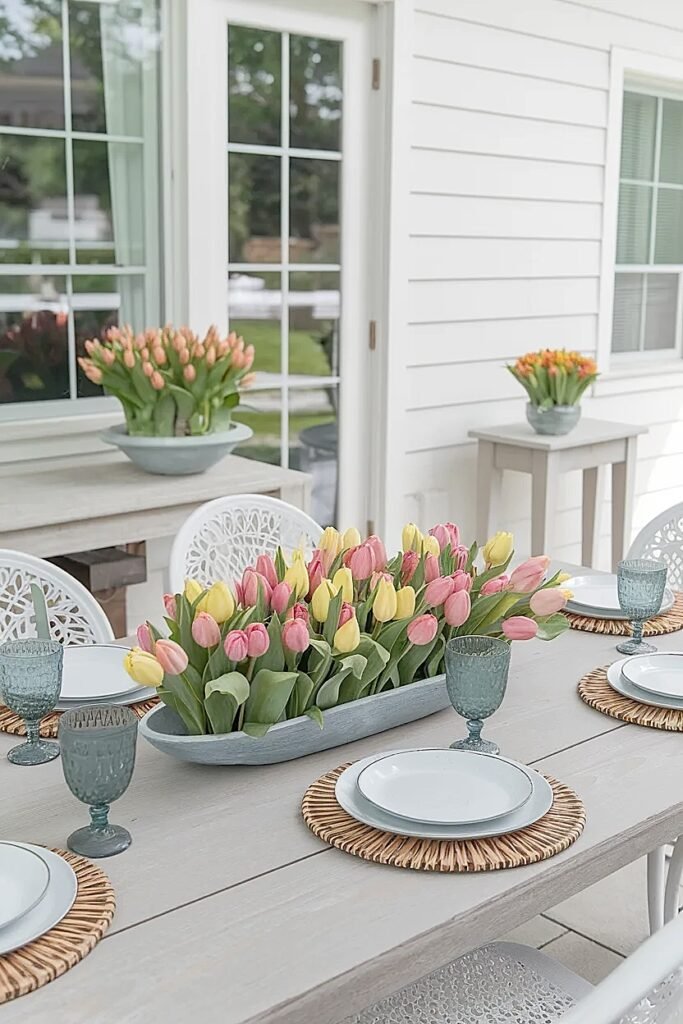
Patio spring tulips centerpieces fail spectacularly when you treat them like indoor arrangements, trust me, I’ve committed this crime repeatedly. Three years ago, I proudly placed this gorgeous 16-inch arrangement on my patio table for a family barbecue, and within twenty minutes my brother-in-law had relocated it to the porch railing so he could actually set down the potato salad. Humbling doesn’t begin to describe it. The problem wasn’t my arranging skills; it was my complete misunderstanding of how outdoor dining actually works versus how I imagined it should work.
Outdoor tables demand completely different thinking than indoor spaces. People gesture bigger in open air. Platters and serving dishes multiply when you’re grilling. That gentle breeze you barely notice? It’s strong enough to topple lightweight vases. And everyone needs way more elbow room than you think when they’re juggling paper plates, corn on the cob, and trying not to spill their drink. Once I stopped trying to impress people with elaborate floral displays and started creating arrangements that enhanced the meal without complicating it, everything changed. These practical setups actually work when real humans are trying to eat real food.
This table helps you build Spring Tulips patio centerpieces that look full and stay usable. Pick the right container, choose a practical layout (serving lane, two-zone, or paired centerpieces), and follow quick do/avoid rules. Bonus: copy-ready checklists for easy styling.
Spring Tulips Patio Centerpieces (Practical Setups)
Use these rules to keep Spring Tulips patio centerpieces lush without crowding your table. Pick a low container, build fullness with clusters, and protect a serving lane (or use two small centerpieces) so real meals still work.
| Practical Setup | Best For | Why It Works | Do / Avoid |
|---|---|---|---|
| OutdoorServing Lane Layout | Long dining tables | Keeps platters moving + center still styled | DO: off-center low oval AVOID: dead-center tall bowl |
| OutdoorTwo Matching Centerpieces | Hosting for 4–8 | Feels fuller because color shows twice | DO: two low bowls AVOID: one oversized piece |
| Outdoor + IndoorLow Bowl Rule | Any table | Open sightlines + usable surface | DO: short + wide shape AVOID: tall profiles |
| OutdoorWind-Safe Build | Breezy patios | Less tipping + less stem movement | DO: heavier wide base AVOID: narrow/light container |
| IndoorTwo-Zone Table | Indoor meals | Flower zone + food zone stays clear | DO: split table zones AVOID: crowding plates |
| Indoor + OutdoorCluster Pockets | Full look with less | Dense groups read fuller than scatter | DO: 2–3 dense clusters AVOID: even thin spread |
Outdoor table layouts that stay usable
Off-center centerpiece leaves a clear platter path.
Color appears twice, feels fuller, center stays open.
Heavier wide base + short clustered stems resist tipping.
Indoor-friendly setups
Flower zone + food zone keeps plates and boards clear.
2–3 dense groups read fuller than a thin spread.
Universal rules (indoors + outdoors)
Short + wide centerpieces keep sightlines open.
How to Make Spring Tulips Patio Centerpieces That Don’t Steal Table Space
Let me hit you with an uncomfortable truth right away: your instinct to create something impressive will sabotage you. I know because I’ve been there, building generous, beautiful arrangements that looked amazing for about fifteen minutes before becoming massive obstacles the moment food appeared. The breakthrough came when I stopped asking “how beautiful can I make this?” and started asking “how much table space can I preserve while still adding beauty?”
Here’s my non-negotiable rule now: every patio centerpiece must leave at least 24 inches of clear, unobstructed surface for actual dining use. On a standard 48-inch round patio table, that means your centerpiece footprint can’t exceed about 12 inches in diameter if you center it. Sounds restrictive, right? It is. And that restriction forces creativity that makes you better.
The magic happens when you realize you’re not limited to 12 inches of floral presence, just 12 inches of table footprint. I build upward instead of outward now. Eight tulip stems in a 6-inch diameter vase with varying stem lengths between 10-16 inches creates significant visual impact while occupying minimal precious table real estate. The vertical emphasis draws eyes upward into all that infinite air space rather than spreading outward where every square inch is desperately needed for plates and food.
Another game-changer: offset positioning instead of dead-center placement. I position centerpieces 6-8 inches off-center now, creating asymmetric compositions that leave even more usable space. This feels wrong initially, we’re conditioned to center everything, but it functions infinitely better during actual meals. Plus, the asymmetry creates more interesting visual tension than rigid centering ever could, and when you’re ready to explore techniques for making your tulip arrangements appear fuller through strategic color organization, those concepts integrate perfectly with these space-conscious approaches, definitely share this with anyone tackling outdoor entertaining this season!
The space-preservation mindset becomes your foundation for everything else, and the bowl selection guidance ahead shows how vessel choice either amplifies or undermines these efforts entirely.
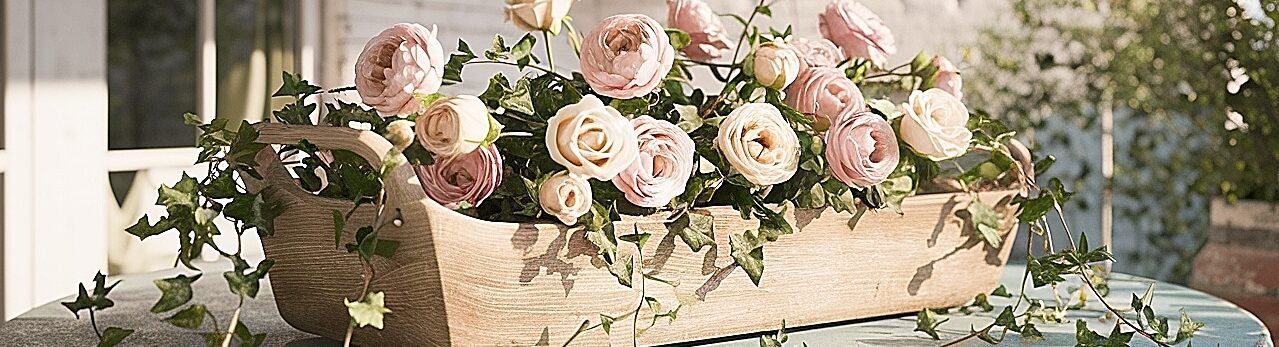
What Are the Best Low Bowl Shapes for Spring Tulips Patio Centerpieces
Vessel shape matters exponentially more outdoors than indoors because you’re dealing with sightlines during conversations across tables while people eat. I watched my wife lean sideways repeatedly during one dinner party, craning around my “stunning” tall arrangement to see guests across the table, before I finally understood: outdoor centerpieces that block views are failed centerpieces, period.
Low bowls solve the sightline crisis while delivering bonus benefits you don’t immediately consider: wider bases resist wind better, shallow depths need less water (huge when you’re refilling outside), and horizontal emphasis feels appropriately relaxed for casual patio dining rather than importing stuffy formal dining room energy where it doesn’t belong.
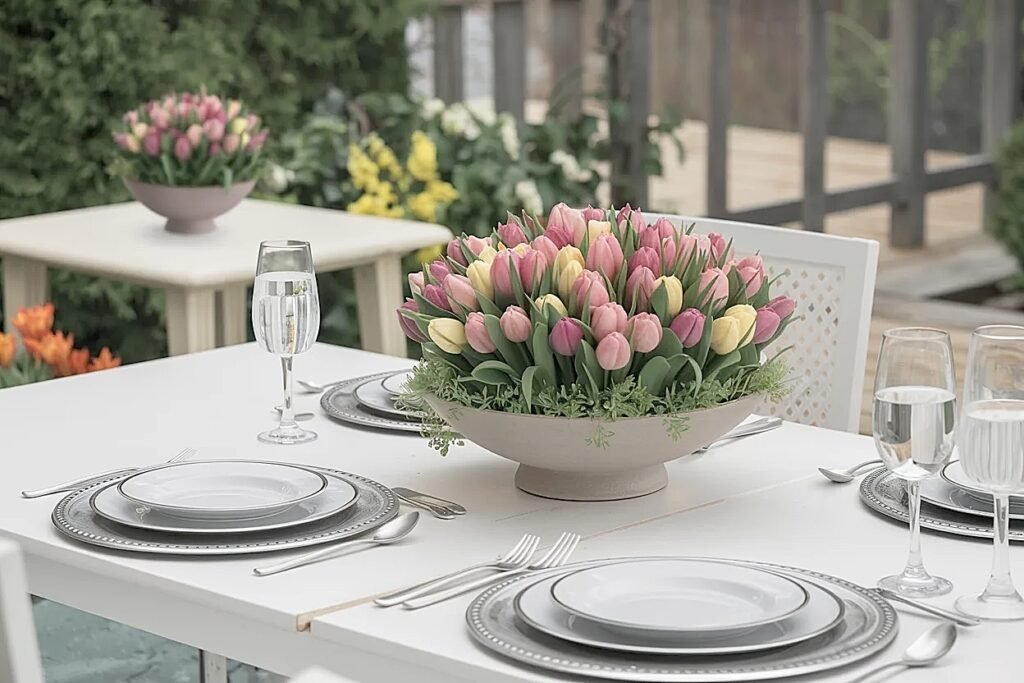
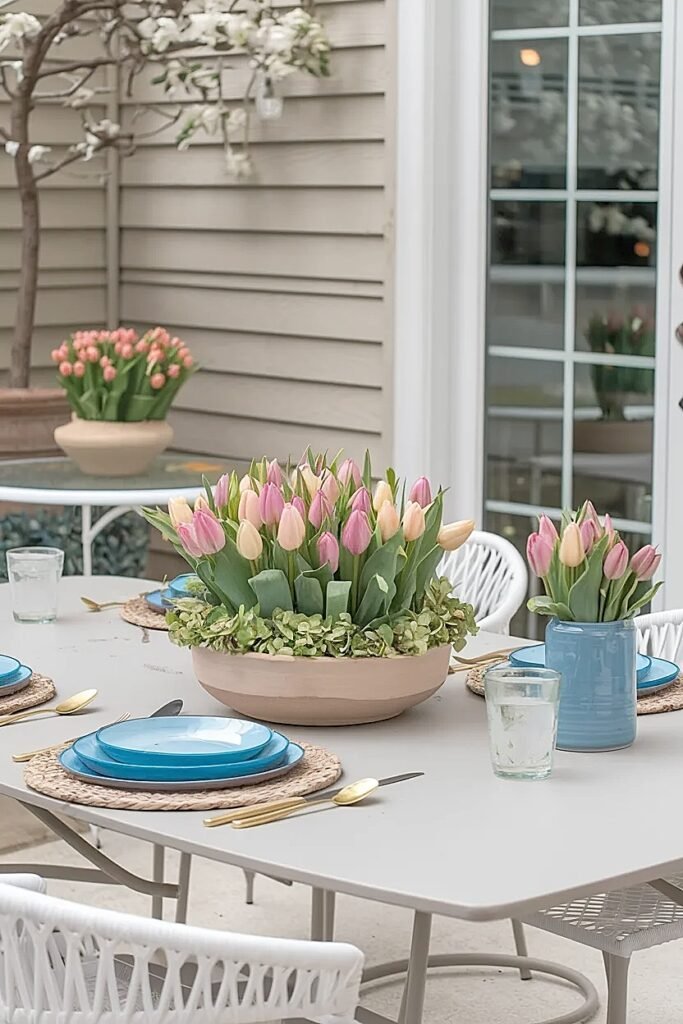
1. Wide Shallow Ceramic Bowls (14-inch diameter, 4-inch height)
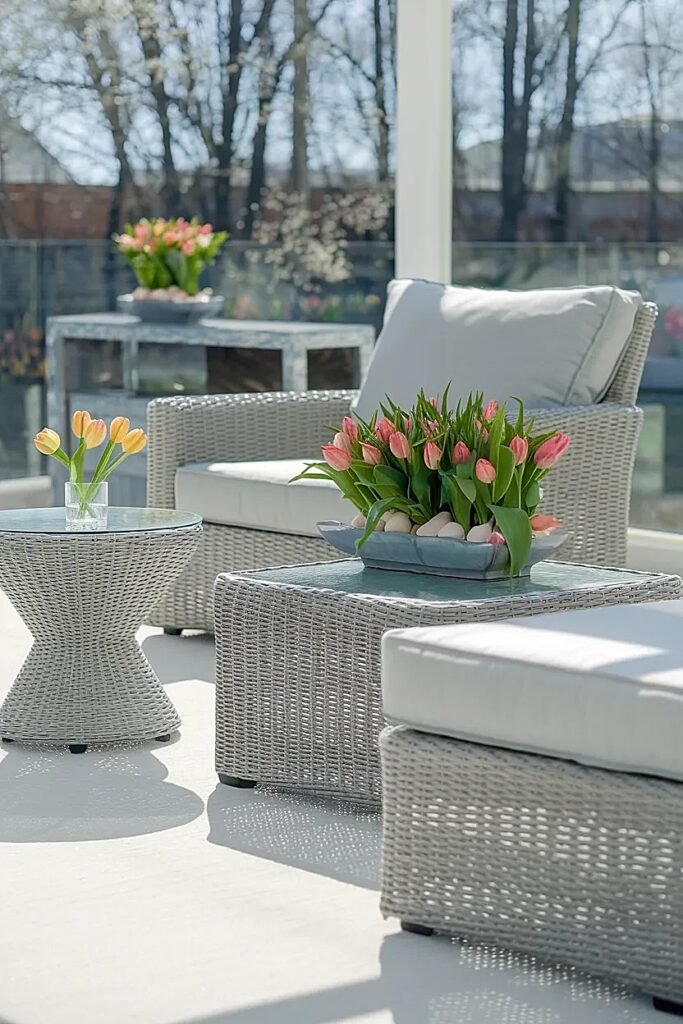
These generous bowls create visual weight through width rather than problematic height, letting you arrange 12-15 tulip stems in sprawling low compositions that read as abundant while staying comfortably under the critical 6-inch sightline threshold. I position stems at varying angles using floral foam, some upright, others tilting outward, creating natural-looking fullness that doesn’t feel forced or stiff. The substantial diameter means your arrangement extends toward table edges where it interferes less with centrally-positioned serving dishes during meals. The ceramic weight provides crucial stability that lightweight plastic or thin metal simply cannot match when wind picks up mid-dinner. This bowl style excels on round tables 48 inches or larger where its generous footprint enhances rather than overwhelms available surface area.
2. Elongated Wooden Dough Bowls (18-inch length, 6-inch width, 3-inch depth)
The rectangular form creates arrangements emphasizing length rather than problematic circumference, working beautifully on rectangular patio tables where the bowl’s linear shape echoes and complements the table’s geometry. I always line these with plastic before adding water, the wood aesthetic is perfect but rarely waterproof. The narrow 6-inch width claims minimal table width while that 18-inch length creates substantial visual presence running parallel to the table’s long axis. Position these lengthwise for maximum effectiveness and minimal obstruction. The rustic quality feels authentically appropriate for outdoor settings rather than trying to transplant indoor formality where it doesn’t fit. That shallow 3-inch depth forces you to cut stems quite short, 8 inches maximum, which inherently creates the low profile you desperately need for maintaining conversation sightlines across tables.
3. Terracotta Saucer Bowls (10-inch diameter, 3-inch height)
These ultra-low saucers create almost invisible arrangements that add color and natural beauty without any spatial imposition whatsoever. The terracotta material handles outdoor conditions brilliantly, moisture fluctuations, temperature swings, direct sun exposure, without deteriorating or looking cheap. I fill these with just 6-8 tulip stems cut very short to 5-7 inches total, creating tight clusters that read as intentional minimalism rather than insufficient effort. The extreme low profile works particularly well on smaller tables where any meaningful height creates conversation-blocking barriers. That natural terracotta color provides a universally-flattering neutral backdrop complementing any tulip color without visual competition. These do dry out faster than deeper vessels, requiring daily water monitoring, but refilling a 3-inch saucer takes literally fifteen seconds.
4. Vintage Metal Compote Dishes (8-inch diameter, 5-inch total height including pedestal base)
The pedestal elevates arrangements slightly while keeping actual stem heights low, creating visual interest through the vessel’s form rather than demanding tall stems that block sightlines. I deploy these for slightly more formal patio dinners where rustic wooden bowls might feel too casual for the occasion. Metal reflects ambient light beautifully during evening dining, adding sparkle and visual interest that matte ceramic or terracotta cannot replicate. The compact 8-inch diameter maintains tight control over table footprint while that weighted pedestal base prevents wind-induced tipping disasters. Fill with 7-9 stems cut to 6-8 inches, letting blooms rest just slightly above the bowl rim for ideal proportions. The vintage aesthetic adds instant character that brand-new vessels rarely possess, worth hunting at antique shops or estate sales.
5. Modern Concrete Geometric Bowls (12-inch diameter, 4-inch height, angular forms)
For contemporary outdoor furniture, these angular concrete vessels create aesthetic cohesion between centerpiece and setting that round traditional bowls cannot achieve. The substantial weight, often 8-10 pounds empty, provides absolutely unmatched stability even during significant wind conditions that would topple lighter options. The neutral gray concrete creates versatile backdrop working with any tulip color while adding modern sculptural interest through geometric form rather than relying solely on flowers for visual appeal. I appreciate how these weather outdoor conditions without showing wear, concrete actually looks better as it ages and develops subtle patina. The 4-inch height keeps everything conversation-friendly while the 12-inch diameter accommodates meaningful stem quantities creating perceived fullness.
These bowl choices set you up for success, and the serving lane concepts ahead address how to organize table space so your centerpiece enhances rather than obstructs dining flow.
How to Build a “Serving Lane” Around Spring Tulips Patio Centerpieces
The serving lane concept completely transformed my outdoor entertaining, it’s the difference between guests confidently serving themselves versus awkwardly reaching around obstacles hoping not to knock over your flowers. I define this as the clear path around your centerpiece where serving dishes live and hands move freely without encountering obstructions.
Picture this from a functional perspective: someone’s reaching for the salad bowl, grabbing serving tongs, transferring food to their plate, all while talking and probably holding a drink in the other hand. That entire motion arc needs zero interference from your centerpiece, which means planning placement with ruthless precision rather than just putting flowers wherever they look pretty.
I create serving lanes by first placing serving dishes in their positions, yes, before the centerpiece goes down, then positioning the centerpiece in whatever remaining space doesn’t interfere with serving access. This backwards approach feels counterintuitive initially but produces infinitely better results. On a 48-inch round table, I typically position four serving dishes around the perimeter, creating natural serving zones, then place my compact centerpiece in the resulting center gap where it’s visible but not obstructive.
The serving lane should maintain minimum 8-inch clearance between your centerpiece’s outermost edge and any serving dish. This buffer accommodates reaching hands, serving utensils extending from dishes, and inevitable small shifts as people serve themselves. Mark this clearance mentally or use tape to plan before finalizing centerpiece position, those 8 inches make the difference between smooth serving and awkward navigation that ruins your beautiful setup.
These spatial planning principles ensure your centerpiece actually enhances the dining experience, and the coffee table ideas ahead adapt these concepts to low-profile furniture with completely different viewing angles.
Ideas for Spring Tulips Patio Centerpieces on Outdoor Coffee Tables (Low Profile)

Coffee tables demand even more extreme height restriction than dining tables because viewers sit lower, looking across the table surface at steeper angles where even modest height creates visual barriers. I learned this watching my own coffee table arrangement block half my wife’s face during a conversation, not exactly the enhancing-the-experience outcome I’d intended.
The maximum height for coffee table centerpieces is 4 inches total, not just the vessel, the entire arrangement including stems and blooms. This severe restriction requires rethinking what “centerpiece” even means in this context.
1. Ultra-Short Stem Cluster in 3-Inch Saucer
Cut tulip stems to just 2-3 inches and cluster 8-10 blooms tightly in a shallow saucer, creating a carpet-like arrangement viewed from above by seated people. The blooms rest almost directly on the table surface, eliminating any height obstruction while the tight clustering creates satisfying fullness from overhead viewing angles. This works brilliantly for lounge seating where coffee tables sit between facing sofas or chairs and people spend hours in conversation needing unobstructed sightlines. Refresh stems every 3-4 days since very short cuts shorten vase life somewhat, but the dramatic effect justifies the extra maintenance.
2. Floating Blooms in Wide Shallow Bowl
Float 6-8 tulip blooms, stems removed entirely, in a wide shallow bowl filled with water, creating a zen-like arrangement that’s literally impossible to create height obstruction with. The floating blooms move gently when the table gets bumped, adding subtle organic movement that static arrangements lack. I add a few floating candles among the blooms for evening gatherings, creating ambient lighting that enhances without adding problematic height. Change water daily since cut blooms without stems deteriorate faster, and rotate bloom positions to maintain visual interest throughout their 4-5 day display life.
3. Linear Arrangement in Narrow Trough
Use a narrow trough planter (12 inches long, 4 inches wide, 2 inches deep) positioned lengthwise on rectangular coffee tables, arranging 5-6 stems cut to 3-4 inches in a linear row. The low narrow form creates deliberate design while maintaining those critical sightlines from seated positions. This works particularly well for modern outdoor furniture where the linear geometry echoes contemporary design aesthetics. The narrow width means the arrangement occupies minimal table footprint, crucial on coffee tables where every square inch matters for setting down drinks, snacks, books, or phones during actual use.
4. Ground-Level Surrounding Arrangement
Position your tulip arrangement on the ground directly under or beside the coffee table rather than on its surface, creating floral presence without claiming any precious table real estate. Use a low bowl (4-inch height maximum) filled with 10-12 tulip stems arranged in a rounded shape visible from seated positions. This completely liberates the coffee table surface for functional use while maintaining nearby floral beauty that enhances the seating area. Particularly effective when coffee tables have lower shelves, position arrangements on these shelves for visibility without surface obstruction.
5. Minimalist Single-Stem Statement
Place one perfect tulip bloom in a tiny bud vase (2-inch height, 1-inch diameter) at the coffee table’s corner, embracing minimalism rather than fighting the spatial constraints. This approach signals intentional design restraint rather than insufficient effort. The single bloom becomes a focal point precisely because of its solitary nature, and the corner positioning leaves maximum table surface clear for actual use. Rotate the single stem to different corners every few days, creating subtle variety throughout the week while maintaining the minimalist aesthetic.
These coffee table approaches work within severe constraints rather than fighting them, and the bistro table guidance ahead addresses another spatial challenge: truly compact surfaces.
What Are the Best Spring Tulips Patio Centerpieces for Small Bistro Tables
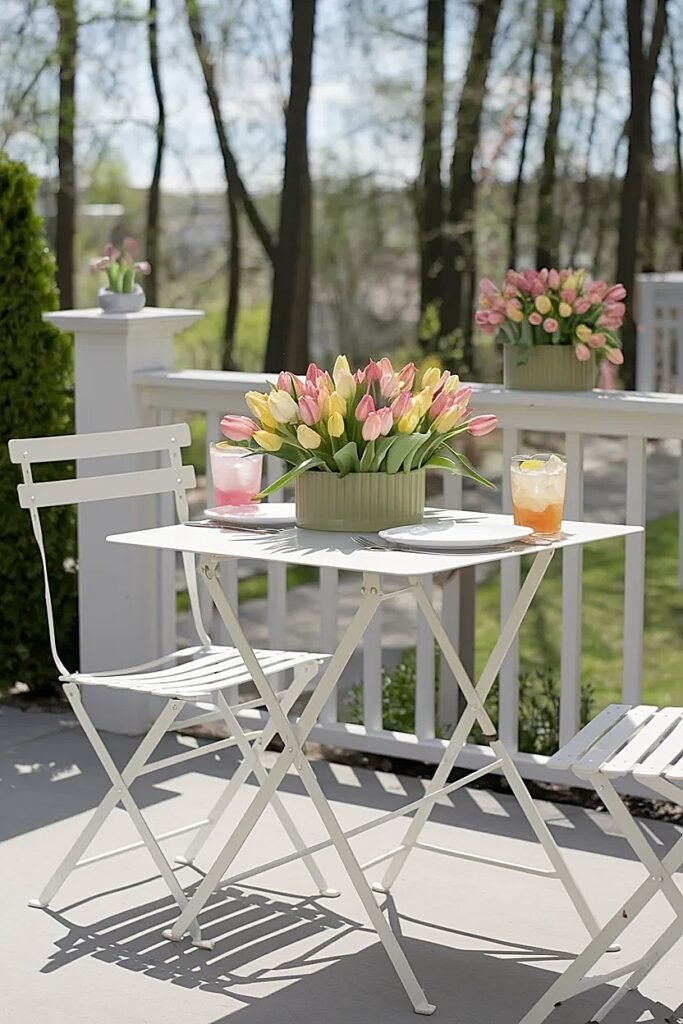
Bistro tables, typically 24-30 inches diameter, present the ultimate centerpiece challenge: creating meaningful floral presence on surfaces barely large enough for two place settings and a shared appetizer platter. I’ve wrestled with this extensively and finally accepted that traditional centerpiece concepts simply don’t translate to bistro scale.
The winning approach: embrace compact elegance rather than trying to replicate standard-table arrangements in miniature form.
1. Single Compact Vessel with Five Stems
Use a 4-inch diameter vessel with 5 tulip stems cut to 6-8 inches, creating a tight cluster occupying minimal footprint while delivering satisfying color and form. The odd number creates more interesting visual composition than even counts. Position slightly off-center, leaving maximum space for plates and a central shared dish.
2. Bud Vase Trio in Triangular Formation
Position three tiny bud vases (2-inch diameter each) in triangular formation near table edge, each holding one perfect tulip bloom. The distributed arrangement prevents any single concentration of visual weight while the collective trio creates presence. The edge positioning maximizes usable central table space for dining essentials.
3. Ultra-Low Floating Bowl Design
Use a 6-inch diameter shallow bowl (2-inch depth) with 4 blooms floating, stems removed, creating barely-there presence that doesn’t compete with plates or food for precious space. The ultra-low profile eliminates any functional obstruction while maintaining aesthetic enhancement through simple floral presence and color.
4. Hanging Arrangement Above Table
Suspend a small hanging arrangement from overhead structure, pergola beam, umbrella frame, tree branch, positioning flowers above rather than on the bistro table surface. This completely liberates table space while creating unique visual interest through unexpected placement. Use a 6-inch hanging basket with 6-8 stems creating cascading effect visible but not obstructive.
5. Single Statement Stem in Weighted Vase
One perfect tulip in a substantial weighted vase (4-inch diameter, 3-pound minimum weight) creates minimalist sophistication appropriate for bistro intimacy. The single stem signals intentional restraint rather than insufficient flowers. The heavy vase prevents wind-related disasters common with bistro tables’ compact bases and lightweight construction.
The bistro solutions embrace spatial reality, and the dual-centerpiece concepts ahead show how two smaller arrangements often solve problems one larger piece creates.
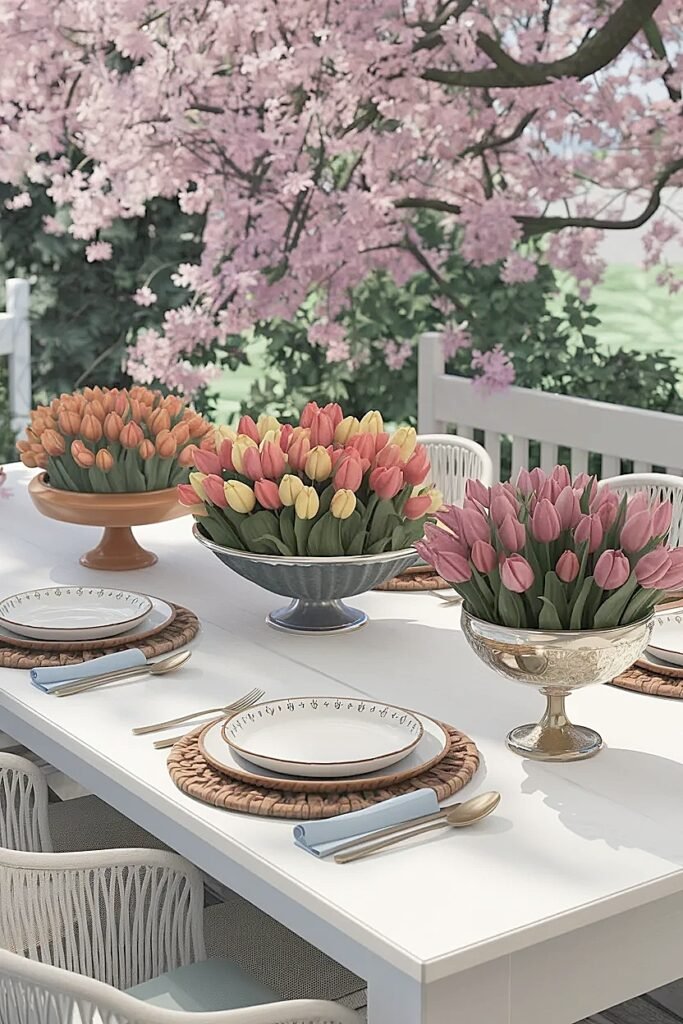
Ways to Use Two Matching Spring Tulips Patio Centerpieces Instead of One Large One
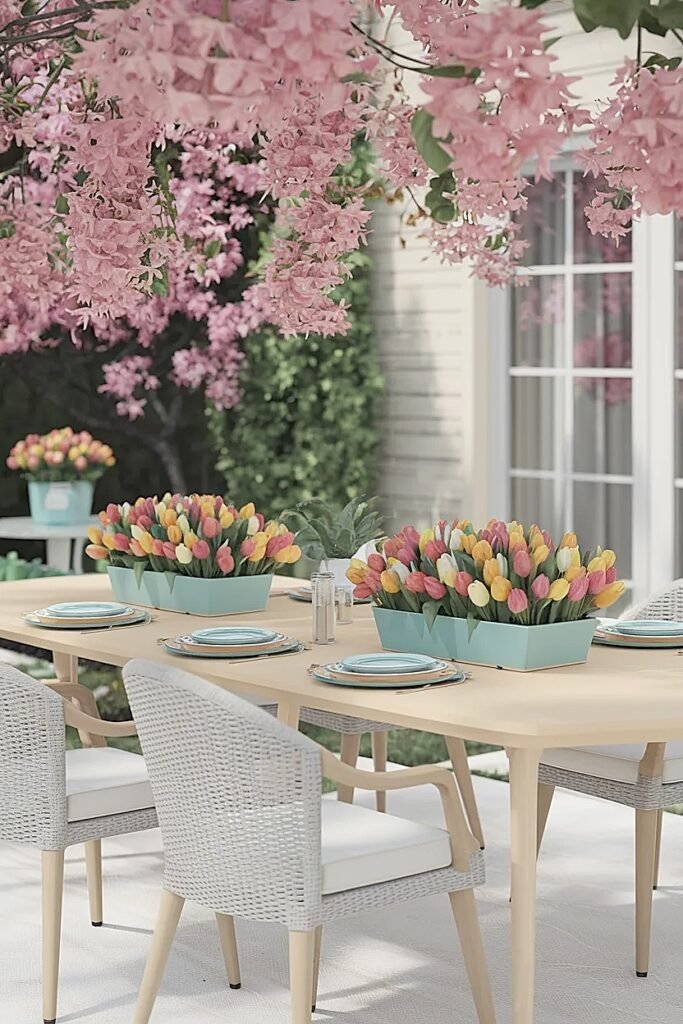
Two smaller matching centerpieces solve multiple problems simultaneously: they distribute visual interest, create flexible positioning options, and ironically often occupy less total footprint than single large pieces while reading as more generous and abundant. I stumbled into this accidentally when I split one large arrangement into two smaller ones to photograph them separately, then realized the dual setup looked infinitely better on the actual table.
The matching aspect matters, two coordinated pieces read as intentional composition while two random arrangements look confused and haphazard.
1. Offset Diagonal Positioning
Position two matching centerpieces diagonally across the table rather than in a straight line, creating visual movement and interest while leaving generous serving space in the resulting center gap. I place one near the table’s northwest position and the other southeast, creating dynamic asymmetry that draws the eye across the entire surface. This works brilliantly on square or round tables where the diagonal creates maximum spatial interest. Each centerpiece should be compact, 6-inch diameter maximum, allowing the dual placement to enhance rather than overwhelm available space.
2. Bookend Placement at Table Ends
Position matching centerpieces at opposite ends of rectangular tables, creating bookend framing effect while leaving the entire center span completely clear for serving dishes and dining. Each end piece should measure 6-8 inches diameter, substantial enough to create presence but compact enough not to crowd table edges. This creates longest possible serving lane down the table’s center, crucial for family-style dining where multiple dishes get passed around. The symmetry appeals to our aesthetic preferences while the functional benefits make dining significantly easier.
3. Tiered Height Variation for Depth
Use two matching vessel styles but vary the stem lengths, one arrangement with 6-inch stems, the other with 10-inch stems, creating tiered visual depth when positioned near each other. Place the taller arrangement slightly back and the shorter one forward, creating layered composition adding dimensional interest. This works particularly well when viewed from one primary direction, like tables positioned against railings or walls. The height variation creates sophisticated composition beyond what uniform height could achieve while maintaining the cohesion that matching vessels provide.
4. Separated for Multi-Table Coordination
Distribute two matching centerpieces across separate adjacent tables, if you’re hosting on multiple bistro or side tables grouped in one patio area. The matching style creates cohesive aesthetic tying the separate surfaces into one unified entertaining zone. This works brilliantly for casual gatherings where people migrate between seating areas rather than staying fixed at one table. The repeated design creates visual rhythm across the entire patio space.
5. One Floral, One Candle Combination
Create one centerpiece with tulips and a matching vessel with candles instead of flowers, positioning them as complementary pair. The floral piece provides color and natural beauty while the candle piece adds ambient lighting for evening gatherings. Both occupy similar footprints and coordinate through matching vessels, creating unified composition serving dual functions. Position the candle piece slightly closer to seating for optimal lighting effect while the floral piece can sit slightly more distant where its beauty enhances without requiring proximity.
The dual-centerpiece strategy multiplies your options dramatically, and the photography guidance ahead ensures your beautiful work documents as impressively as it appears in person.
How to Create Spring Tulips Patio Centerpieces That Photograph Well Without Extra Stuff
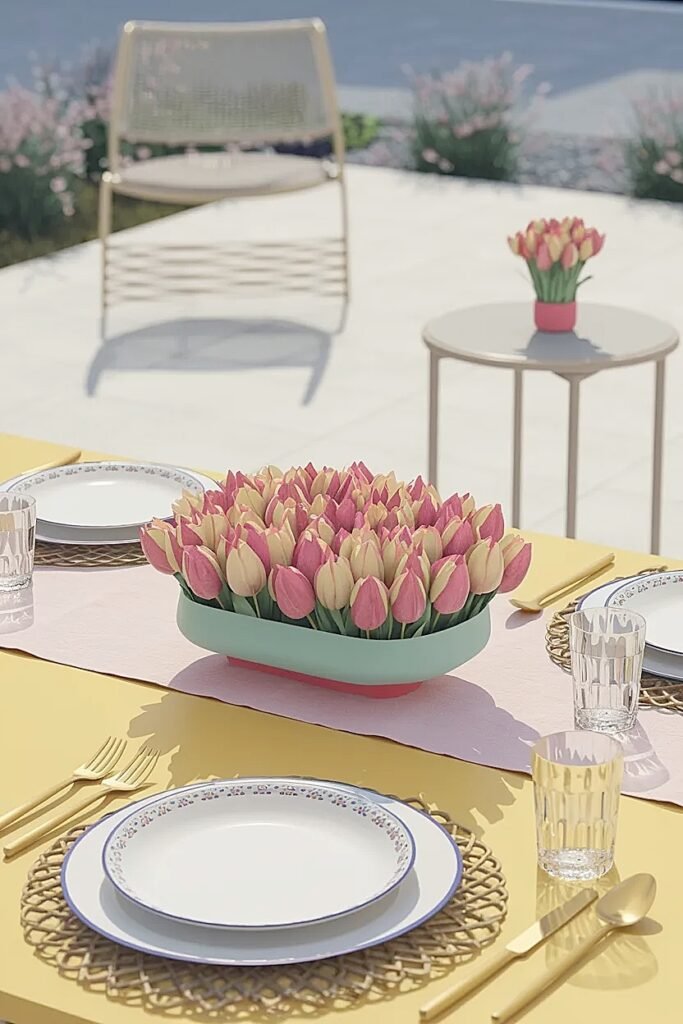
Here’s something nobody tells beginners: the arrangements that photograph best are almost always simpler than the ones you initially create. I spent years adding ribbons, decorative moss, colored rocks, candles, and various accessories trying to make arrangements “more interesting,” and every single photograph looked cluttered and confused. The revelation: clean simplicity photographs dramatically better than accessory-heavy complexity.
Outdoor photography introduces specific challenges, bright sun creates harsh shadows, wind causes motion blur, and busy backgrounds compete with your subject. Your centerpiece needs to be photographically strong enough to overcome these obstacles through composition clarity rather than added embellishment.
The first principle: choose backgrounds intentionally. I position arrangements against neutral backgrounds, a plain tablecloth, a section of fence or wall, the open sky, rather than photographing them with chaotic backgrounds full of patio furniture, grills, planters, and random outdoor clutter. That background simplicity lets the tulips become the obvious subject rather than one element among visual noise.
Lighting matters immensely. I photograph in morning or late afternoon when sun angles create gentle dimensional shadows rather than harsh midday overhead lighting that flattens everything. The golden hour light adds warmth that enhances tulip colors naturally without requiring editing. If you must photograph at midday, position the arrangement in shade, under an umbrella or tree, where lighting stays soft and even.
The composition itself needs deliberate simplicity. I use single-variety tulips in each arrangement rather than mixing multiple colors that photograph as chaotic. The vessel should complement rather than compete, neutral ceramic, terracotta, or simple glass lets tulips star. Eliminate every accessory that doesn’t directly serve the arrangement’s beauty. That ribbon you think adds interest? It’s visual clutter in photographs. Those decorative stones around the base? Distraction. The candles positioned nearby? Competing focal point.
For social media specifically, shoot from directly above arrangements, that top-down perspective has become Instagram’s signature angle for floral photography. The overhead view shows the arrangement’s fullness and color distribution while eliminating background distractions entirely. The table surface becomes your background, so ensure it’s clean and uncluttered before shooting.
Take test shots before finalizing your arrangement. Those tests reveal problems invisible to your eyes, stems at odd angles, gaps in fullness, distracting background elements, that you can correct before the arrangement is complete. This prevents the frustration of finishing a beautiful centerpiece only to discover it photographs poorly.
The photography principles ensure your work gets documented as beautifully as it deserves, and the side table guidance ahead addresses display surfaces with completely different purposes and constraints.
What Are the Best Spring Tulips Patio Centerpieces for Outdoor Side Tables and Lounges
Side tables and lounge areas serve completely different functions than dining tables, they’re about relaxation, conversation, and setting down drinks rather than serving meals, which liberates your centerpiece designs from many dining-related restrictions while introducing new considerations around scale and purpose.
These surfaces tend to be smaller, 12-18 inches diameter, and positioned lower, creating intimate spaces where bold centerpieces would feel overwhelming but modest arrangements risk disappearing into insignificance.
1. Tall Narrow Statement Piece for Lounge Drama
Use a tall narrow vase (12-14 inches height, 3-inch diameter) with 5-7 tulip stems creating vertical drama appropriate for lounge spaces where sightline obstruction isn’t a concern like it is at dining tables. The vertical emphasis draws eyes upward, creating architectural interest that low arrangements cannot achieve. This works brilliantly on side tables beside lounge chairs or sofas where the height creates presence without blocking conversation across seating areas. The narrow diameter prevents the arrangement from overwhelming small side table surfaces while the height creates meaningful visual impact.
2. Cascading Arrangement with Trailing Elements
Create arrangements where tulip stems angle outward and downward, creating cascading effect that softens side table edges and adds movement. I position stems at 45-degree angles using floral foam, letting blooms hang slightly over the table rim. This works particularly well for tables at seating edge where the cascade creates visual flow from furniture to flowers. Use 6-8 stems in a low bowl (6-inch diameter, 4-inch height) positioned toward the table edge where the cascade effect is most visible and effective.
3. Textured Base with Moss and Minimal Stems
Create a moss-covered base filling a low bowl, then position just 3-4 tulip stems emerging from the moss carpet like they’re growing naturally. The moss adds textural interest and natural aesthetic while keeping the stem count minimal, appropriate for small side tables where too many stems would overwhelm. The naturalistic appearance feels more garden-inspired and less formal-arrangement-focused, which suits lounge areas’ relaxed purpose perfectly. The moss also helps retain moisture, reducing how frequently you need to water arrangements in outdoor conditions.
4. Single Color Mass for Bold Simplicity
Fill a 6-inch diameter bowl with 8-10 tulips in one single color, creating bold monochromatic statement appropriate for lounge spaces where subtlety might get overlooked. The single-color mass creates impact through color intensity and stem quantity rather than variety. I favor deep saturated colors, burgundy, deep coral, rich purple, that create dramatic presence even from across the patio. This works especially well when your outdoor cushions or furniture includes colors that the tulips can echo, creating coordinated aesthetic tying the space together visually.
5. Minimalist Sculptural Approach with Three Perfect Stems
Position just three absolutely perfect tulip stems in a sculptural vessel, maybe a modern ceramic piece with interesting form, creating minimalist installation emphasizing quality over quantity. The sparse arrangement signals sophisticated restraint appropriate for adult lounging spaces where overcrowded florals might feel juvenile or trying-too-hard. The sculptural vessel becomes as important as the flowers themselves, creating integrated composition where vessel and blooms work together. This approach requires accepting that less is genuinely more, a difficult concept when you’re starting out but transformative once you embrace it.
Conclusion
Creating practical patio tulip centerpieces means fundamentally rethinking what “centerpiece” means in outdoor contexts. These aren’t indoor arrangements adapted for patios, they’re purpose-built designs respecting how people actually use outdoor spaces. Start with the spatial restrictions: minimum 24 inches clear table surface, maximum 6 inches centerpiece height for dining tables, maximum 4 inches for coffee tables. Choose low bowl shapes that resist wind and maintain sightlines.
Build deliberate serving lanes around arrangements rather than hoping people will navigate around them. Embrace two smaller centerpieces when one large piece would overwhelm available space. Keep compositions clean and simple for better photography. And remember: if your centerpiece requires moving before anyone can actually eat, it’s failed regardless of how beautiful it looks. These practical approaches create arrangements that enhance outdoor living rather than complicating it, which is precisely the point of decorating in the first place.
This website contains affiliate links, and some products are gifted by the brand to test. As an Amazon Associate, I earn from qualified purchases. Some of the content on this website was researched and created with the assistance of AI technology.